To install an automatic gate opener, begin by assembling the components according to the manufacturer’s instructions. Then, attach the opener to the gate and power it using an electrical connection or a solar panel for remote locations.
Finally, program the opener’s settings and test its functionality.
Choosing The Right Automatic Gate Opener
Factors to consider when selecting an automatic gate opener:
- Gate type and size: Determine the type of gate (swing, slide, or barrier) and its dimensions to choose an opener that can effectively operate it.
- Power source: Consider whether you have access to an electrical power source or need a solar-powered opener for remote locations.
- Security features: Look for openers with robust security features such as keypads, remote controls, and safety sensors to protect your property.
- Operating mechanism: Decide between hydraulic, electromechanical, or mechanical systems based on your budget, noise tolerance, and required maintenance.
- Durability: Choose a gate opener made of durable materials like stainless steel or corrosion-resistant compounds for long-lasting performance.
- Installation and compatibility: Ensure the opener is compatible with your gate and assess whether you can install it yourself or need professional assistance.
Understanding the different types of automatic gate openers:
There are three main types of automatic gate openers: swing gate openers, slide gate openers, and barrier gate openers. Swing gate openers are suitable for gates that swing open and close like a door. They can be single or double-leaf gates. Slide gate openers perform horizontal sliding motions to open and close the gate. Barrier gate openers, on the other hand, are often used in parking lots or toll booths, providing a barrier that blocks or allows access.
Credit: losgatosironworks.com
Preparing For The Installation Process
Preparing for the Installation Process
Befor beginning the installation of an automatic gate opener, there are several important steps to take. First, assess the gate and surrounding area. Ensure that the gate structure is sturdy and in good condition. Measure the width and height of the gate to select the appropriate automatic gate opener model.
Gathering the necessary tools and materials
Once the gate has been assessed, gather the necessary tools and materials for installation. These may include a power drill, measuring tape, level, screwdriver, wrench, and the automatic gate opener kit. Ensure that all tools are in good working condition and gather any additional supplies needed, such as screws and bolts.
Taking safety precautions before starting the installation
Before starting the installation process, it is important to prioritize safety. Ensure that the power to the gate opener and surrounding area is turned off. Wear appropriate safety gear, such as gloves and safety glasses. Follow any safety guidelines provided by the manufacturer and consult a professional if needed.
Step-by-step Installation Guide
htmlTo install an automatic gate opener, follow these step-by-step instructions:
Installing the gate opener’s control box and wiring:
1. Begin by finding a suitable location for the control box. It should be near the gate and within reach of a power source. Mount the control box securely using the provided hardware.
2. Ensure the power to the gate opener is turned off. Connect the control box to the power source, following the manufacturer’s wiring instructions. Take caution and hire a licensed electrician, if necessary, to ensure proper electrical connections.
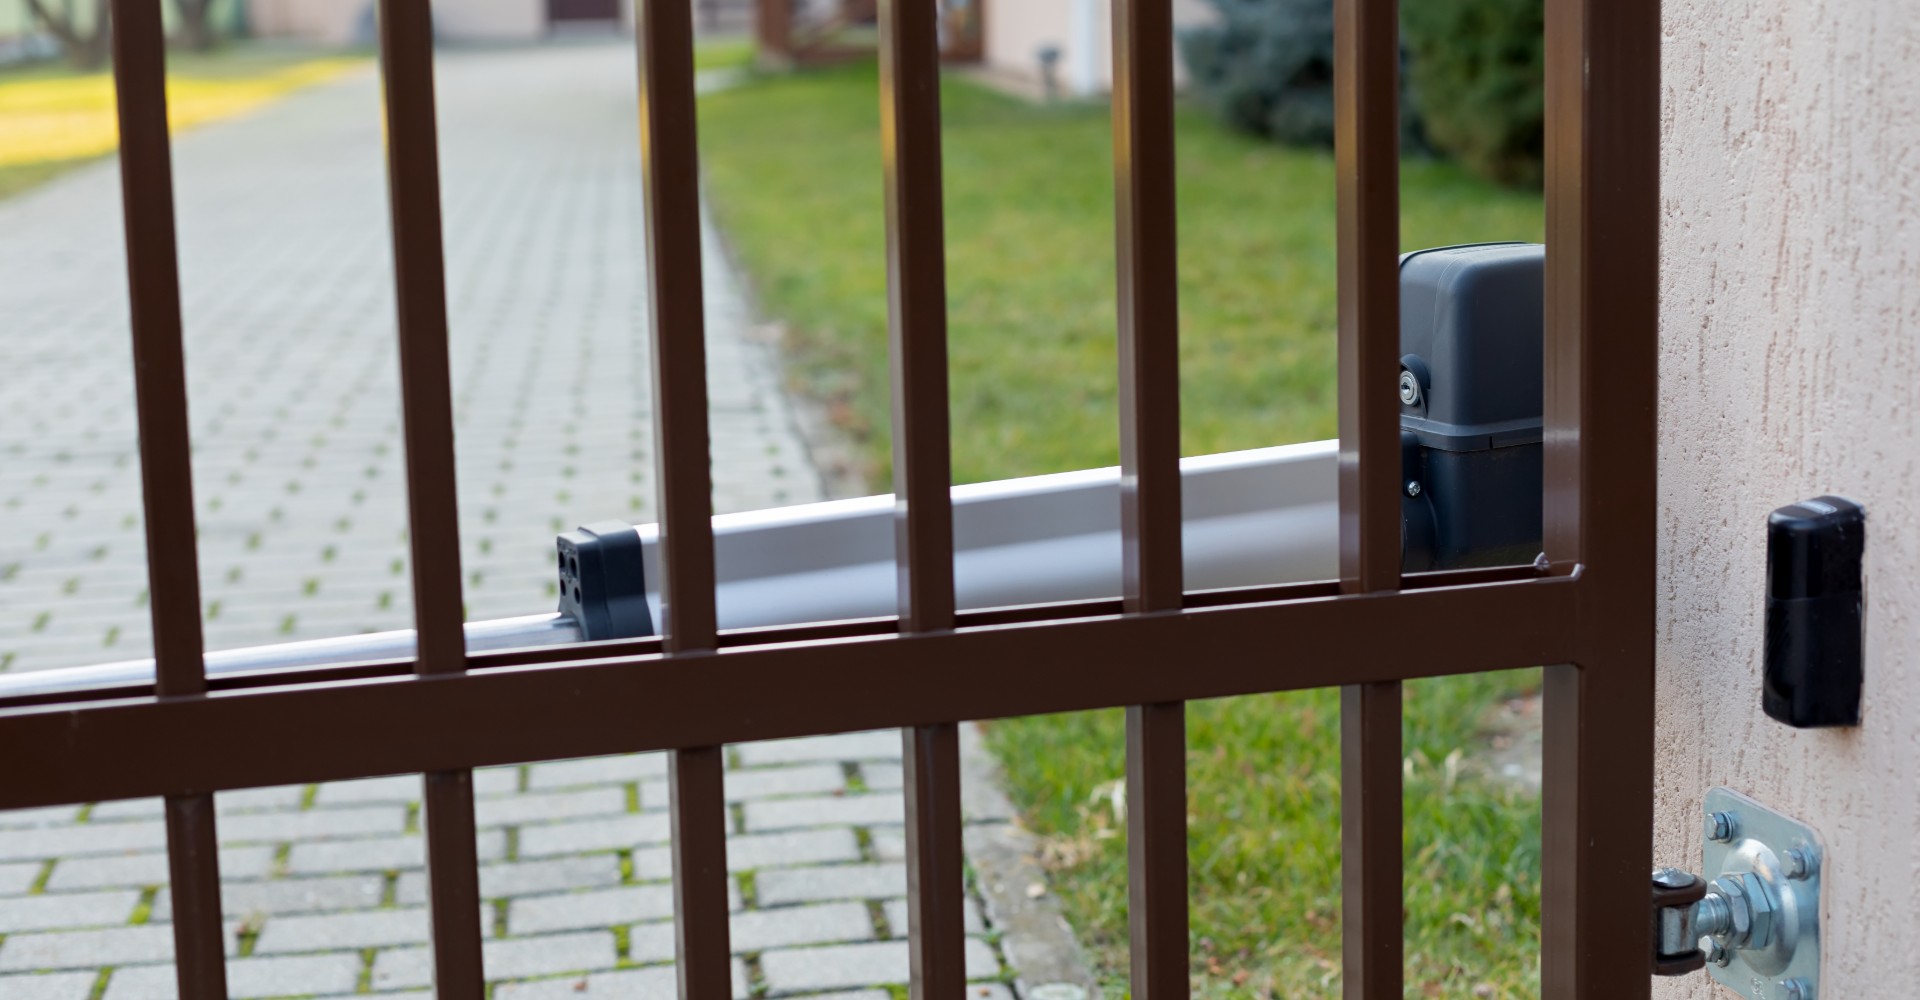
Mounting the gate opener and attaching it to the gate:
1. Carefully measure and mark the position for mounting the gate opener on the gate. Ensure that the gate opener is aligned correctly with the gate’s movement direction.
2. Attach the gate opener to the gate using the provided mounting brackets and hardware. Ensure a secure connection to prevent any movement or wobbling.
Connecting the opener to a power source:
1. Once again, ensure the power is turned off before proceeding with this step. Connect the gate opener to the power supply as per the manufacturer’s instructions. Use appropriate wiring and connectors to ensure a safe and stable electrical connection.
Programming the gate opener’s settings and safety features:
1. Refer to the instruction manual to access the programming menu of the gate opener. Depending on the model, you may need to enter a specific code or press a combination of buttons to access the settings.
2. Follow the instructions to program the desired settings, such as gate opening and closing speed, delay timers, and safety features like obstacle detection and auto-reverse.
Testing the gate opener’s functionality:
1. Finally, power on the gate opener and test its functionality. Ensure that the gate opens and closes smoothly without any issues. Test all safety features, such as obstacle detection, to ensure they are working correctly.
Additional Tips And Troubleshooting
When installing an automatic gate opener, it’s important to consider additional tips and troubleshooting methods to ensure smooth operation. One key consideration is adding extra security features to your system, such as installing sensors or integrating it with a security camera system. These additions can enhance the overall security of your property and provide you with peace of mind.
Another crucial aspect of maintaining your automatic gate opener is regular maintenance. Proper maintenance is vital for the longevity of the opener and can help prevent common issues from arising. This includes regular cleaning of the gate and opener, checking and tightening all connections and bolts, and lubricating moving parts like hinges and chains. Inspecting and cleaning sensors regularly is also essential to ensure their proper functioning. In case of any issues, troubleshooting common problems like gate misalignment or power fluctuations can help get your system back on track.
To summarize, when installing an automatic gate opener, considering additional security features and ensuring proper maintenance are key to a successful and hassle-free experience. By following these tips and troubleshooting methods, you’ll be able to enjoy the convenience and security that an automatic gate can provide.
Frequently Asked Questions On How To Install An Automatic Gate Opener
Can I Install My Own Electric Gates?
Yes, it is possible to install your own electric gates. However, it is important to be aware that it requires careful adherence to safety guidelines and knowledge of electrical systems. It is recommended to consult with a professional to ensure proper installation and avoid any potential hazards.
How To Choose The Right Electric Gate Opener For Diy Installation?
To choose the right electric gate opener for DIY installation, consider factors like gate size, weight, and type. Measure your gate accurately and choose an opener that can handle the weight. Decide between a sliding or swinging gate opener based on your gate’s design.
Take into account the power source, remote control options, and additional security features.
How Long Does It Take To Install An Automatic Gate?
The time it takes to install an automatic gate can vary depending on factors like size, complexity, and site conditions. Generally, installation can be completed within a few days to a week.
Conclusion
Installing an automatic gate opener is a practical and efficient way to enhance security and convenience at your property. By following the step-by-step guide provided in this blog post, you can successfully install an automatic gate opener without any hassle.
With the right tools and techniques, you’ll have a fully functioning gate opener that makes entering and exiting your property a breeze. Say goodbye to manually opening and closing your gate and enjoy the benefits of automation.