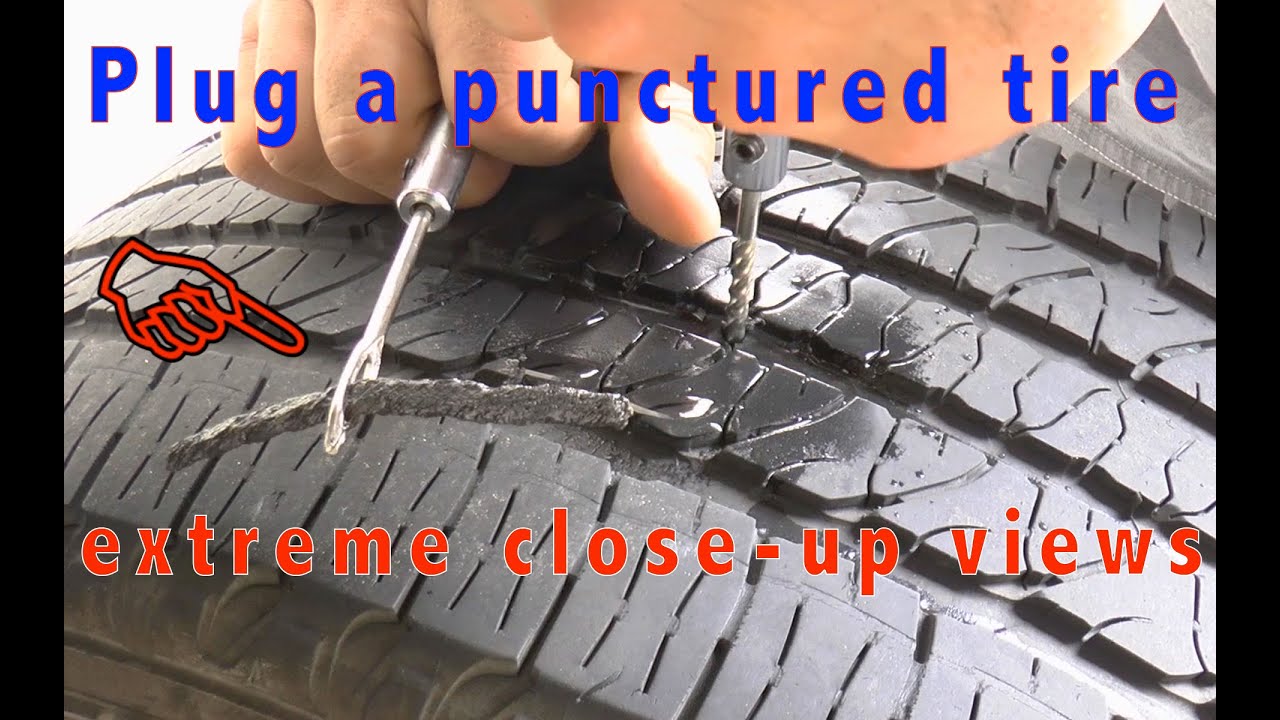
To install a tire plug, first locate the puncture in the tire. Then, insert the plug into the puncture using a tire plug insertion tool.
What You’ll Need
To install a tire plug, you’ll need a tire plug kit, pliers, a tire pressure gauge, and a soapy water solution. The tire plug kit typically includes a T-handle insert tool, a spiral probe, and rubber plugs.
Here’s a step-by-step guide on how to install a tire plug:
- Start by identifying the punctured area on the tire. You can do this by inspecting the tread for any visible objects, such as nails or screws.
- Once you’ve identified the punctured area, remove the object using pliers if necessary.
- Using the spiral probe from the tire plug kit, clean the puncture hole by inserting and twisting the tool.
- Take a rubber plug from the kit and insert it into the T-handle insert tool.
- Next, apply a small amount of soapy water solution to the rubber plug to lubricate it.
- Insert the rubber plug into the puncture hole until approximately half an inch of the plug remains visible.
- Using the pliers, firmly pull the T-handle insert tool straight out of the tire, leaving the plug securely in place.
- Finally, check the tire pressure using a tire pressure gauge to ensure it is properly inflated.
Step 1: Assessing The Damage
Assessing the damage to your tire is the crucial first step when it comes to installing a tire plug. Start by identifying the puncture location. Look closely at the tire to find the spot where it has been pierced. This could be a nail, a screw, or another sharp object. Once you have found the puncture, assess its size and type. Some punctures may be small and can be easily repaired with a plug, while others may be larger or in certain areas of the tire that cannot be fixed. It is important to check if a tire plug is suitable for the specific puncture you have. This will ensure a successful repair and a reliable tire.
Step 2: Preparing The Tire
After successfully completing Step 1 of installing a tire plug, proceed to Step 2: Preparing the Tire. In this step, you need to deflate the tire before working on it. Use a tire pressure gauge to release the air pressure gradually. Next, inspect the punctured area, removing any debris or foreign objects that may obstruct the tire plug from sealing properly. Clean the puncture area with soapy water and a brush to ensure a clean and adhesive-friendly surface for the plug. Wipe off any excess water before moving on to Step 3, where you will insert the tire plug.
Step 3: Preparing The Tire Plug Kit
|
When installing a tire plug, it is important to properly prepare the tire plug kit. Familiarize yourself with the components of the kit to ensure you understand how to use each item effectively. Check that the plug material is appropriate for the type of puncture you are dealing with. Some plugs are designed specifically for small punctures, while others can handle larger holes. |
|
Assemble the necessary tools and materials before starting the installation process. This usually includes a tire reamer or rasp, a plug insertion tool, and tire plugs. Additionally, you may need pliers, a lubricant, and a tire pressure gauge. |
Step 4: Inserting The Tire Plug
Step 4: Inserting the Tire Plug
Applying a lubricant to the plug: Before inserting the tire plug into the puncture hole, it is important to apply a lubricant such as rubber cement or tire sealant to the plug. This will help in easy insertion and ensure a secure seal.
Inserting the plug into the puncture hole: Carefully insert the pre-glued end of the tire plug into the puncture hole. Push the plug all the way in until only a small portion is left visible. Ensure that the plug is aligned with the hole.
Ensuring the plug is inserted correctly and securely: Once the plug is inserted, use a pair of pliers to pull on the plug and confirm it is securely seated inside the hole. Gently tug on the plug to ensure it does not easily come out. This will ensure a tight seal that effectively prevents air leakage.
Step 5: Sealing The Puncture
After inserting the tire plug, it’s crucial to trim the excess plug material that is sticking out of the tire. Using a pair of pliers or a sharp blade, carefully cut off the excess so that it is flush with the surface of the tire.
Once the excess plug material has been removed, it’s time to check for proper seal and inflation. Fill the tire with the recommended air pressure and listen for any hissing sounds, indicating a potential air leak. To confirm the seal, you can use a soapy water solution and apply it to the repaired area. If you see bubbles forming, it means there is still a leak and you will need to repeat the process.
By following these steps, you can effectively seal a tire puncture using a plug. Remember to always follow manufacturer instructions and consult a professional if you are unsure or uncomfortable performing the repair yourself.
Step 6: Reinflating The Tire
In step 6 of the tire plug installation process, you will be re-inflating the tire to the recommended tire pressure. To measure the PSI, use a tire pressure gauge. This tool allows you to determine the current tire pressure accurately.
Before re-inflating the tire, it is essential to know the recommended tire pressure for your specific vehicle. This information can usually be found in the owner’s manual or on a sticker located on the driver’s side door jamb. Once you have identified the proper psi, you can begin inflating the tire.
Connect the air compressor hose to the valve stem of the tire and secure it tightly. Using the tire pressure gauge, check the current tire pressure. If the pressure is below the recommended level, continue inflating the tire until you reach the desired PSI. On the other hand, if the tire pressure is above the recommended level, release some air until you reach the proper inflation level.
After reaching the appropriate tire pressure, remove the air compressor hose and replace the valve cap. It is also essential to verify the proper inflation level by using the tire pressure gauge one more time. This step ensures that your tire is inflated correctly, reducing the risk of any complications while driving.
Step 7: Monitoring And Future Considerations
Regularly checking the repaired tire for any issues: After installing a tire plug, it is crucial to frequently monitor the repaired tire for any signs of problems. Pay close attention to factors such as air pressure, tread wear, and any unusual vibrations or noises. This will help ensure the longevity and safety of the repaired tire.
Understanding the limitations of a tire plug repair: It is essential to recognize that a tire plug is a temporary solution and should not be considered a permanent fix. While it may provide a quick and convenient fix for small punctures, larger or sidewall damages may require professional assistance.
Considering professional assistance for significant damage: In cases of significant tire damage, such as sidewall cuts or separation, it is advisable to seek professional assistance. Tire experts possess the knowledge and equipment to assess the extent of the damage and determine the best course of action. Prioritizing safety will ensure efficient and effective repairs if needed.
Credit: www.youtube.com
Frequently Asked Questions On How To Install A Tire Plug
How Do You Put A Tire Plug In?
To put a tire plug in, follow these steps: 1. Locate the puncture on the tire. 2. Use a plug insertion tool to insert the plug into the hole. 3. Pull the tool out slowly while leaving the plug in place.
4. Use a razor blade to trim any excess plug sticking out. 5. Inflate the tire and check for leaks. Done!
Is Glue Needed For Tire Plug?
Yes, glue is needed for tire plug.
How Long Can I Drive On A Tire Plug?
A tire plug can last for up to a few thousand miles if properly installed and the tire is in good condition. It’s best to get the tire inspected by a professional to determine if the plug is safe to drive on.
How Do You Make A Tire Plug Go In Easier?
To make a tire plug go in easier, lubricate the plug and the hole using soapy water or tire sealant. Gently push the plug into the puncture hole, making sure it goes in straight. Use a tire plug installation tool to insert the plug completely, and then trim any excess plug material flush with the tire.
Conclusion
To wrap up, learning how to install a tire plug is a valuable skill that can come in handy during unexpected punctures. By following the step-by-step process outlined in this guide, you can save time and money by fixing minor tire issues yourself.
Remember, practice makes perfect, so don’t be discouraged if it seems tricky at first. With experience, you’ll become more confident and proficient in handling tire repairs. Keep your tires well-maintained, and they’ll serve you well on the road ahead. Happy plug installment!