To install aluminum fence posts, begin by digging holes at the desired locations and setting the posts securely in the ground.
Overview Of Aluminum Fence Posts Installation
Overview of Aluminum Fence Posts Installation
Installing aluminum fence posts is a crucial step in ensuring a sturdy and durable fence. Proper installation is important for the longevity and stability of the fence, as well as its overall appearance. Before beginning the installation process, it is essential to gather the necessary materials and tools. These may include a post-hole digger, concrete mix, level, tape measure, and fence panels.
The installation process involves digging holes for the posts, ensuring that they are aligned properly and at the correct height. Once the posts are in position, concrete mix is poured around them to provide stability and support. It is crucial to allow the concrete to cure fully before attaching the fence panels.
Overall, installing aluminum fence posts requires attention to detail and proper technique. Following these steps and guidelines can help ensure a successful installation, resulting in a functional and attractive fence.
Step 1: Measuring And Marking
Measuring the fence line: Start by measuring the length of the area where you plan to install the aluminum fence posts. Use a tape measure to get an accurate measurement.
Determining the spacing between posts: Depending on the type of fence you are installing, you will need to determine the appropriate spacing between each aluminum fence post. This can vary based on the style of the fence and the size of the panels.
Marking the positions of the posts: Once you have determined the spacing, use a string line or spray paint to mark the positions where the aluminum fence posts will be installed. This will help you ensure that the posts are evenly spaced and aligned.
Step 2: Digging The Holes
Digging the Holes:
When installing aluminum fence posts, it is important to dig the holes correctly. To do this, you will need a post hole digger or auger. These tools will allow you to dig precise holes with ease.
Start by choosing the right hole diameter and depth for your fence posts. The diameter of the hole should be slightly larger than the post, allowing for easy installation. The depth of the hole will depend on the height of your fence. As a general rule, the hole should be around one-third the height of the fence post.
Once you have determined the correct hole size, use the post hole digger or auger to dig the holes. Make sure the holes are evenly spaced and level, as this will ensure a professional-looking installation.
By following these steps, you will be well on your way to installing aluminum fence posts successfully.
Step 3: Setting The Posts
- Inserting the posts into the holes
- Checking for proper alignment and levelness
- Securing the posts with concrete or gravel
Once you have dug the holes for your aluminum fence posts, you can proceed to insert them. Carefully place each post into its respective hole, ensuring it is straight and centered. Checking for proper alignment and levelness is crucial at this stage to ensure a sturdy and professionally installed fence.
After inserting the posts, you have two options to secure them: concrete or gravel. If you choose to use concrete, prepare the mix according to the manufacturer’s instructions and pour it into the hole around the post. Make sure the post remains straight while the concrete sets. Alternatively, you can use gravel by adding it to the hole and compacting it tightly around the post. Both methods offer excellent stability and support for your fence, so choose the one that suits your preferences.
Step 4: Attaching The Fence Panels
After successfully completing steps 1 to 3 of the installation process, it’s time to move on to step 4: attaching the fence panels. Before attaching the panels, it is important to prepare them properly for installation. This includes checking for any damage or defects, ensuring the panels are clean, and making sure all necessary accessories and hardware are on hand.
Once the panels are ready, the next step is to position and attach them to the aluminum fence posts. Proper alignment is crucial to ensure a straight and visually appealing fence. Using a level and measuring tape can help achieve accurate placement. It’s important to securely fasten the panels to the posts using appropriate hardware such as screws or brackets.
Along with proper alignment, providing adequate support is essential for a durable fence. This can be accomplished by adding cross rails or additional brackets as needed. Attention should also be paid to maintaining consistent spacing between the panels for a uniform look.
By carefully following these steps, you can successfully attach the fence panels to the aluminum posts, creating a sturdy and attractive fence for your property.
Step 5: Securing The Fence Posts
When installing aluminum fence posts, securing them properly is crucial for the stability and longevity of the fence. One way to add additional support is by using braces or crossbars. These can be placed at strategic points along the fence line to provide extra reinforcement and prevent the posts from bending or leaning over time. It is important to check for stability during the installation process and make any necessary adjustments to ensure that the posts are straight and secure. Once the posts are positioned correctly, they can be secured in place with screws or brackets. This will ensure that the posts remain firmly in place and can withstand the elements. By following these steps, you can install aluminum fence posts that are secure and durable.
Tips And Tricks For Successful Aluminum Fence Post Installation
htmlBefore you start the installation process, proper ground preparation is crucial. Clear the area of any debris, rocks, or plants that could hinder the installation process. Make sure the ground is level and free from any obstructions. This will ensure that the fence posts are securely anchored and will lead to a more successful installation.
Proper alignment is essential for a visually appealing and structurally sound fence. To ensure accurate alignment, use a level and string line. Attach the string line to the first post and stretch it out to the next post, ensuring it is level. This will help you align all the fence posts in a straight line and maintain consistency throughout the installation process.
Aluminum fence posts are susceptible to rust over time. To prevent this, apply a rust-resistant coating to the posts before installation. This protective coating will extend the lifespan of the posts and keep them looking pristine for years to come.
When anchoring the fence posts, it is crucial to choose the right type of concrete. Look for a concrete mix that is specifically designed for fence post installations. This type of concrete offers superior strength and durability, ensuring a secure foundation for your aluminum fence.
To add a decorative touch to your fence, consider adding caps or finials to the top of the aluminum fence posts. These decorative elements not only enhance the aesthetic appeal of your fence but also provide additional protection to the post ends from weathering and wear.
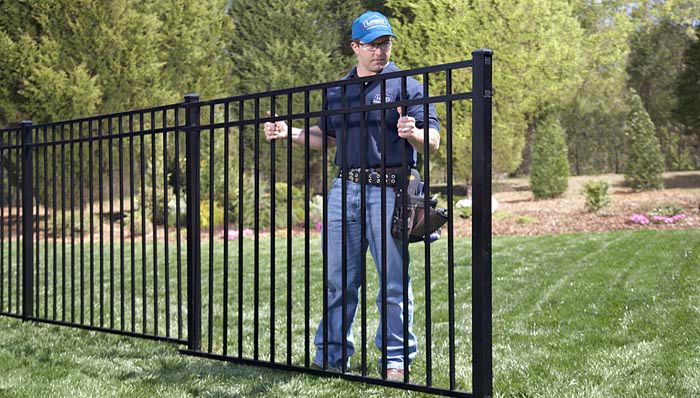
Credit: www.lowes.com
Common Mistakes To Avoid During Aluminum Fence Post Installation
During the installation of aluminum fence posts, it is important to avoid some common mistakes that can impact the stability and longevity of the fence. One of the key factors to consider is the digging of proper and even holes for the posts. Inadequate hole depth or uneven holes can result in a wobbly fence that is prone to leaning or even collapsing. Another crucial aspect is ensuring that the posts are securely set with concrete. Without proper concrete support, the posts may loosen over time, compromising the integrity of the fence.
Accurate leveling is another essential consideration. Failing to level the posts correctly can result in an uneven fence line. Additionally, it is essential to incorporate additional support brackets where necessary, particularly for longer stretches of fencing or areas with high winds. These brackets provide extra stability and prevent the fence from swaying or sagging.
Finally, it is crucial to be aware of any local building codes or regulations pertaining to fence installation. Neglecting to adhere to these rules can lead to issues and potential legal consequences. By avoiding these common mistakes, homeowners can ensure a successful and long-lasting aluminum fence installation.
Troubleshooting Common Issues In Aluminum Fence Post Installation
Installing aluminum fence posts can be a straightforward process, but it’s important to be prepared for common issues that may arise. One common challenge occurs when dealing with uneven ground or slopes. To tackle this problem, start by measuring and determining the height difference between the highest and lowest points. Then, adjust the post height accordingly by cutting or extending the posts.
When it comes to resolving alignment issues between posts, ensure that they are properly spaced and plumb using a level or plumb bob. Use shims or spacers to fill any gaps and ensure a straight line. If your posts end up being loose or wobbly, consider using a concrete mix to reinforce them or install additional support brackets.
Fixing gaps or misalignment between fence panels can be done by adjusting panels or adding filler pieces. Additionally, addressing rust or corrosion on the posts is crucial to maintain the fence’s durability and aesthetic. Regularly inspect and clean the posts, applying an appropriate rust-resistant coating or paint to protect them.
Enjoy a sturdy and stylish aluminum fence with proper post installation. Remember to follow the manufacturer’s instructions and consult professionals if needed. For further guidance and products, check out the resources and recommended products section below.
| Resources | Recommended Products |
|---|---|
| Online tutorials and installation guides | High-quality aluminum fence posts |
| Professional fence installation services | Concrete mix for post reinforcement |
| Customer reviews and feedback | Rust-resistant coating or paint |
Frequently Asked Questions Of How To Install Aluminum Fence Posts
Should Aluminum Fence Posts Be Set In Concrete?
Yes, aluminum fence posts should be set in concrete to provide stability and support. Concrete ensures the posts remain upright and can withstand various weather conditions. It also helps prevent shifting or leaning over time, ensuring a durable and sturdy fence installation.
How Deep To Dig For Aluminum Fence Posts?
Dig the aluminum fence posts to a depth of 24-36 inches for proper stability and security.
Do You Need Gravel Under An Aluminum Fence Post?
Yes, gravel is recommended under an aluminum fence post. It provides stability and helps with drainage, preventing the post from shifting or sinking.
Can I Install An Aluminum Fence Myself?
Yes, you can install an aluminum fence yourself. It’s a DIY project that requires careful planning and following instructions. Consider your skill level, tools required, and local regulations. Ensure the ground is level and dig proper post holes. Assemble and secure the fence panels and gate following manufacturer guidelines.
Conclusion
Installing aluminum fence posts is a straightforward process that can add both beauty and security to your property. By following the steps outlined in this guide, you’ll be able to install your fence posts with ease. Remember to choose the right materials, measure correctly, and securely anchor the posts into the ground.
With proper installation, your aluminum fence will provide years of durability and style. So go ahead and transform your outdoor space today!