To install a T post fence, start by determining the placement of the posts and digging holes accordingly. Then, insert the T posts securely into the holes, making sure they are evenly spaced.
Introducing a T post fence to your property provides numerous benefits such as enhanced security, privacy, and containment for pets or livestock. Whether you’re a farmer, homeowner, or DIY enthusiast, knowing how to install a T post fence is essential.
By following a few simple steps, you can complete this project efficiently and effectively. We will guide you through the process of installing a T post fence, ensuring a durable and attractive fence that will serve its purpose for years to come. So, let’s get started!
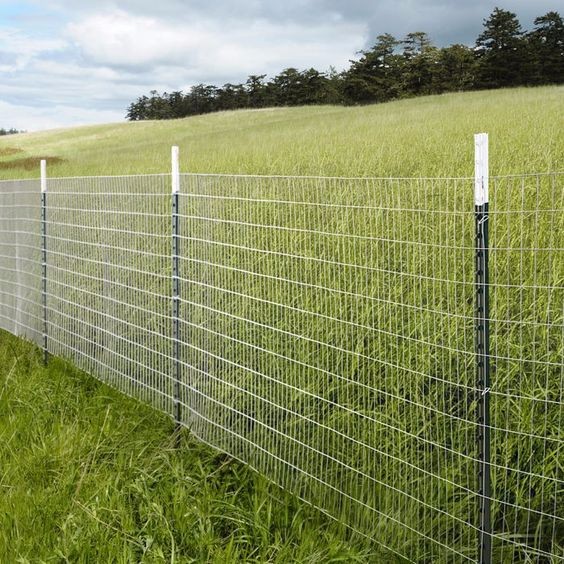
Credit: www.starpickets.com
Choosing The Right T Posts For Your Fence
Finding the perfect T posts for your fence is crucial for ensuring its stability and longevity. Before making a purchase, consider the following factors that will help you select the most suitable T posts:
| Factor | Description |
|---|---|
| Material | Opt for galvanized steel T posts as they are highly durable and resistant to rust and corrosion. |
| Size and Length | Consider the dimensions of your fence and choose T posts that are appropriate in size and long enough to provide sufficient support. |
| Weight Class | Check the weight class rating of T posts to ensure they can withstand the tension and stress exerted by your fence. |
| Spade Design | Look for T posts with a reinforced spade design as it helps with easier installation and provides added stability in the ground. |
By considering these factors, you can make an informed decision and choose the right T posts that will meet the specific needs of your fence project.
Preparing The Ground For Installation
Before you start installing your T-post fence, it is important to properly prepare the ground to ensure a hassle-free installation process. The first step in this preparation process is clearing the fence line. This involves removing any vegetation, rocks, or debris that may interfere with the installation of the fence. You should mark the locations for your fence posts, making sure they are evenly spaced and aligned. This will help maintain the stability and aesthetics of your fence. Once the locations are marked, you can start digging holes for the T posts. Make sure the holes are deep enough to securely hold the posts and create a sturdy foundation for your fence. With these preparations in place, you can proceed with the actual installation of your T post fence.
Installing The T Posts
Installing the T Posts
Setting the first T post is the initial step when installing a T post fence. Ensure you choose the right location for your fence and mark the position for the first post. Dig a hole that is suitable for the length and width of the post and insert it securely into the ground. Next, align and level the T posts by using a level or a string line, ensuring they are straight and evenly spaced. This will help maintain the structural integrity of your fence.
Securing the T posts in the ground is critical to ensure the stability of your fence. Use concrete or gravel to secure the posts and prevent them from shifting or leaning. Dig a hole slightly wider than the post and fill it with concrete or gravel, then insert the post and allow it to set properly. Repeat this process for each T post along the fence line, ensuring they are all securely anchored in the ground.
By following these steps, you can successfully install a T post fence that is sturdy, level, and durable.
Adding The Fence Panels
When installing a T post fence, one important step is to add the fence panels.
Measuring and cutting the fence panels is the first subheading under this step. It is crucial to measure the length between the T posts accurately. Using a measuring tape, measure the distance between the posts and then cut the fence panels accordingly, leaving a small gap for expansion and contraction.
The next subheading is about attaching the fence panels to the T posts. Secure the panels to the T posts using galvanized or coated nails or screws. Position the panels in line with the T posts, ensuring they are level and straight. Make sure to attach each panel securely to prevent sagging or movement.
Lastly, ensuring proper alignment of the fence panels is essential. Regularly check the alignment of the panels as you continue installing them. By making small adjustments as needed, you can ensure a straight and professional-looking fence.
Adding Gates And Accessories
Adding gates to your T post fence can provide convenient access to your property. To install gates, start by securing gate posts at the desired locations, making sure they are plumb and level. Attach gate hinges to the gate posts, ensuring they are sturdy and secure. Hang the gate from the hinges, making sure it swings freely and smoothly. For added security and protection, consider installing post caps on top of your T posts. These caps not only enhance the fence’s appearance but also help prevent moisture from entering the posts, reducing the risk of rust and decay.
| Gate Type | Description |
|---|---|
| Barbed Wire | Attach barbed wire to the top of your T post fence to enhance security and deter trespassers. Ensure the wire is tightly stretched and secured at proper intervals. |
| Electric Wire | Consider adding an electric wire to your T post fence for additional security. This can be particularly useful for keeping animals out or in specific areas. Consult local regulations and safety guidelines when installing electric wire. |
By following these steps, you can efficiently add gates to your T post fence and incorporate additional accessories to enhance security and protection.
Maintaining Your T Post Fence
Regular inspections and repairs are important to maintain the integrity of your T post fence. Conducting inspections at least once a year will help identify any signs of damage or wear and tear. Look for loose or damaged posts, broken wires, and sagging sections. If any issues are found, make the necessary repairs promptly to prevent further damage.
Another crucial aspect of maintaining your T post fence is cleaning and painting. Regularly clean the fence using a mild detergent and water to remove dirt and debris. This will help prevent buildup and prolong the life of the fence. Consider painting the fence with a rust-resistant paint to provide an added layer of protection against the elements.
To prevent rust and corrosion on your T post fence, take preventative measures. Apply a rust-resistant coating or consider using posts made of galvanized steel. Keep the fence clear of vegetation to avoid moisture buildup, which can accelerate rusting. Finally, ensure proper drainage around the fence to prevent water accumulation.
Frequently Asked Questions On How To Install T Post Fence
How Far Apart Should You Put T Posts On A Fence?
T-posts on a fence should be placed approximately 8 to 10 feet apart. This spacing ensures proper stability and support for the fence.
How Far Do You Drive T Posts Into The Ground?
T posts are typically driven into the ground to a depth of about 3-4 feet.
Do You Need Concrete For T Posts?
Yes, you need concrete for T posts. Concrete provides stability and prevents T posts from shifting or falling over.
How Do You Attach A Fence To T Posts?
To attach a fence to T posts, follow these steps: 1. Position the T posts at the desired intervals along the fence line. 2. Use a post driver or mallet to drive the T posts into the ground securely. 3.
Attach the fence fabric or wire to the T posts using fence clips or wire ties. 4. Stretch the fence tightly and secure it to the T posts using additional clips or ties as needed. 5. Make sure the fence is level and properly aligned before finishing the installation.
Conclusion
Installing a T-post fence might seem like a daunting task, but with the right tools and some basic knowledge, you can make it a breeze. By following the step-by-step guide outlined in this blog post, you’ll be able to create a sturdy and secure fence that will keep your property safe and protected.
Remember to choose the right materials, prepare the ground properly, and install the T-posts at the correct intervals. With these tips in mind, you’ll be well on your way to successfully installing your T-post fence. So go ahead and get started!