To install a circular saw blade, loosen the blade lock button, remove the arbor nut and outer flange, place the saw blade onto the saw’s arbor, and secure it by tightening the arbor nut and outer flange. Installing a circular saw blade is a necessary skill for any DIY enthusiast or professional woodworker.
Proper installation ensures the blade operates safely and efficiently, allowing clean cuts and reducing the risk of accidents. By following a few simple steps, you can easily replace or install a circular saw blade. We will guide you through the process, providing clear instructions for this important task.
Whether you need to replace a worn-out blade or install a new one, you’ll find all the information you need to get the job done right. Let’s dive into the details and learn how to install a circular saw blade correctly.
Gathering The Necessary Tools And Materials
Gathering the necessary tools and materials to install a circular saw blade is essential for a smooth and successful installation process. First and foremost, it is crucial to wear safety goggles throughout the entire process to protect your eyes from any flying debris or particles. Additionally, wearing gloves will provide an extra layer of protection while handling the saw blade and other sharp objects. Another important tool to have on hand is a wrench or Allen key (depending on the saw model) to securely attach the blade to the circular saw. These simple yet vital tools will ensure a safe and efficient installation of your circular saw blade.
Ensuring Safety Precautions
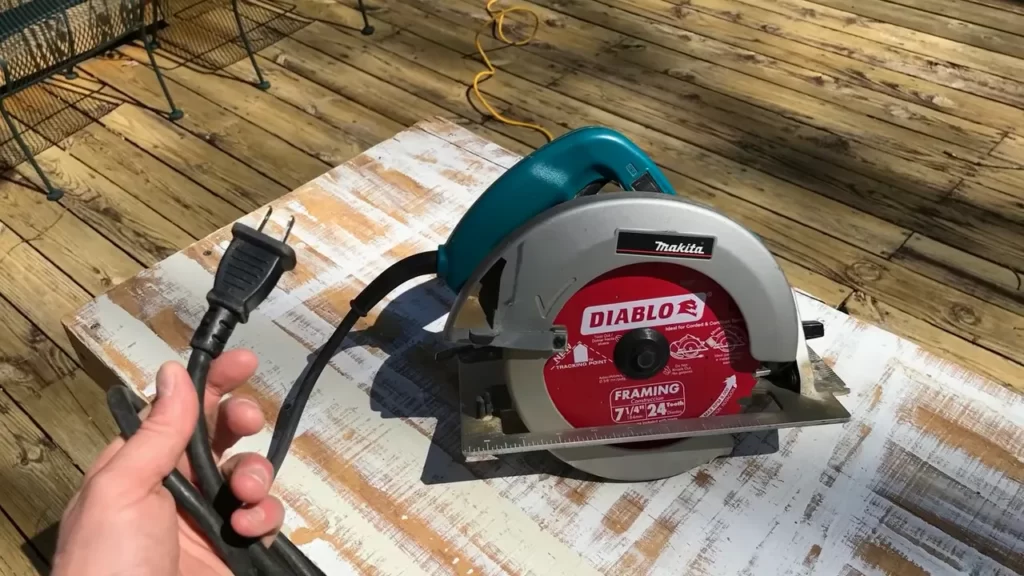
Ensuring safety should be your top priority when it comes to installing a circular saw blade. Before starting the process, always disconnect the power source to eliminate the risk of accidents. This can be done by unplugging the saw or turning off the power switch.
Additionally, it is crucial to wear protective gear such as safety glasses, gloves, and ear protection. These precautions will safeguard you from potential injuries and ensure a safe working environment.
Inspecting the saw before installing the blade is another vital step. Carefully examine the saw for any damage, such as a worn-out blade or loose parts. This will help prevent any mishaps and ensure smooth operation.
By following these safety precautions, you can confidently proceed with installing a circular saw blade and complete your project efficiently.
Releasing The Blade Guard
To install a circular saw blade, the first step is to release the blade guard. You can locate the blade guard release button on the saw. By pushing the release button, you can unlock the guard, allowing you to access the blade and change it.
Removing The Arbor Bolt
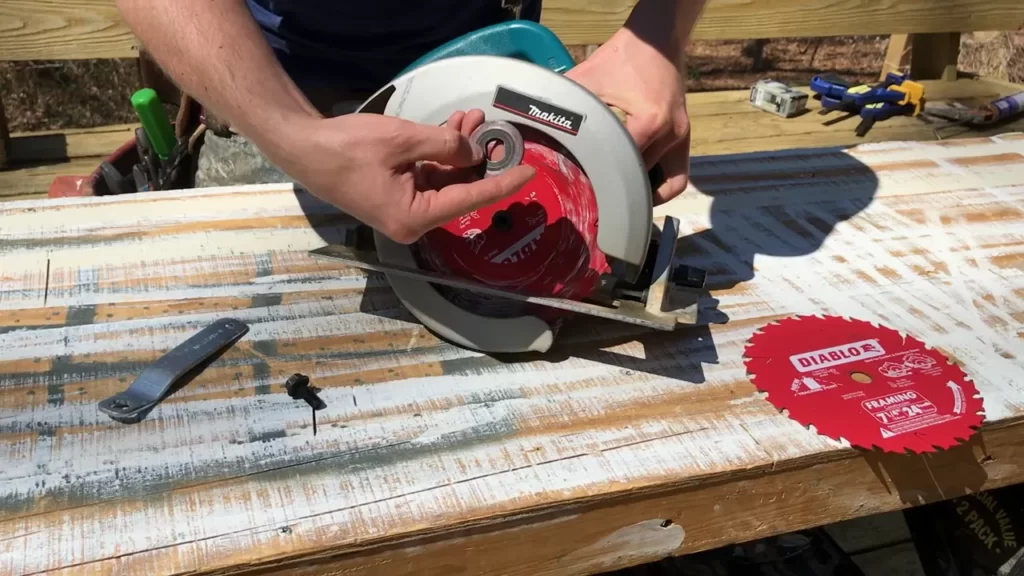
Removing the arbor bolt is an essential step in installing a circular saw blade. To start, identify the arbor bolt or nut located at the center of the saw’s blade. It may require using a wrench or an Allen key to loosen and remove the bolt. Insert the appropriate tool into the bolt and turn counterclockwise to loosen it. Once the bolt is loose, carefully remove it and set it aside. Be cautious not to lose the bolt as it is crucial for securing the blade. With the bolt removed, the old blade can be taken off and the new one installed. Remember to tighten the arbor bolt securely to ensure the blade is properly attached. In summary, identifying the arbor bolt and using the appropriate tool to remove it allows for the smooth installation of a circular saw blade.
Taking Out The Old Blade
Installing a circular saw blade involves a few simple steps. Firstly, to remove the old blade, slide the old blade off the arbor. Be sure to handle the blade carefully to avoid injury. It is essential to use the proper tools and safety equipment during this process. To remove the old blade, you may need to use a wrench to loosen the arbor nut. Once the nut is loosened, carefully slide the old blade off the arbor. Remember to inspect the old blade for any damage or signs of wear and tear. It is crucial to replace worn or damaged blades to ensure optimal performance and safety when working with a circular saw.
Checking The New Blade
Checking the new blade:
Before installing a circular saw blade, it is crucial to verify the compatibility of the blade with the saw. Ensure that the blade’s specifications match those recommended by the saw manufacturer. This includes checking the blade diameter, arbor size, and the number of teeth. Inspect the condition of the new blade for any defects such as chips, cracks, or bent teeth. These issues can negatively affect the saw’s performance and safety. Take a close look at the blade’s carbide tips, where most damage occurs, to ensure they are intact and sharp.
Once you have confirmed the blade’s compatibility and checked for defects, you can proceed with the installation process. Always refer to the manufacturer’s instructions to properly attach the blade to the circular saw, using the recommended tightening procedure. Remember to work carefully and safely when handling sharp blades, wearing necessary protective gear. With a properly installed and well-maintained circular saw blade, you can confidently tackle various cutting tasks with ease.
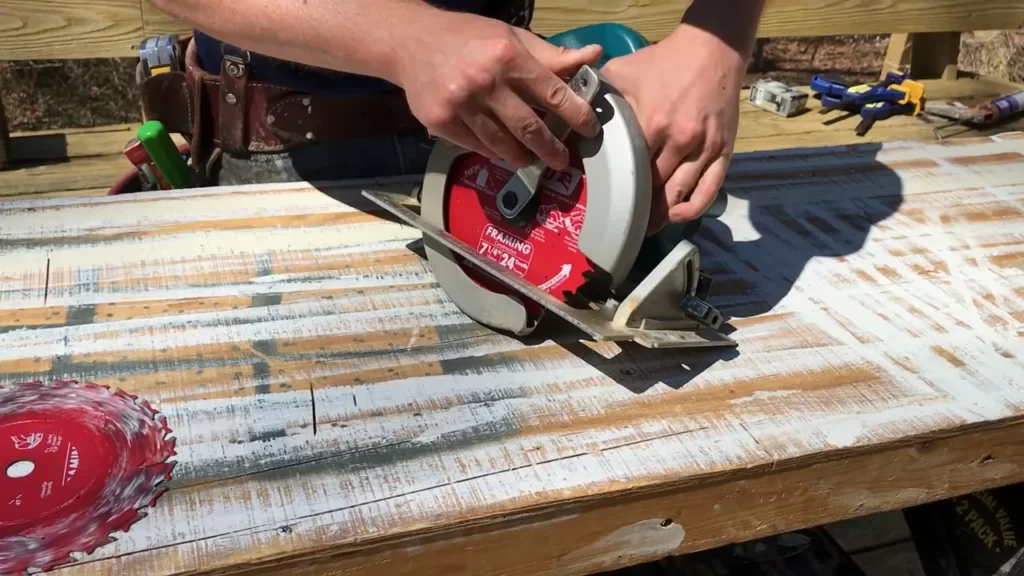
Placing The New Blade On The Arbor
When installing a circular saw blade, it is important to align the blade with the arbor shaft correctly. This ensures proper operation and safety while using the saw. To begin, carefully place the new blade onto the arbor, making sure that the center hole of the blade fits securely onto the arbor shaft. Check that the blade is sitting flat and properly positioned on the arbor.
Next, take note of the blade’s teeth direction. The direction of the toothed edge will determine its cutting action. For most circular saw blades, the teeth should be facing in the direction of the rotation, which is usually indicated on the blade itself. Make sure the teeth are pointing in the correct direction.
Once the blade is in place and aligned correctly, secure it firmly by tightening the arbor nut or bolt. Use the appropriate tool, such as a wrench or Allen key, to tighten the nut or bolt securely. This will ensure that the blade remains fixed in position during use, reducing the risk of accidents or blade slippage. Ensure the blade is tightly secured before operating the saw.
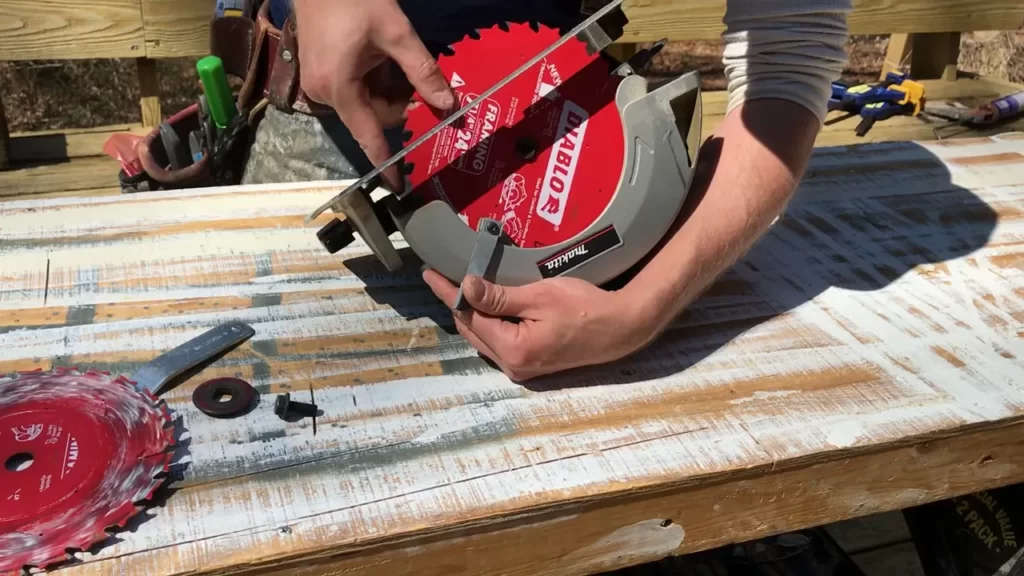
Tightening The Arbor Bolt
To tighten the arbor bolt of a circular saw blade, use a wrench or Allen key to fasten it securely. Make sure not to over tighten the bolt, as this could cause damage to the blade or the saw itself. It is important to be cautious while tightening to avoid any potential mishaps. Remember to follow the manufacturer’s instructions for your specific circular saw model. By ensuring the arbor bolt is tightened properly, you can help maintain the efficiency and safety of your circular saw. Proper maintenance and care of your tools are crucial for successful projects and to extend their lifespan.
Reconnecting The Power Source
Before installing a circular saw blade, it is crucial to reconnect the power source. This entails either plugging in the saw or reattaching the battery. For corded circular saws, locate a nearby power outlet and insert the plug firmly until it clicks into place. Ensure that the cord is not tangled or obstructed in any way that could lead to accidents. If you are using a cordless circular saw, make sure the battery is fully charged and correctly aligned with the saw’s battery compartment. Press the battery into place until you hear a clicking sound indicating a secure connection.
Remember to prioritize safety and take necessary precautions, such as wearing appropriate protective gear, before proceeding with any power tool-related tasks.
Running A Test Cut
Running a test cut is an important step when installing a circular saw blade. To do this, start by marking a piece of scrap wood for cutting. This will help you see how the saw performs and ensure that it is set up correctly. Use a pencil or marker to make a clear line where you want to cut.
Next, activate the saw and carefully guide it through the test cut. Pay attention to how smoothly the blade glides through the wood and whether the cut is clean. This will give you an idea of the blade’s performance and whether any adjustments need to be made.
Remember, safety is paramount when working with power tools. Always wear protective gear, such as safety goggles and gloves, and follow the manufacturer’s instructions for your specific circular saw model.
Checking For Proper Alignment And Operation
Installing a circular saw blade requires attention to detail to ensure smooth and accurate cuts. Start by checking the alignment of the blade with the saw’s base plate. Ensure that the blade is centered and parallel to the cut line. Use a straightedge to confirm alignment.
Next, inspect the cut for smoothness and accuracy. Take note of any unevenness or jagged edges. This could indicate a misaligned blade or improper operation. Adjust the blade or saw settings if necessary to achieve the desired results.
Make sure to tighten the blade properly using the wrench provided. This will prevent any unnecessary movement during operation, reducing the risk of accidents.

| Tools | Steps |
|---|---|
| Wrench | Loosen the arbor nut |
| Place the blade onto the arbor | |
| Rotate the blade until it aligns with the saw’s markings | |
| Tighten the arbor nut |
Remember to always follow the manufacturer’s instructions and use appropriate safety precautions when handling circular saw blades.
Cleaning The Blade After Use
After using a circular saw blade, it is important to clean it thoroughly to maintain its efficiency and longevity. Cleaning the blade removes any debris or buildup that may have accumulated during use. Start by carefully inspecting the blade for any lingering material such as sawdust, resin, or adhesive. If there is debris present, use a soft brush or compressed air to gently remove it from the teeth and the gaps between them.
If the blade has stubborn residues that are difficult to remove with a brush alone, you can use a blade cleaner or solvent specifically designed for this purpose. Apply the cleaner onto a cloth or a brush, and carefully wipe down the surface of the blade, paying attention to each tooth and the spaces between them. Make sure to follow the manufacturer’s instructions for the cleaner and wear protective gloves if necessary. Once the blade is clean, dry it thoroughly before storing it away to prevent rust or corrosion.
Storing The Blade Properly
Proper storage is essential to maintain the longevity of your circular saw blade. Keeping the blade in a protective case or container is highly recommended. This helps to prevent any accidental damage, such as chips or dents, which can affect the cutting performance. Additionally, storing the blade in a cool, dry place away from moisture is crucial. Moisture can lead to rust and corrosion, ultimately reducing the lifespan of the blade. Remember to clean the blade thoroughly before storage to remove any dirt or debris. By following these simple storage guidelines, you can ensure that your circular saw blade stays in top-notch condition, providing clean and precise cuts whenever needed.
Regular Blade Maintenance
Regular blade maintenance is crucial for the optimal performance of a circular saw. One important aspect of maintenance is sharpening the blade when it becomes dull. Checking for signs of wear or damage before each use is also recommended to ensure safe and efficient operation.
When a circular saw blade starts to dull, it can result in slower and less precise cuts. To sharpen the blade, you can use a file or a specialized blade sharpening tool. Make sure to follow the manufacturer’s instructions and take the necessary safety precautions.
Regular blade maintenance can prolong the lifespan of your circular saw blade and save you money in the long run. It is recommended to establish a routine maintenance schedule, inspecting the blade for wear and sharpening as needed. By keeping your circular saw blade sharp and in good condition, you can achieve cleaner cuts and improve your overall woodworking experience.
Frequently Asked Questions For How To Install A Circular Saw Blade
Which Way Does A Circular Saw Blade Go In?
To insert a circular saw blade, align the teeth with the direction of rotation indicated on the blade. Make sure the saw is unplugged, release the blade lock, and follow the manufacturer’s instructions for inserting the blade securely. Ensure the teeth face forward for optimal cutting performance.
How Do You Put A Blade On A Circular Saw For The First Time?
To put a blade on a circular saw for the first time, follow these steps: 1. Make sure the saw is unplugged. 2. Locate the blade release button or lever. 3. Press the button or lift the lever to release the old blade.
4. Align the new blade with the saw’s mounting holes. 5. Push the blade onto the shaft and release the button or lever to secure it.
How Do You Put A Blade In A Saw Saw?
To put a blade in a saw, follow these steps: 1. Make sure the saw is powered off and unplugged. 2. Locate the blade release button or lever on the saw. 3. Press or pull the release to open the blade clamp.
4. Insert the blade into the clamp, aligning the teeth with the guide. 5. Close the clamp and secure it in place. 6. Double-check the blade is properly seated before powering on the saw.
Conclusion
To wrap things up, mastering the installation of a circular saw blade is an essential skill for any DIY enthusiast or handyman. By following the step-by-step guide provided in this blog post, you can confidently and safely replace your saw blade whenever necessary.
Remember, proper installation ensures optimal performance and longevity of your circular saw. So, don’t hesitate to apply these tips and get ready for a smooth cutting experience every time.