o install a gate opener, first, gather the necessary tools and materials, then follow the step-by-step instructions provided by the manufacturer. Now, let’s delve into a more detailed explanation of how to successfully install a gate opener.
When it comes to enhancing the security and convenience of your property, installing a gate opener is a fantastic choice. A gate opener allows you to remotely control the opening and closing of your gate, providing both safety and ease of access.
By following the manufacturer’s instructions, you can install a gate opener on your own without the need for professional assistance. This comprehensive guide will walk you through the installation process, ensuring that you can enjoy the benefits of a gate opener hassle-free. We will cover all the necessary steps and provide useful tips to make your installation process smooth and efficient.
Factors To Consider Before Installing A Gate Opener
Before installing a gate opener, it is crucial to consider several factors. First, you need to determine the type of gate you have, whether it is a sliding gate, swing gate, or a barrier gate. Each gate type requires a specific type of gate opener to ensure proper installation and functionality.
Next, you should assess the size and weight of your gate. Gate openers have weight and size limitations, so it is essential to choose one that can handle the specific measurements of your gate. Failure to do so can lead to malfunctions and premature damage to the gate opener.
Another factor to consider is the power source for your gate opener. You have the option of choosing between AC-powered or solar-powered gate openers. The power source selected should be based on the availability of electrical outlets and the proximity to sunlight.
Lastly, you should evaluate the security features of the gate opener. Look for features such as anti-theft protection, remote access control, and safety sensors to ensure the safety and security of your property.
Gathering The Necessary Tools And Materials
Gathering the Necessary Tools and Materials
To successfully install a gate opener, you will need a gate opener kit that includes all the essential components. This kit typically includes the power supply components, safety equipment, and hardware and mounting accessories.
The power supply components are crucial for the gate opener to function effectively. It usually consists of a control board, battery, and power transformer.
For safety purposes, ensure that you have the necessary equipment such as safety sensors, emergency stop buttons, and warning signs that comply with industry standards.
Lastly, the hardware and mounting accessories are required to properly install the gate opener onto your gate. This can include gate brackets, gate wheels, hinges, and other necessary hardware.
By gathering all the necessary tools and materials beforehand, you will be well-prepared to successfully install your gate opener.
Measuring And Preparing The Gate
When installing a gate opener, it is important to begin by measuring and preparing the gate for the installation process. This involves identifying the points of installation, taking accurate measurements, clearing the installation area, and ensuring gate compatibility with the opener.
Identifying the Points of Installation: Before starting the installation, carefully identify the points on the gate where the opener will be placed. This will ensure that the opener is installed in the correct location for optimal functionality.
Taking Accurate Measurements: Measure the dimensions of the gate to determine the appropriate size and type of opener needed. Take accurate measurements of the height, width, and weight of the gate to ensure compatibility with the chosen opener.
Clearing the Installation Area: Clear the area surrounding the gate to provide a safe and accessible space for installation. Remove any obstacles such as plants, debris, or other objects that may hinder the installation process.
Ensuring Gate Compatibility with Opener: Verify that the chosen gate opener is compatible with the type and material of the gate. Check the manufacturer’s specifications and guidelines to ensure a proper match between the opener and gate.
Assembling The Opener Components
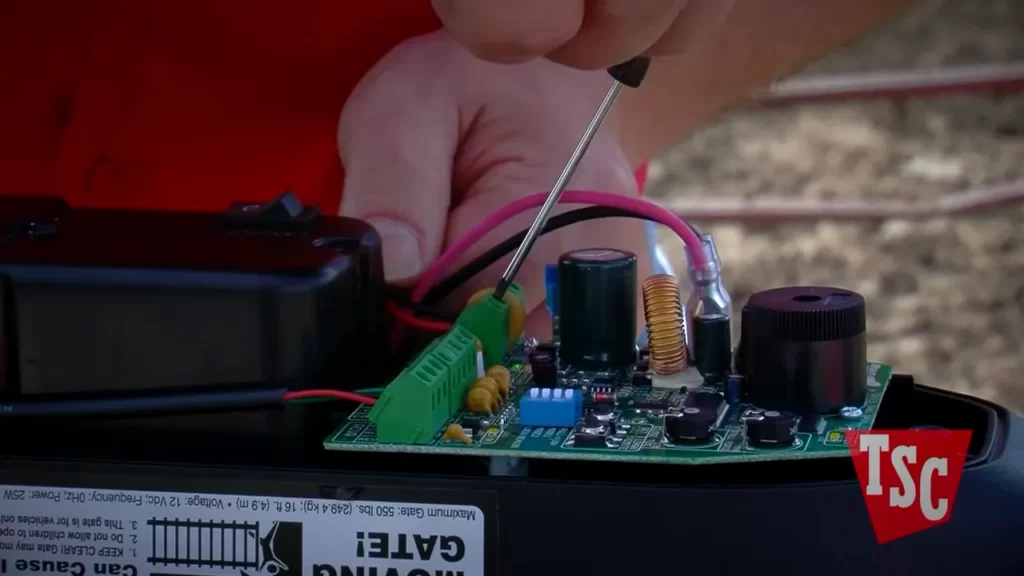
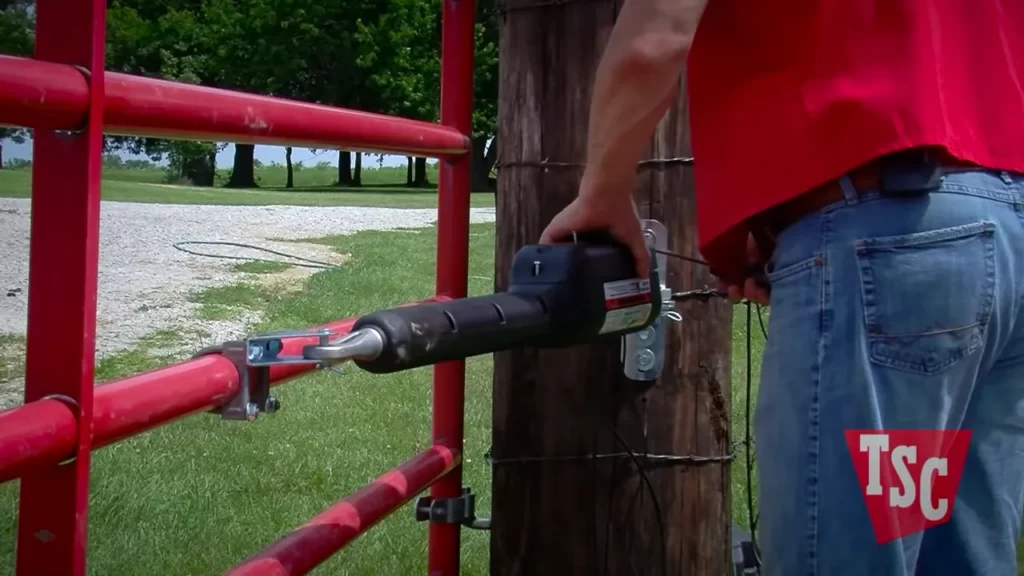
To install a gate opener, you first need to assemble the opener components. Begin by connecting the rail(s), making sure they are properly aligned and securely attached. Next, mount the motor unit to a solid surface, such as a post or wall, using the provided brackets and screws. Make sure the motor unit is level and secure.
After the motor unit is mounted, attach the control box to the motor unit, following the manufacturer’s instructions. The control box houses the control board and other electronic components, so it is important to secure it properly. Use the provided screws or brackets to attach the control box securely to the motor unit.
Finally, wire the opener components according to the wiring diagram provided by the manufacturer. Connect the control board to the control box, and then connect the control box to the power source. Ensure that all wiring connections are tight and secure. Once all the components are assembled and wired properly, your gate opener is ready for use.
Mounting The Gate And Opener
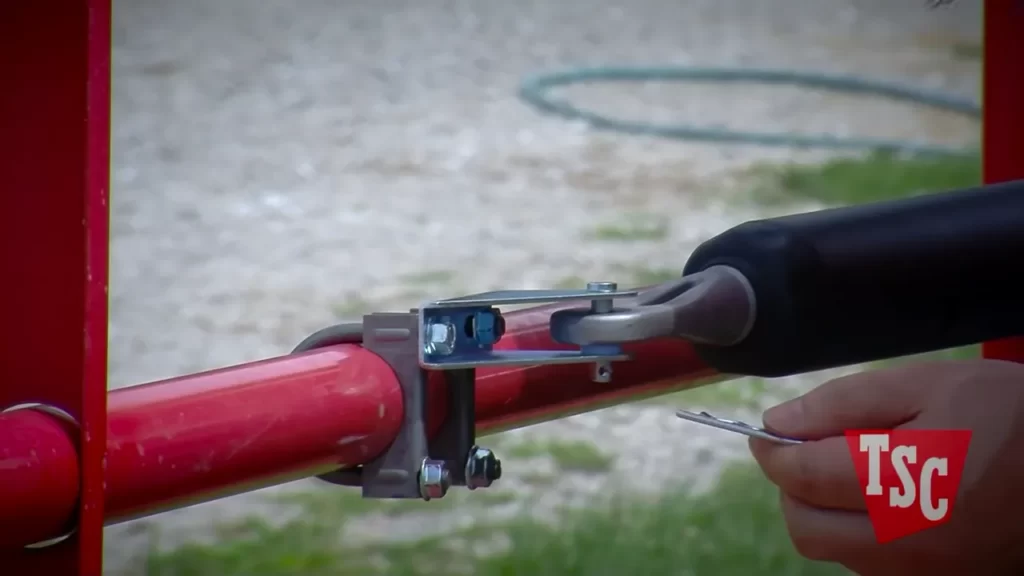
To install a gate opener, start by positioning the gate opener correctly. Align the opener with the gate to ensure it functions properly. Once aligned, secure the opener to the gate using appropriate hardware. Make sure the opener is tightly attached for stability.
After securing the opener, adjust its position as needed. Carefully follow the manufacturer’s instructions to ensure proper adjustment. Incorrect positioning may result in malfunctioning or ineffective operation.
Remember to take necessary safety precautions while installing the gate opener. Ensure power is turned off during installation and follow all safety guidelines provided by the manufacturer.
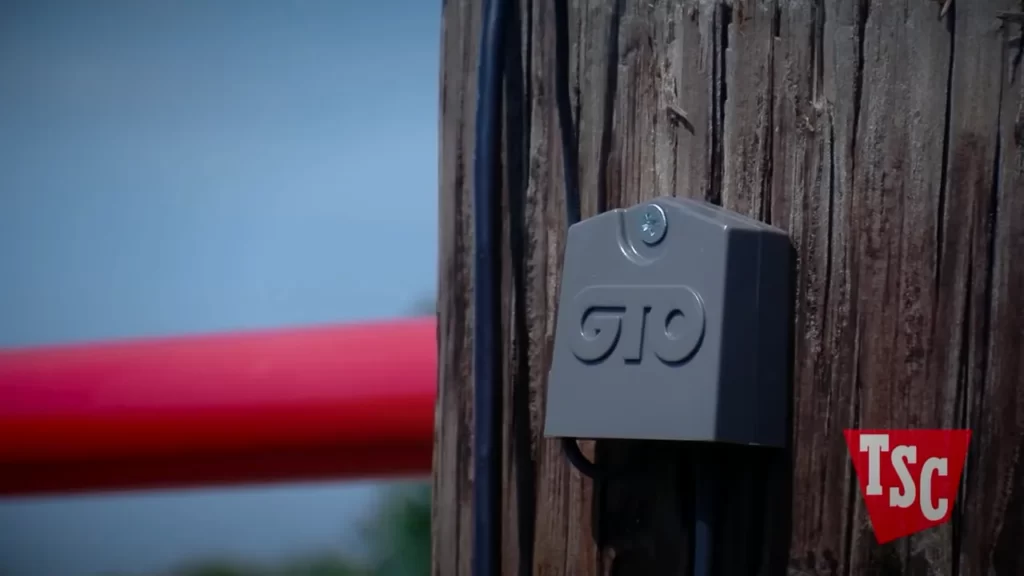
Connecting The Power Supply
When installing a gate opener, one of the crucial steps is connecting the power supply. Firstly, it is important to determine the power source location. Identify the nearest power outlet or consider installing a new one near the gate opener. Running wires for the power supply should be done carefully, ensuring they are hidden and protected from any potential damage. Next, connect the wires to the control box according to the manufacturer’s instructions. It is recommended to use wire connectors to ensure a secure connection. Once everything is properly connected, it is essential to test the power connection. This involves turning on the power and checking if the gate opener functions correctly. Any issues with the power connection should be addressed promptly to ensure the gate opener operates smoothly.
Testing The Opener’s Functionality
To ensure that your gate opener is working properly, it is important to go through a series of tests. The first step is to check the remote control operation. Make sure the remote control is functioning correctly by pressing the buttons and verifying that the gate responds accordingly. You should also test the gate opening and closing to ensure smooth operation. Pay close attention to any unusual noises or resistance during this test.
Next, it is essential to test the safety features of the gate opener. Check that the safety sensors are working by placing an object in the path of the gate. The gate should not close if it detects an obstruction. Additionally, test the auto-reverse function by manually obstructing the gate while it is closing. The gate should stop and reverse its direction.
If any issues arise during the testing process, you may need to troubleshoot common problems. Check for any loose connections or faulty wiring. Make sure the power supply is sufficient and that the opener is compatible with the gate’s weight and size. Refer to the manufacturer’s manual for specific troubleshooting instructions.
| Testing the Opener’s Functionality |
|---|
| Checking Remote Control Operation |
| Verify that the remote control accurately operates the gate by pressing the buttons and observing the gate’s response. |
| Verifying Gate Opening and Closing |
| Test the gate’s opening and closing functionality to ensure smooth operation. Pay attention to any unusual noises or resistance. |
| Testing Safety Features |
| Place an object in the path of the gate to test the safety sensors, which should prevent the gate from closing. Manually obstruct the gate to check the auto-reverse function. |
| Troubleshooting Common Issues |
| If any issues arise, troubleshoot common problems such as loose connections, faulty wiring, insufficient power supply, or compatibility issues with gate weight and size. |
Adjusting The Gate Opener Settings
When installing a gate opener, it is crucial to adjust the settings properly to ensure optimal performance. One of the key settings to configure is the gate opening and closing range. This determines how far the gate opens and closes. It is essential to set this range accurately to prevent the gate from hitting any obstacles or causing damage. Adjusting the speed and force settings is another crucial step in fine-tuning the gate opener. These settings control how fast the gate opens and the force it uses to operate. By programming additional accessories, such as remote controls or keypads, you can enhance the functionality and convenience of your gate opener. Lastly, customizing the security features is vital to ensure the safety of your property. This may include features like automatic closing or the ability to set a security code. Overall, properly adjusting the gate opener settings is crucial for a smooth and efficient operation.
Frequently Asked Questions On How To Install A Gate Opener
Can I Install My Own Electric Gates?
Yes, it is possible to install your own electric gates. However, it is crucial to follow safety guidelines and have proper knowledge of electrical wiring and gate installation. It is recommended to consult a professional for guidance or hire an experienced technician to ensure the gates are installed correctly and safely.
How To Choose The Right Electric Gate Opener For Diy Installation?
To choose the right electric gate opener for your DIY installation, consider the weight and size of your gate, the type of power source you prefer (solar or AC), the safety features you need, the level of automation you desire, and your budget.
What Power Is Needed For A Gate Opener?
The power needed for a gate opener depends on the specific model and size of the gate. Different gate openers have different power requirements, so it is important to check the manufacturer’s recommendations for the correct power supply.
Conclusion
To sum up, installing a gate opener can be a simple yet effective way to enhance convenience and security. By following these step-by-step instructions and tips outlined in this post, you can successfully install a gate opener without any hassle.
Remember to choose the right opener, prepare the necessary tools, and carefully follow the installation process. With the right opener in place, your gate will transform into a modern and automated entryway for your home or property. Embrace the benefits of a gate opener and enjoy the ease and security it brings.