To install a Larson storm door, you will need to follow the provided instructions carefully. Properly align the door, secure it in place, and attach the hardware for a successful installation.
Introducing a Larson storm door to your home can bring both aesthetic appeal and added functionality. These doors are designed to protect your main front door from the elements, while allowing for ventilation and natural light. Installing a Larson storm door is a relatively straightforward process, but it does require some careful attention to detail.
In this guide, we will walk you through the steps of installing a Larson storm door, so that you can enhance the overall security and energy efficiency of your home. Just follow the provided instructions closely, and you’ll have your Larson storm door installed in no time.
Tools And Materials Needed
Tools and Materials Needed
Installing a Larson Storm Door requires a few essential tools and materials to ensure a smooth and successful installation. Here is a list of the necessary tools:
| Flathead screwdriver |
| Phillips screwdriver |
| Drill with bits |
| Tape measure |
| Level |
| Hacksaw |
| Utility knife |
| Safety glasses |
| Gloves |
| Masonry drill bits (if mounting on brick or concrete) |
Additionally, you will need the following materials:
- Larson Storm Door
- Screws
- Shims
- Weatherstripping
Make sure you have all these tools and materials on hand before starting the installation process. This will save you time and ensure that you have everything you need to complete the project.
Preparing For Installation
Before installing a Larson Storm Door, it is important to prepare for the installation process. This involves measuring the door frame to ensure the storm door will fit properly. Start by assessing the existing door to determine its condition and any potential obstacles that may need to be addressed for a smooth installation. Clear the work area of any clutter or debris to provide a safe and clean environment for the installation process.
Removing The Existing Door
Removing the old door is the first step in installing a Larson Storm Door. Start by unscrewing the hinges of the existing door using a screwdriver. Carefully remove the door from its hinges and set it aside. Once the door is removed, take a moment to inspect the door frame for any damages or rot. If there are any issues, repair them before proceeding.
Next, prepare the door frame by removing any trim or molding around it. Use a pry bar or a hammer and chisel to gently remove the trim. Be cautious not to damage the surrounding walls or frame. Once the trim is removed, check for any protruding nails and remove them as well.
Inspect the door frame for any excess paint or debris. Use a scraper to remove any flaking or chipped paint. It is important to have a clean and smooth surface to ensure a proper fit for the Larson Storm Door. Clean the door frame thoroughly with a damp cloth to remove any dust or dirt.
To summarize, start by removing the old door and then prepare the door frame by inspecting it for damages, removing any trim or molding, and cleaning the surface. Following these steps will ensure a smooth installation process for the Larson Storm Door.
Installing The Door Frame
Attaching the hinge rail is the first step in installing a Larson Storm Door. The hinge rail is an essential component that allows the door to open and close smoothly. To attach the hinge rail, ensure that the frame is leveled and aligned correctly. Use a level to verify that the frame is perfectly vertical and adjust if necessary. Once the frame is aligned, secure it in place using screws or nails. Take care to attach the hinge rail firmly but avoid over-tightening to prevent any damage to the frame. The secure attachment of the hinge rail ensures the stability of the storm door and allows for proper functionality.
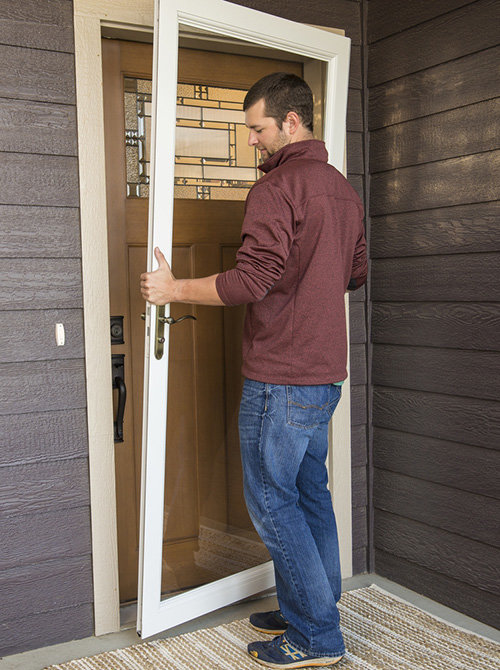
Attaching The Door
Installing the Larson storm door onto the frame requires precision and careful adjustment to ensure proper fit. Start by positioning the door onto the frame, making sure that it is centered and level. Secure the hinges to the door frame using the provided screws, ensuring that they are tightly fastened.
Next, adjust the door for a proper fit. Open the door and check the gaps between the door and the frame. If there are any large gaps, use shims to fill them in. Make sure that the door closes smoothly without rubbing against the frame or threshold. Adjust the hinges as needed to achieve a proper alignment.
Once the door is properly attached and adjusted, test its functionality by opening and closing it a few times. Check for any loose screws or hardware that may need tightening. Finally, clean the door and frame to remove any dirt or debris.
Installing The Door Handle And Lockset
Once you have successfully hung your Larson storm door, the next step is to install the door handle and lockset. This process involves drilling holes for the handle and lockset, and then attaching them securely to the door.
To start, measure and mark the appropriate spots on the door for the handle and lockset. Use a drill with the appropriate bit size to carefully drill the required holes. Make sure to drill straight and avoid splintering the wood.
After drilling the holes, attach the handle and lockset to the door. Follow the manufacturer’s instructions for aligning and securing the components. Make sure that the handle operates smoothly and that the lockset engages properly.
Once everything is securely in place, test the handle and lockset to ensure they function correctly. Open and close the door multiple times to verify that the handle operates smoothly and the lockset engages securely.
With the handle and lockset properly installed and functioning, your Larson storm door is now complete and ready to use.
Adding Weatherstripping And Sweep
The first step in installing a Larson storm door is applying weatherstripping to the frame. This is an important step to ensure a tight seal and prevent air leaks. Start by measuring the top and side edges of the door frame and cut the weatherstripping to fit. Peel off the backing and press the weatherstripping firmly onto the frame, making sure it adheres well. Next, install the door sweep for insulation. Measure the bottom of the door frame and cut the sweep to the appropriate length. Attach the sweep to the bottom of the door using screws or adhesive, making sure it extends slightly past the edge of the door. By adding weatherstripping and a door sweep, you can improve the energy efficiency of your home and keep drafts at bay. It’s a simple and effective way to enhance the performance of your Larson storm door.
Adjusting And Testing The Door
Adjusting and testing the Larson storm door is crucial to ensure proper installation and functionality. To check the door alignment, start by examining the door’s position in relation to the frame. It should be centered and level. A simple way to test its functionality is by opening and closing the door to assess smooth operation without any sticking or scraping. Additionally, verify that the door’s locking mechanism engages properly and securely. Inspect the weatherstripping to ensure a tight seal against drafts and debris. Also, examine the door for any gaps or cracks that may compromise its effectiveness. Regularly maintain the door by lubricating hinges and cleaning the frame and glass panels to promote longevity and performance.
Finishing Touches
Applying paint or finish to your Larson storm door is an important step in the installation process. It not only enhances the appearance of the door but also protects it from the elements. Before applying paint or finish, make sure to clean up the work area to ensure a smooth and flawless finish.
Start by removing any dirt, dust, or debris from the door using a soft brush or cloth. Wipe it down with a damp cloth to remove any remaining residue. Sand the door lightly to create a smooth surface for the paint or finish to adhere to. Make sure to remove any sanding dust using a tack cloth.
Next, apply a primer to the door to help the paint or finish adhere better and provide a more even coverage. Choose a primer that is compatible with the type of paint or finish you will be using. Apply the primer in thin, even coats, following the manufacturer’s instructions.
Once the primer is dry, you can proceed to apply the paint or finish. Use a high-quality brush or roller for best results. Apply the paint or finish in thin, even coats, allowing each coat to dry completely before applying the next. This will ensure a smooth and professional-looking finish.
Finally, clean up the work area by removing any paint drips or spills using a damp cloth or appropriate cleaning solution. Dispose of any used materials properly and ensure proper ventilation throughout the process.
Regular Maintenance
Maintaining and cleaning your Larson storm door regularly is important to ensure its longevity and functionality. Here are a few tips to help you with the regular maintenance of your storm door:
- Keep the surface clean: Use a mild detergent and water solution to clean the door surface regularly, removing any dirt, dust, or other debris that may have accumulated.
- Inspect the door: Regularly inspect the door for any signs of wear and tear, such as loose screws, damaged weatherstripping, or broken parts.
- Lubricate the hinges and moving parts: Apply a silicone-based lubricant to the hinges, handles, and other moving parts to ensure smooth operation. This will prevent hinges from squeaking and extend the door’s lifespan.
- Addressing issues or repairs: If you identify any issues or need repairs, it is best to reach out to a professional for assistance. Attempting to fix complex problems on your own might lead to further damage.
Troubleshooting Tips
Installing a Larson storm door can be a great way to enhance the security and insulating properties of your home. However, like any home improvement project, you may encounter some challenges during the installation process. Knowing how to troubleshoot these common issues can help ensure a smooth installation experience.
| Common installation challenges | Possible solutions |
|---|---|
| The door doesn’t fit properly in the opening. | Measure the opening carefully and check if the door is the correct size. If it’s not, you may need to trim the door or the opening to make it fit. |
| The frame is misaligned. | Check if the door frame is level and plumb. Adjust it as necessary using shims or a level to ensure proper alignment. |
| The door doesn’t close or latch properly. | Ensure that the hinges are properly installed and tightened. Adjust the strike plate or latch assembly if necessary to ensure a secure closure. |
| Difficulty with handle or lock installation. | Follow the manufacturer’s instructions carefully when installing the handle or lockset. Consider seeking professional help if you are unsure. |
| The door doesn’t stay open or close on its own. | Adjust the pneumatic closer or door closer mechanism to ensure correct tension for proper functioning. |
By being aware of these common installation challenges and their possible solutions, you can tackle them effectively and enjoy the benefits of a properly installed Larson storm door.
Credit: www.larsondoors.com
Frequently Asked Questions Of How To Install A Larson Storm Door
Can I Install A Storm Door By Myself?
Yes, you can install a storm door by yourself. Just follow the instructions provided with the door and use the necessary tools. Make sure to measure accurately, align the door properly, and secure all screws tightly.
Should A Storm Door Handle Be On The Same Side As The Main Door?
Yes, the storm door handle should be on the same side as the main door for easy access and convenience.
How Do You Attach A Storm Door To An Existing Door Frame?
To attach a storm door to an existing door frame, follow these steps: 1. Measure the door frame and purchase a storm door that fits. 2. Remove the door handle and hinges from the existing door. 3. Install the storm door by attaching the frame to the door frame using screws.
4. Secure the storm door by attaching the handle and hinges. 5. Test the door for proper operation and make any necessary adjustments.
Conclusion
Installing a Larson storm door is a straightforward process that can greatly enhance the appearance and functionality of your home. By following the step-by-step instructions provided in this guide, you can easily tackle this DIY project. From selecting the right tools to properly measuring and aligning the door, we have covered all the essential tips and tricks to ensure a successful installation.
Now, it’s time to enjoy your new Larson storm door and the added protection it provides for your home. Happy installing!