To install a paver driveway, start by preparing the ground properly and then lay the pavers in a pattern of your choice. Installing a paver driveway is a great way to enhance the aesthetics and functionality of your property.

Whether you want to replace your old driveway or create a new one, pavers offer durability, versatility, and a wide range of design options. However, it is important to follow a proper installation process to ensure a long-lasting and stable driveway.
We will guide you through the steps to install a paver driveway, from preparing the ground to laying the pavers. By following these steps, you can create a beautiful and functional driveway that will withstand the test of time.
Choosing The Right Paver For Your Driveway
Choosing the right paver for your driveway requires considering several factors. Firstly, durability and strength are crucial aspects to evaluate. The pavers should be able to withstand heavy loads and resist cracking or shifting over time. Opt for pavers made of quality materials, such as concrete or natural stone, known for their resilience.
Next, style and design options come into play. Pavers are available in various colors, shapes, and patterns, allowing you to create a unique and visually appealing driveway that complements your home’s architecture. Consider the overall aesthetic you want to achieve and select pavers that align with that vision.

Lastly, you should think about the maintenance requirements of different paver options. Some pavers may require regular sealing or cleaning to maintain their appearance and prevent damage. Others may be more low-maintenance, requiring minimal effort to keep them looking their best.
Preparing The Ground For Paver Installation
Preparing the Ground for Paver Installation
Evaluating the site and measuring the driveway area – Before starting the installation process, it is crucial to evaluate the site and accurately measure the driveway area. This will help determine the amount of material needed for the project.
Removing existing vegetation and debris – Clearing the driveway area of any existing vegetation, plants, or debris is essential to create a clean and smooth foundation for the pavers. Use a shovel or a rake to remove these obstacles.
Excavating and grading the ground – Once the area is cleared, begin excavating the ground to the desired depth. It is recommended to dig down a few inches to allow space for the base and paver thickness. After excavation, ensure the ground is properly graded to ensure proper drainage.
Installing The Paver Driveway
html
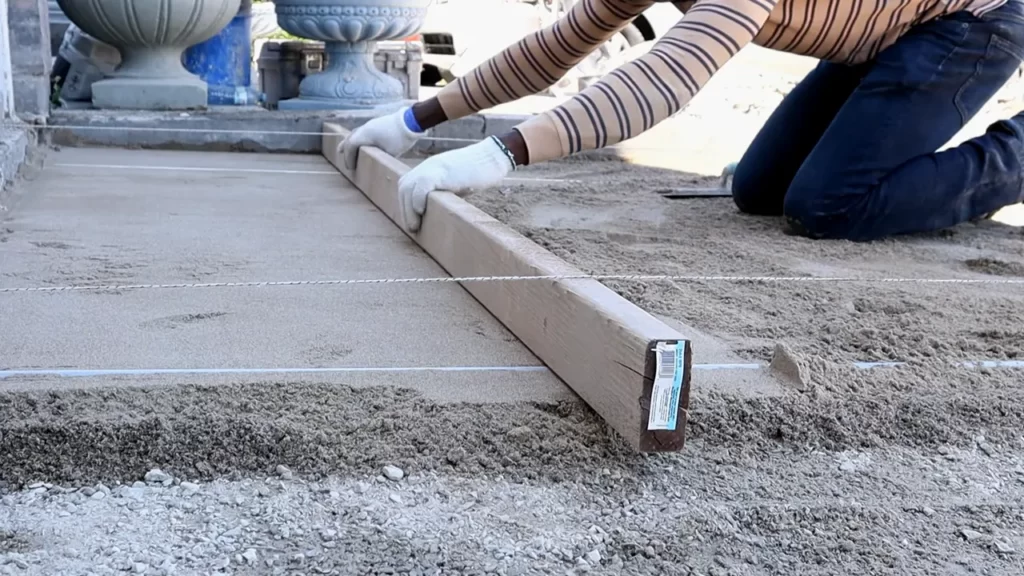
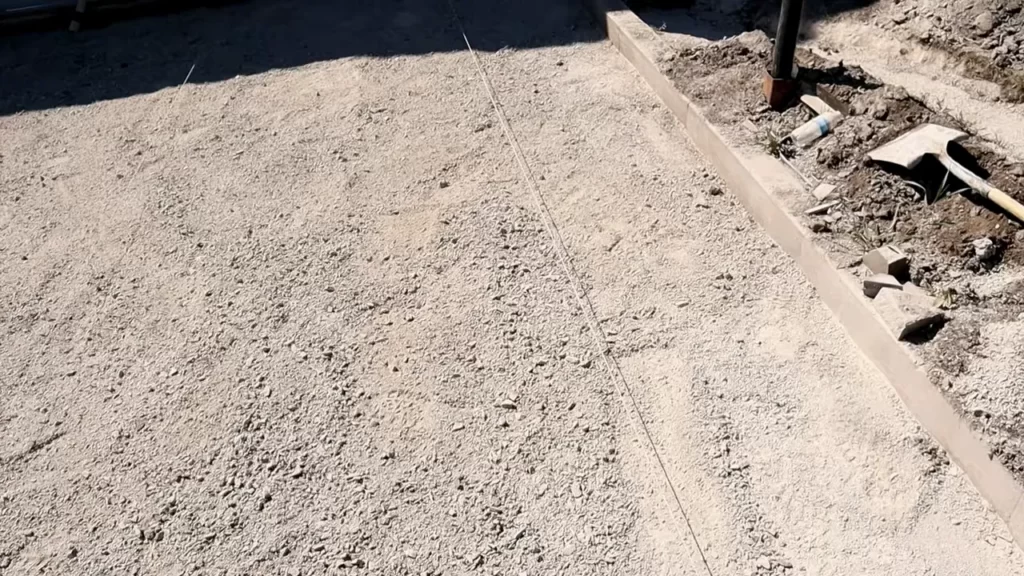
Creating a stable base for the pavers is crucial to ensure the longevity and durability of your driveway. Start by adding and compacting the base material, such as gravel or crushed stone. This will provide a solid foundation for the pavers.

Next, it’s important to ensure proper slope and drainage. The driveway should have a slight slope to allow water to flow away from the surface. This will prevent pooling water and potential damage to the pavers.
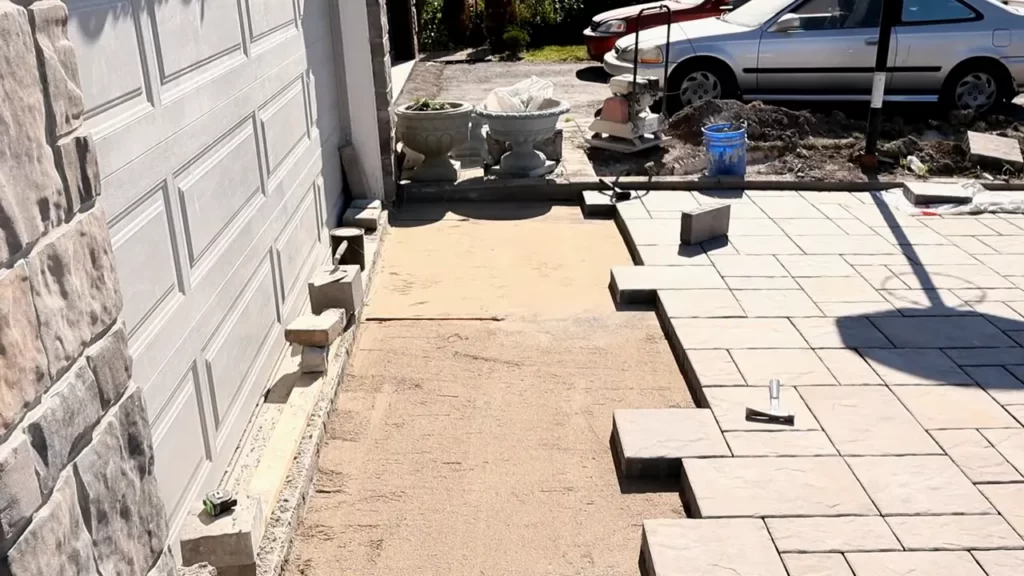
Once the base is ready, you can start laying the pavers on the prepared surface. Arrange them in a desired pattern, making sure to leave appropriate gaps for joint sand. This will allow for flexibility and prevent cracking.
If you have edges and corners that require fitting, you can easily cut the pavers to the desired size using a wet saw or a chisel and hammer. Be careful to wear appropriate safety gear while doing this.
After laying the pavers, it’s important to secure them in place. You can use plastic or metal edging, or concrete borders, along the sides of the driveway to keep the pavers from shifting.
Once the pavers are in place, apply joint sand to fill the gaps between them. This will stabilize the pavers and prevent weed growth. Make sure to sweep the sand into all the joints and then use a compactor to ensure a tight fit.
Your paver driveway is now ready to be enjoyed! Regular maintenance, such as sealing and cleaning, will help prolong its lifespan and keep it looking its best for years to come.

Finishing Touches And Maintenance
When installing a paver driveway, it is important to focus on finishing touches and ongoing maintenance to ensure its longevity and appearance. One crucial step in the finishing process is sealing the pavers to protect them against stains and damage. By applying a high-quality sealer, you can prevent oil spills, food stains, and discoloration from ruining the look of your driveway.
Another important aspect of maintaining a paver driveway is adding edge restraints. These restraints help prevent the pavers from shifting over time, which can lead to an uneven and unstable surface. Edge restraints can be made from various materials, such as plastic or metal, and they are installed along the perimeter of the driveway to secure the pavers in place.
In addition to sealing and edge restraints, regular maintenance is key to keeping your paver driveway looking its best. This includes sweeping away debris, removing weeds or moss, and cleaning any spills or stains promptly. With proper care, your paver driveway can withstand the test of time and provide a beautiful entrance to your home for years to come.
Frequently Asked Questions On How To Install A Paver Driveway
How Do You Prepare Ground For Driveway Pavers?
To prepare ground for driveway pavers, follow these steps: 1. Clear the area of any vegetation or debris. 2. Compact the soil to create a firm base. 3. Add a layer of gravel or crushed stone for drainage. 4. Use a screed to level the surface.
5. Install the pavers according to the manufacturer’s instructions.
How Deep Should A Paver Base Be For A Driveway?
The paver base for a driveway should be at least 6 inches deep to provide proper support and stability.
Can I Install Pavers Myself?
Yes, you can install pavers yourself. Just make sure to follow proper guidelines, such as correct measurements, leveling the area, and using the right tools. It’s important to have knowledge of the installation process and practice caution to ensure a successful outcome.
Conclusion
Installing a paver driveway is a rewarding DIY project that can transform the look and functionality of your home. By following these step-by-step instructions, you’ll be able to create a durable and visually appealing driveway that enhances your property’s curb appeal.
Remember to carefully plan, prepare the area, lay the pavers correctly, and finish with proper edging and sealing. With proper maintenance, your paver driveway will provide years of reliable use and aesthetic satisfaction.
