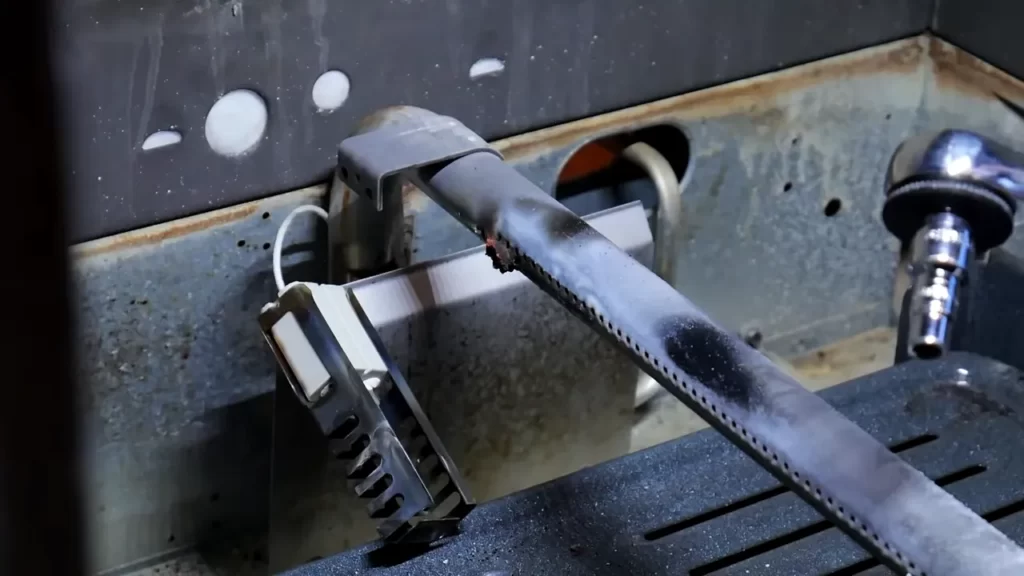
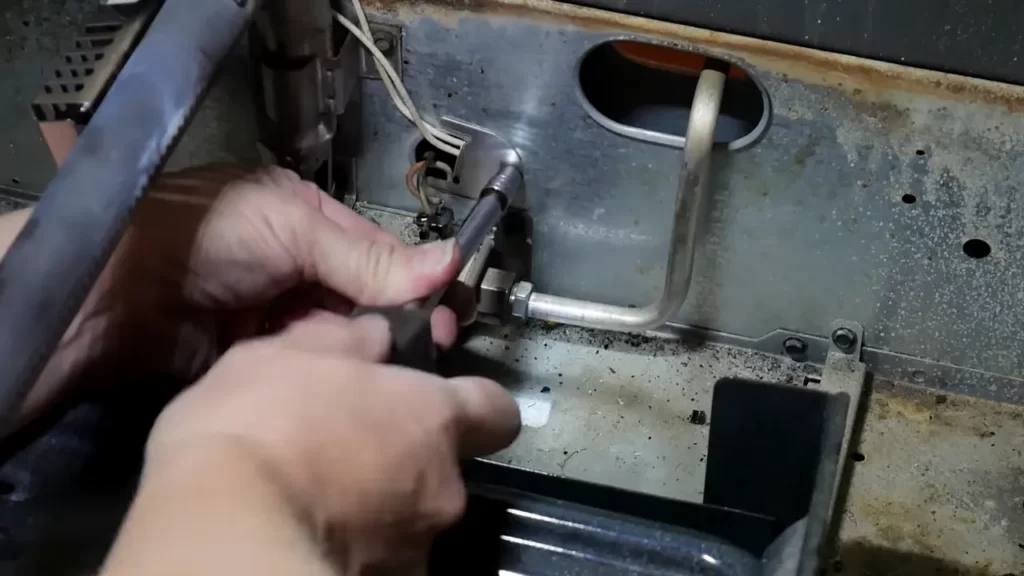
o install an ignitor for a gas oven, disconnect the power supply and gas line, remove the old ignitor, attach the new ignitor using the provided hardware, reconnect the gas line and power supply, and test the oven for proper ignition. Now let’s dive into the step-by-step process of installing an ignitor for a gas oven.
Ignitors play a critical role in fueling the fire that heats your oven, so it’s essential to replace them if they become faulty or worn out. By following these simple steps, you can have your gas oven up and running with a new ignitor in no time.

Gathering The Necessary Tools And Materials
Before installing an ignitor for a gas oven, it is important to gather the required tools and materials. These include:
| Tools: | Materials: |
| 1. Screwdriver | 1. New ignitor |
| 2. Pliers | 2. Gloves |
| 3. Wire cutters | 3. Safety goggles |
| 4. Nut driver | 4. Masking tape |
| 5. Multimeter | 5. Protective cloth |
Additionally, it is crucial to have the following materials for a smooth installation:
- Wire connectors
- Electrical tape
- Pipe thread sealing tape
- Gas line shut-off valve
Before starting the installation process, it is important to prioritize safety precautionary measures. Make sure to:
- Turn off the gas supply to the oven
- Wear safety goggles and gloves
- Ensure the oven is unplugged
- Work in a well-ventilated area
By gathering the proper tools and materials and following safety precautions, you can successfully install an ignitor for a gas oven.
Removing The Old Ignitor
When installing a new ignitor for a gas oven, the first step is to disconnect the gas supply and power source. Safety is of utmost importance in this process. Identify and locate the existing ignitor, typically found at the back of the oven cavity. Make sure you have appropriate safety equipment, such as gloves and goggles, before proceeding.
Start by shutting off the gas supply valve to the oven. This valve is usually located near the main gas line connection. Next, unplug the power cord from the wall socket to cut off the electricity to the oven.
With the gas and power disconnected, it is now safe to remove the old ignitor. Follow the manufacturer’s instructions, as the specific steps may vary depending on the model of your oven. Generally, you will need to remove any retaining screws or brackets holding the ignitor in place. Once these are removed, carefully disconnect the wires connecting the ignitor to the oven.

Now that the old ignitor has been removed, you are ready to install the new one. Refer to the manufacturer’s instructions for the specific steps to complete the installation.
Installing The New Ignitor
When it comes to installing a new ignitor for a gas oven, it is important to choose the right replacement ignitor. The compatibility of the ignitor with your specific oven model is crucial. Refer to the manufacturer’s instructions or consult a professional if you are unsure about the correct ignitor.
Once you have the appropriate replacement ignitor, you can proceed with the installation process. Start by disconnecting the power supply and the gas line to ensure safety. Attach the new ignitor to the gas oven according to the instructions provided with the ignitor. Make sure to secure it properly to avoid any issues in the future.
After attaching the ignitor, reconnect the gas supply and power source to the new ignitor. Double-check all connections to ensure everything is secure and tight. Once everything is properly connected, you can turn on the gas supply and restore the power. Test the ignitor by turning on the oven and verifying that it ignites as expected.
Testing And Troubleshooting
After successfully installing an ignitor for your gas oven, it is essential to test its functionality before using the appliance. Proper testing helps identify any potential issues and ensures the ignitor is working correctly.
Testing the functionality of the newly installed ignitor involves observing the ignition process. When the oven is turned on, the ignitor should start to glow bright red and in a few moments, ignite the gas. If the ignitor does not glow or fails to ignite the gas, it indicates a problem that needs attention.

Common issues that may arise when testing the functionality of the ignitor include a weak glow, intermittent ignition, or no glow at all. Troubleshooting these issues requires a systematic approach. Start by checking the electrical connections, ensuring they are properly connected and secure. Verify that the ignitor is receiving the correct voltage. If necessary, consult the manufacturer’s manual for specific troubleshooting steps.
Safety checks are crucial before using the gas oven. Look for any gas leaks by carefully inspecting the connections and using a soapy water solution to detect any bubbles, which can indicate leakage. It’s also important to perform a final test by turning on the oven and ensuring the burners light up quickly and consistently.
Maintaining And Extending The Lifespan Of The
Ignitor
Regular cleaning and maintenance are crucial for ensuring the longevity of the ignitor in your gas oven. Over time, the ignitor can accumulate dirt, grease, and other debris that can affect its performance. To maintain its functionality, clean the ignitor regularly using a soft cloth and a non-abrasive cleaner. Take care not to damage any components while cleaning.
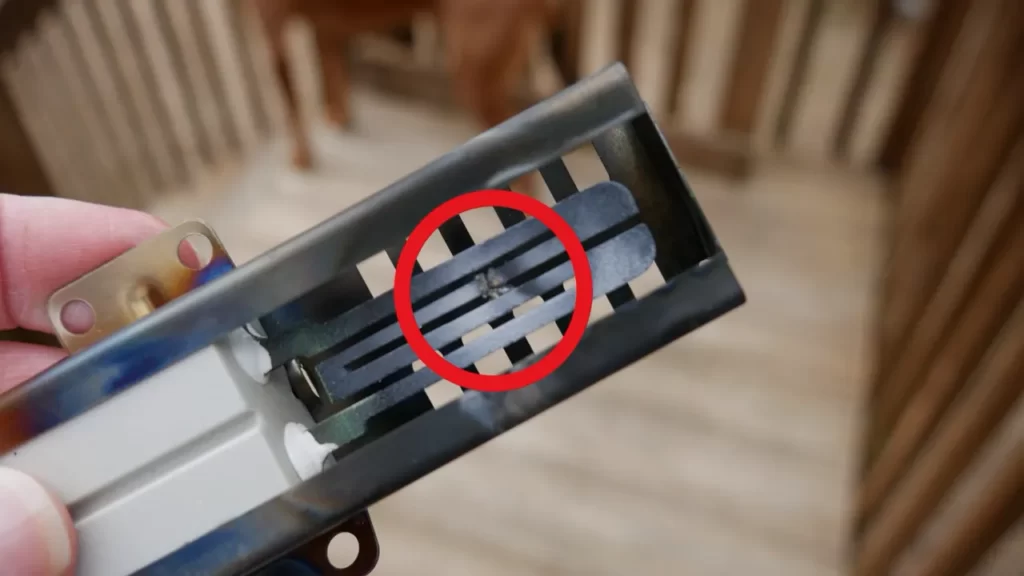
It is also important to be aware of the signs of a worn-out or malfunctioning ignitor. Common indicators include the oven not heating up, the ignitor not glowing, or the gas smell being absent. If you experience any of these issues, it may be time to replace the ignitor.
To extend the lifespan of the ignitor, consider these tips: avoid slamming the oven door, as this can damage the ignitor; do not use abrasive cleaners or solvents when cleaning the ignitor; and keep the oven clean to prevent debris from affecting the ignitor’s performance.
By following these maintenance tips and being aware of signs of malfunction, you can ensure the proper functioning and longevity of the ignitor in your gas oven.
Recommended Ignitor Brands And Models
html
Top-rated ignitor brands for gas ovens:

1. Brand A: This ignitor model from Brand A is highly recommended by customers. It is known for its durability and efficient performance. It has received excellent reviews and ratings from users, highlighting its reliability and ease of installation.
2. Brand B: Another popular choice among customers is the ignitor model by Brand B. It is praised for its fast heating time and consistent ignition. Users appreciate its compatibility with various gas oven models and its long lifespan.
3. Brand C: Brand C offers an ignitor model that has been well-received by customers. It is commended for its affordability without compromising on quality. Users have mentioned its hassle-free installation process and its ability to ignite the gas oven quickly.
Features to consider when choosing an ignitor:
| 1. Compatibility: | Ensure that the ignitor is compatible with your specific gas oven model. |
| 2. Durability: | Look for ignitors that are made of high-quality materials and have a reputation for long-lasting performance. |
| 3. Ease of Installation: | Consider ignitors that come with clear instructions for installation and require minimal effort to set up. |
| 4. Customer Reviews and Ratings: | Check customer reviews and ratings to gauge the overall satisfaction and reliability of the ignitor. |
By considering these factors and choosing a reputable brand and model, you can confidently install an ignitor for your gas oven that meets your requirements and ensures efficient ignition.
Frequently Asked Questions For How To Install An Ignitor For A Gas Oven
How Much Does It Cost To Replace The Igniter In A Gas Oven?
The cost to replace the igniter in a gas oven can range from $100 to $300, depending on the model and brand of the oven.
How Do I Install A New Igniter?
To install a new igniter, follow these steps: 1. Turn off the power to the appliance. 2. Locate the old igniter and remove it carefully. 3. Insert the new igniter into the designated slot. 4. Connect the wires securely to the new igniter.
5. Turn on the power and test the igniter to ensure it’s working properly.
How Do I Know If My Gas Oven Igniter Is Bad?
To determine if your gas oven igniter is bad, check if it glows when the oven is turned on. If it doesn’t glow, or takes longer than usual, it may be faulty. A weak glow may also indicate a bad igniter.
For accurate diagnosis, consult a professional technician.
Conclusion
To sum it up, installing an ignitor for a gas oven is a relatively simple process that can save you time and money. By following the steps outlined in this guide, you can ensure that your oven functions efficiently and safely.
Remember to take proper safety precautions, such as turning off the gas supply, and always consult the manufacturer’s instructions for your specific model. With a little bit of patience and the right tools, you’ll have your oven up and running smoothly in no time.
