To install brick edging, first, prepare the area by removing any existing grass or debris. Next, dig a trench along the desired perimeter, making sure it is deep and wide enough to accommodate the bricks.
Then, lay a base of sand or gravel in the trench and compact it to create a stable foundation. Finally, place the bricks in the trench, ensuring they are level and tightly packed together.
Factors To Consider
When installing brick edging, there are several factors to consider. The first is brick size and shape. Different sizes and shapes of bricks are available, such as standard rectangular bricks or curved bricks specifically designed for edging. Material and color options are also important to think about. Bricks come in a variety of materials, including clay, concrete, and stone, each with its own unique look and durability. Additionally, there are a wide range of color options to choose from, allowing you to match the brick edging with the aesthetics of your landscape. Lastly, determining the quantity needed is crucial. This will depend on the length and height of the edging, as well as whether you want a single or double layer. By carefully considering these factors, you can ensure a successful brick edging installation that enhances the beauty and functionality of your outdoor space.
Measuring And Marking
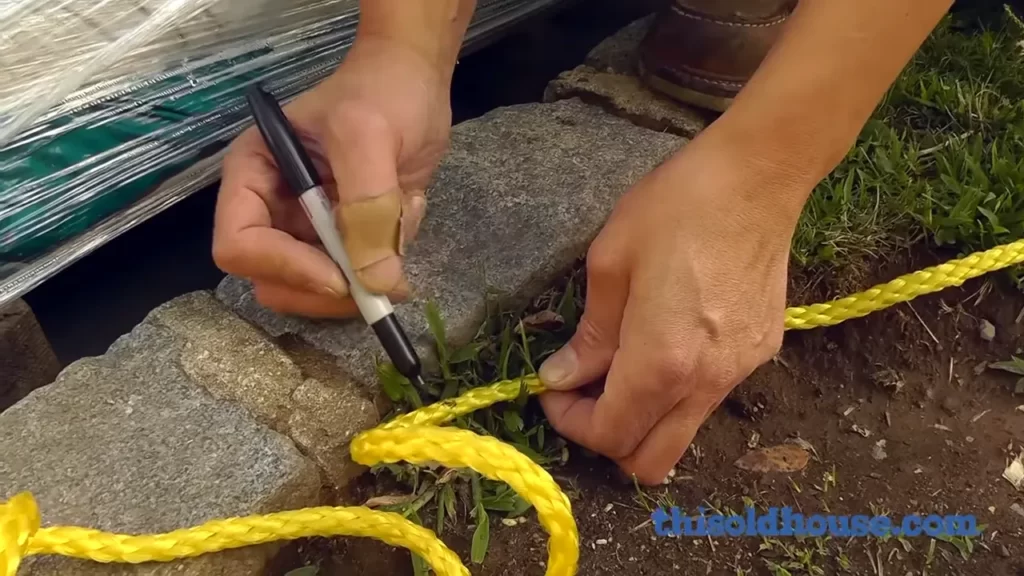
When it comes to installing brick edging, the first step is measuring and marking. Determining the edging area is important before you start any actual work. Begin by measuring the total length of the area where you want to install the edging and note down the measurements.
Next, marking the layout becomes crucial in ensuring a straight and even installation. Use stakes and string to mark the outer edges of the edging area. This will help you have a clear visual of the shape and size of your project.
Once the layout is marked, you can proceed with the installation process and start preparing the ground for the brick edging. Remove any grass or vegetation from the area, ensuring a clean surface for the bricks to be placed.
Remember to take your time during this process and be precise with the measurements and marking. This will help you achieve a professional-looking brick edging that will enhance the appearance of your landscape.
Clearing And Leveling
Clearing and leveling the ground is an important step in installing brick edging. The first task is to remove any existing vegetation and debris from the area where the edging will be installed. This can be done by using a shovel or a garden rake to clear away grass, weeds, and other unwanted plants. Next, the ground needs to be leveled to ensure a smooth and even surface for the brick edging. This can be achieved by using a garden rake or a leveling tool to evenly distribute the soil and remove any bumps or uneven areas. Taking the time to properly clear and level the ground will ensure that the brick edging is installed securely and will provide a clean and professional finish to your landscaping project.
Excavating The Trench
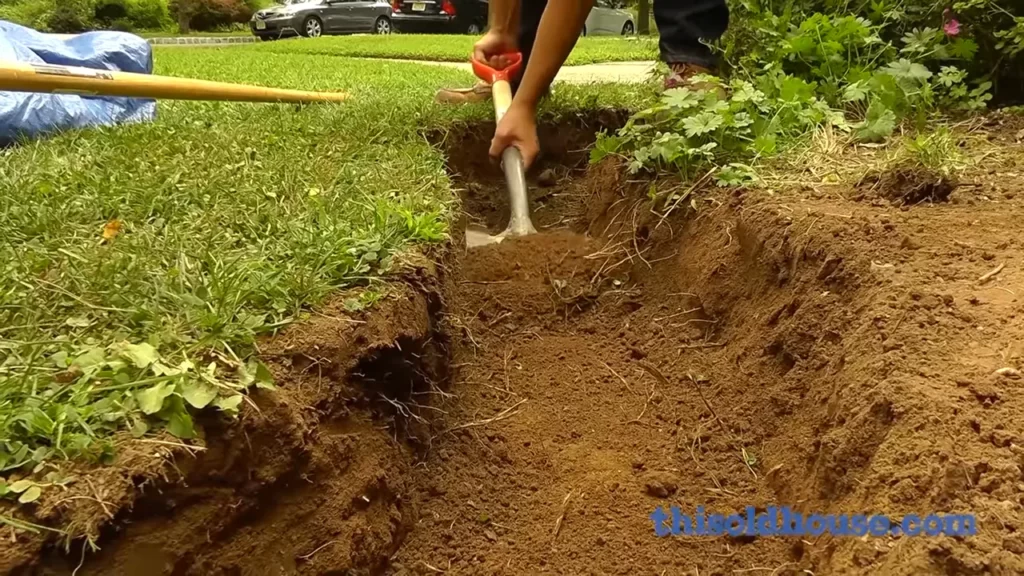
If you are looking to install brick edging, the first step is excavating the trench. The depth and width of the trench will depend on the size and thickness of the bricks you are using. As a general guideline, the depth of the trench should be about half the height of the bricks. Make sure the trench is slightly wider than the bricks to allow for proper placement and stability. Tools required for this task include a spade or shovel for digging, a level to ensure the trench is even, and a tape measure to measure the depth and width. Once the trench is dug, you can proceed with laying the bricks and securing them in place.
Creating A Base
When installing brick edging, it is important to create a solid base to ensure stability and longevity. One way to create a base is by adding a layer of crushed rock or sand. This layer provides a stable foundation for the bricks and helps prevent shifting over time. To do this, start by excavating the area where the edging will be installed. Once the area is cleared, add a layer of crushed rock or sand, ensuring it is even and level. Use a compactor to gently pack down the material, making it firm and stable. This will help to prevent any sinking or shifting of the bricks in the future. Once the base is compacted, you can begin laying the bricks, following the desired pattern or design.
Laying Bricks
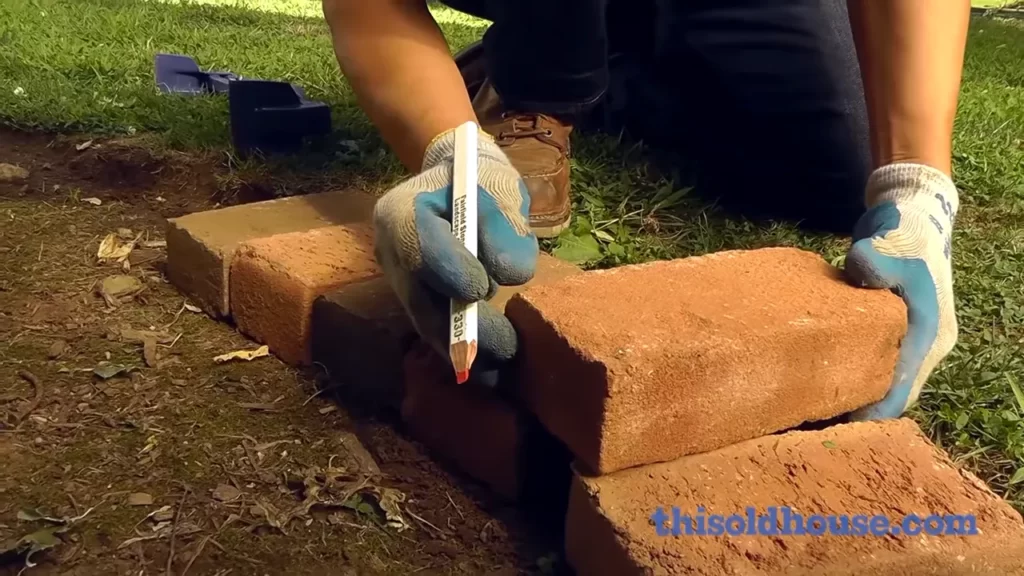
Laying bricks as landscape edging can add a charming touch to your garden or pathway. To begin, start by placing the bricks in the trench. Ensure proper alignment and spacing, allowing for a consistent and visually appealing look. A hammer can be useful to tap the bricks gently into place, ensuring they are level and firmly settled. If you need to make any adjustments, remove bricks carefully and readjust as necessary. If you encounter areas where a brick needs to be smaller or shaped differently to fit in the trench, these can easily be cut using a chisel and hammer. Take the time to cut the bricks properly, as this will result in a cleaner and more professional appearance. Once all the bricks have been laid, backfill the trench with soil and tamp it down firmly – this will help to stabilize the bricks and prevent them from shifting over time.
Securing The Edging
Installing brick edging can be a great way to enhance the aesthetic appeal of your garden or landscape. One important aspect of the installation process is securing the edging to ensure durability and stability. To do this, start by backfilling the trench with soil, making sure it is packed firmly. Then, use a rubber mallet to gently tap each brick into place, ensuring they are level and aligned. Keep checking for stability as you go along, making adjustments if necessary. This will help to prevent any future shifting or movement of the bricks. By following these steps, you can successfully install brick edging that will not only protect your garden but also add a touch of elegance to your outdoor space.
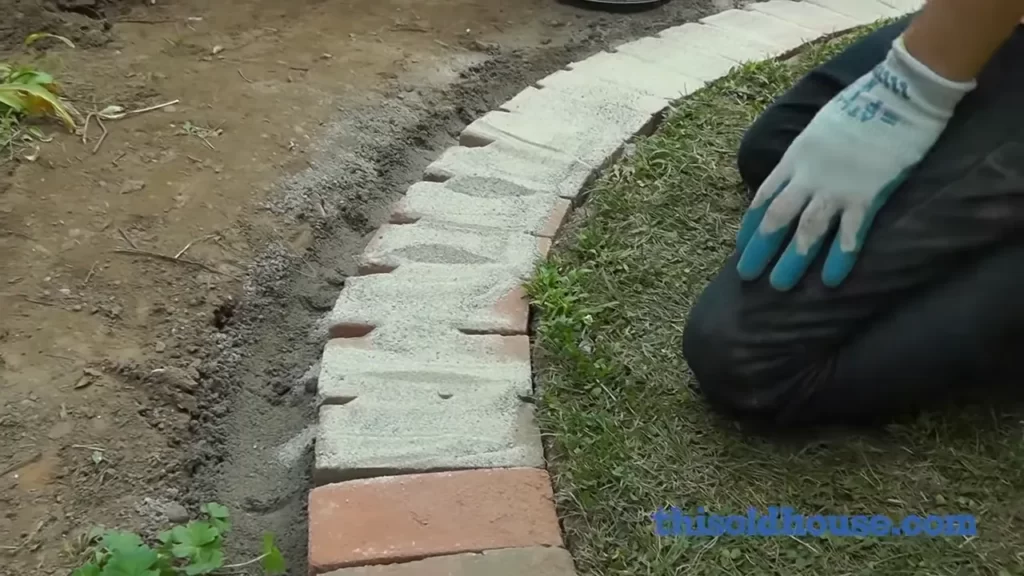
Filling The Gaps
Installing brick edging can give your outdoor space a polished and organized look. Filling the gaps between the bricks is an important step to ensure the edging stays in place and provides a sturdy border for your garden or pathway.
One way to fill the gaps is by adding sand or fine gravel. This material helps to stabilize the bricks and prevent shifting over time. After placing the bricks in the desired pattern, sprinkle the sand or fine gravel evenly over the entire area.

Next, brush the sand into the gaps. Use a broom or brush to sweep the sand into the spaces between the bricks. This helps to fill any remaining gaps and ensures a tight fit. Make sure to brush the sand in all directions to fully distribute it.
To further settle the sand, wet the area. Lightly spray water over the brick edging, allowing it to soak into the sand. The moisture helps the particles bind together, creating a solid and secure base for the bricks.
Filling the gaps with sand or fine gravel, brushing the sand into the gaps, and wetting the area are essential steps in installing brick edging. Once completed, your edging will not only enhance the aesthetic appeal but also provide stability and longevity to your outdoor space.
Cleaning Up
Cleaning up
- Removing excess sand or debris
- Inspecting the installation for any adjustments needed
After installing brick edging, it is important to clean up the area to ensure a polished and finished look. Start by removing any excess sand or debris that may have accumulated during the installation process. This can be done by using a broom or a leaf blower to sweep away any loose material. Additionally, take the time to inspect the installation for any adjustments that may be needed. Check for any uneven bricks or gaps between the bricks and make the necessary adjustments. This will help to ensure that the brick edging is secure and uniform. With these simple cleaning steps, your brick edging will be ready to enhance the appearance of your landscape.
Maintenance Tips
Maintenance Tips
Regularly cleaning the brick edging is essential to keep it looking neat and preventing the buildup of dirt and debris. You can use a stiff broom or a pressure washer to remove any dirt or stains. It is important to avoid using any harsh chemicals or abrasive tools that could damage the brick.
If you notice any damages or shifts in the bricks, it is crucial to address them promptly. Broken or loose bricks can lead to further damage and compromise the stability of the edging. Carefully remove the damaged brick and replace it with a new one. Additionally, you can use mortar to secure any loose bricks in place and prevent further shifting.
Adding sealant to the brick edging is recommended to enhance its durability and provide protection against moisture and harsh weather conditions. A high-quality brick sealant can also help to prevent weed growth and maintain the appearance of the edging for a longer period of time.
Frequently Asked Questions For How To Install Brick Edging
Does Brick Edging Need Mortar?
Mortar is not necessary for brick edging. Brick edging can be done without mortar.
How Do You Install Scalloped Brick Edging?
To install scalloped brick edging, follow these steps: 1. Prepare the area by removing any grass or soil and digging a trench. 2. Lay a layer of sand in the trench for a stable base. 3. Start placing the bricks one by one, using a mallet to ensure they are level and secure.
4. Fill the gaps with sand, then sweep away any excess. 5. Finally, compact the bricks with a hand tamper.
How Do You Install Paver Edgers?
To install paver edgers, follow these steps: 1. Clear the area of debris and excavate a trench. 2. Level the trench and lay a base of gravel. 3. Place the paver edgers tightly against each other, using a rubber mallet to secure them.
4. Fill any gaps between the edgers with sand or gravel. 5. Compact the edgers and finish by sweeping additional sand between the joints.
Conclusion
Installing brick edging can add a touch of elegance and organization to any outdoor space. By following the step-by-step instructions outlined in this blog post, you can easily create a beautiful and durable border for your garden or pathway. Remember to choose the right materials, carefully prepare the ground, and take your time during the installation process.
With proper maintenance, your brick edging will stand the test of time and enhance the overall aesthetic of your landscape. So why wait? Start enhancing your outdoor space today!