To install a chainsaw chain, carefully place the chain onto the sprocket and guide bar, making sure the teeth face in the right direction. Installing a chainsaw chain properly is crucial for maintaining smooth and efficient cutting performance.
Whether you’re a professional or a DIY enthusiast, understanding how to install a chainsaw chain correctly is essential for your safety and the longevity of the equipment. By following a few simple steps, you can ensure that your chainsaw is ready for use whenever the need arises.
We will provide a step-by-step guide on how to install a chainsaw chain, along with some useful tips and precautions to keep in mind. Read on to learn more.

Choosing The Right Chainsaw Chain
Choosing the right chainsaw chain is essential for optimal performance and safety. Before installing a new chain, it’s important to understand the different types available and consider various factors.
Understanding the Different Types of Chainsaw Chains:
| Type | Features |
|---|---|
| Full Chisel | Fast cutting, but requires regular sharpening. |
| Semi-Chisel | Moderate cutting speed, suitable for versatile use. |
| Skip Tooth | Ideal for cutting thick and tough materials. |
Factors to Consider when Selecting a Chainsaw Chain:
- Bar Length: Choose a chain that matches the length of your chainsaw’s guide bar.
- Chain Pitch: Ensure the chain pitch matches the specifications of your chainsaw model.
- Gauge: The chain gauge must align with the bar groove width for proper fit.
- Intended Use: Consider the type of work you’ll be doing – whether it’s light pruning or heavy-duty cutting.
- Chain Maintenance: Some chains require more frequent sharpening or other maintenance tasks, so factor this into your decision.
By considering these factors and understanding the different types of chainsaw chains available, you’ll be able to choose the right chain for your needs and ensure smooth and efficient cutting.
Preparing The Chainsaw For Chain Installation
Preparing the Chainsaw for Chain Installation
Safety Precautions Before Installing a Chainsaw Chain:
- Put on safety gear: Before starting the chain installation process, make sure to wear the necessary safety gear, including gloves, protective eyewear, and sturdy boots.
- Disconnect the chainsaw: Turn off the chainsaw and disconnect it from the power source to prevent any unintentional accidents during the chain replacement.
- Clean the chainsaw: Before removing the old chain, it is essential to clean the chainsaw thoroughly. Remove any debris or sawdust that may have accumulated, ensuring a smooth installation process.
Removing the Old Chainsaw Chain
To remove the old chainsaw chain, follow these steps:
- Locate the chain tensioning screw and relieve the tension on the chain by loosening it counter-clockwise.
- Remove the guide bar cover by unscrewing the nuts holding it in place.
- Gently lift the guide bar and slide the old chain off the bar and sprocket.
- Carefully inspect the guide bar and sprocket for any damages or wear. Replace them if necessary.
Installing The New Chainsaw Chain
Steps to Properly Install a Chainsaw Chain:
1. Prepare the Chainsaw: Before installing a new chainsaw chain, make sure the chainsaw is turned off and the spark plug wire is disconnected for safety. Clean the chainsaw bar and remove any debris or old chain remains.
2. Choose the Right Chain: Select a chainsaw chain that is suitable for your chainsaw model. Check the owner’s manual or consult a professional if you are unsure of the correct chain size and specifications.
3. Loosen the Bar Nuts: Use a wrench to loosen the bar nuts and remove the side cover of the chainsaw. This will allow you to access the chain tensioning
mechanism.
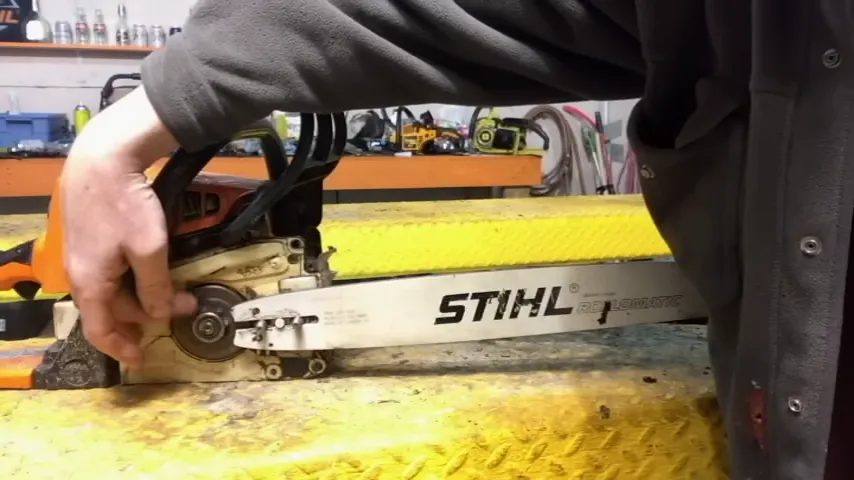
4. Adjust the Chain Tension: Proper chain tension is crucial for safety and optimal performance. Use the chain tensioning screw or knob to adjust the tension until the chain is snug against the bar, but still allows you to easily move it by hand.
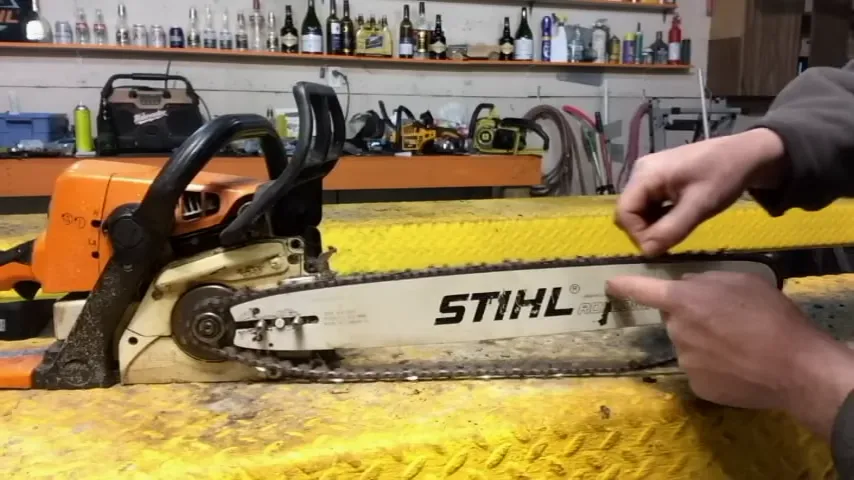
5. Install the New Chain: Place the new chainsaw chain onto the bar, ensuring that the teeth face in the correct direction. Make sure the drive links fit into the bar groove. Reattach the side cover and tighten the bar nuts, ensuring the chain tension remains adjusted.
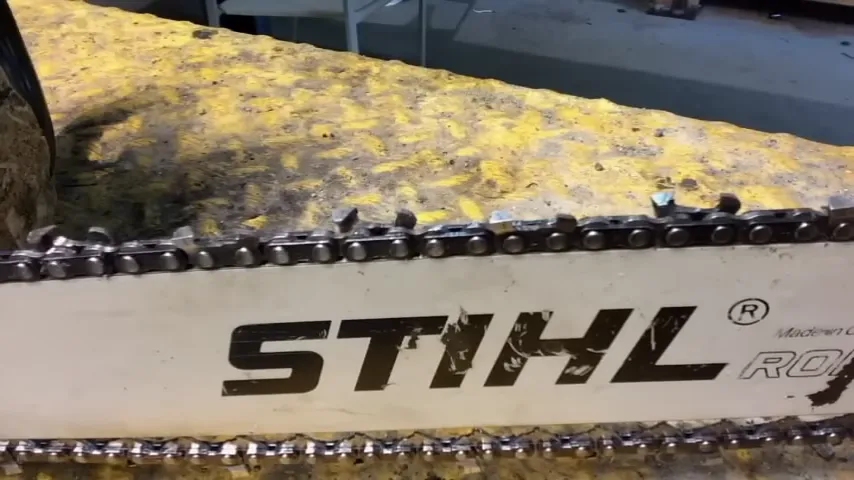
6. Check Chain Tension: After installing the new chain, double-check the chain tension to ensure it is still in the correct range. The chain should be tight enough to avoid sagging, but loose enough to move smoothly along the bar.
7. Test and Adjust: Before using the chainsaw, manually rotate the chain around the bar to ensure it moves freely. If necessary, readjust the chain tension until it is properly aligned.
Maintaining And Troubleshooting Chainsaw Chains
html
Proper maintenance is crucial for keeping your chainsaw chain in optimal condition. Here are a few important practices to follow:
- Regular Cleaning: Clean the chainsaw chain after each use to remove debris and prevent build-up.
- Lubrication: Apply lubricant to the chain to reduce friction and increase longevity.
- Tightening: Check the tension of the chain regularly and adjust as needed to ensure proper operation.
- Sharpening: Keep the chain sharp by regularly sharpening the cutting teeth with a chainsaw file or professional sharpening tool.
Despite proper maintenance, chainsaw chains can still experience issues. Here are some common problems and their troubleshooting tips:
| Issue | Troubleshooting Tip |
|---|---|
| Dull Chain | Sharpen the chain using a chainsaw file or replace it if necessary. |
| Chain Slippage | Check the tension of the chain and tighten if needed. Replace the chain if it continues to slip. |
| Poor Cutting Performance | Ensure the chain is properly sharpened and lubricated. If the issue persists, consider replacing the chain. |
By following proper maintenance practices and troubleshooting techniques, you can keep your chainsaw chain in excellent working condition and ensure safe and efficient operation.
Frequently Asked Questions On How To Install Chainsaw Chain
Do Chainsaw Chains Need To Be Tight?
Yes, chainsaw chains need to be tight. Proper tension ensures efficient cutting, reduces kickback risk, and prolongs chain life. Regularly check tension by lifting the chain in the middle. It should move easily, and the teeth should not come out of the guide bar groove.
How Do You Tension A Chainsaw Chain?
To tension a chainsaw chain, follow these steps: 1. Turn off the chainsaw and let it cool down. 2. Locate the tensioning screw on the side of the chainsaw. 3. Tighten the screw to increase chain tension or loosen it to decrease tension.
4. Check the tension by lifting the chain up from the guide bar. 5. Ensure there is a 1/8 inch gap between the chain and guide bar.
What Angle Should A Chainsaw Chain Be?
The chainsaw chain should be at a precise angle for optimal performance. It should have a consistent 25 to 35-degree cutting angle to ensure efficient cutting and reduced kickback. Correctly sharpening the chain and maintaining the angle is crucial for safe and effective chainsaw operation.
Conclusion
Installing a chainsaw chain may seem daunting, but with these step-by-step instructions, it’s easier than you think. By following the proper safety precautions and using the right tools, you’ll be able to efficiently install a new chain and ensure optimal performance from your chainsaw.
Remember to regularly inspect, maintain, and replace your chainsaw chain to keep it functioning at its best. With this knowledge, you’ll be ready to tackle any chainsaw chain installation with confidence. Happy cutting!