o install the Cricut Explore Air 2, simply follow the provided instructions for a seamless setup process. The Cricut Explore Air 2 is a versatile cutting machine that allows you to create stunning crafts and designs.
Whether you’re a beginner or an experienced crafter, this machine offers an easy installation process. By following the instructions provided, you’ll be able to set up your Cricut Explore Air 2 and start creating in no time. We will guide you through the steps to install your Cricut Explore Air 2.
So let’s get started and unleash your creativity with this amazing cutting machine.
Unboxing And Initial Setup

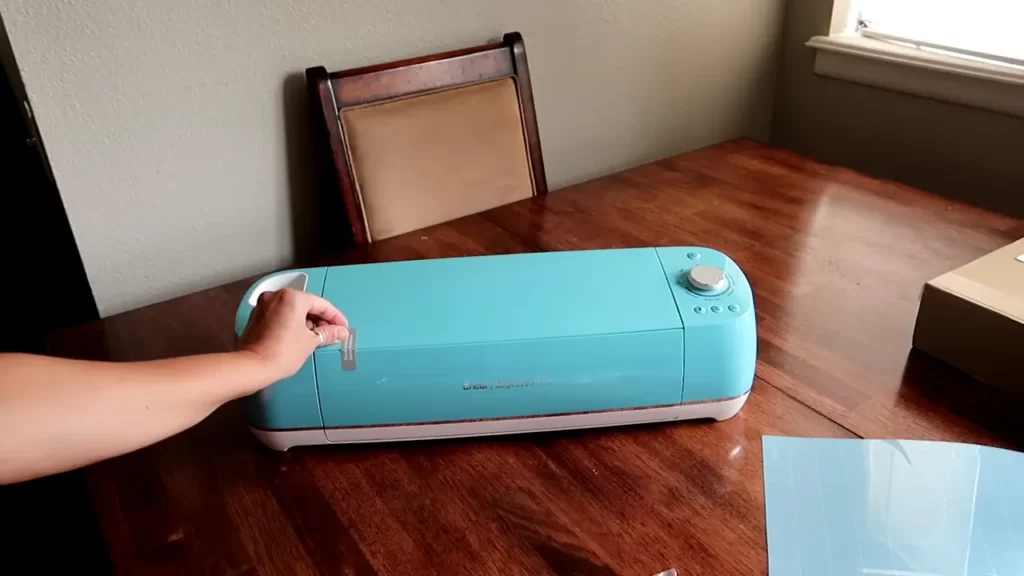
When you first purchase the Cricut Explore Air 2, the unboxing experience is exciting. Inside the package, you’ll find everything you need to get started. The machine itself is sleek and stylish, with a variety of colors to choose from. Along with the Cricut Explore Air 2, there’s a power cord, USB cord, cutting mat, and a basic tool set. These essential tools will help you create amazing projects.
Once you’ve unpacked everything, it’s time to set up the machine for first-time use. The process is straightforward and can be done in a few simple steps. Connect the power cord and plug it in, then connect the USB cord to your computer. Download and install the Cricut Design Space software, which is free and compatible with both Mac and Windows. Once installed, open the software and follow the on-screen instructions to connect your machine.
With the Cricut Explore Air 2 unboxed and set up, you’re ready to start exploring all the creative possibilities it offers. This versatile machine allows you to cut, write, and score a wide range of materials with precision and ease. Whether you’re a seasoned crafter or new to the world of DIY, the Cricut Explore Air 2 is a must-have tool for bringing your ideas to life.
Connecting To Your Computer Or Mobile Device
To install Cricut Explore Air 2 and connect it to your computer or mobile device, you’ll need to follow a few simple steps. First, download the Design Space software from the official Cricut website. Once downloaded, install the software on your computer or mobile device.
To connect your Cricut Explore Air 2 to your computer, you can either use a USB cable or connect via Bluetooth. If using a USB cable, plug one end into your computer and the other into your Cricut machine.
If you prefer to connect via Bluetooth, ensure that Bluetooth is enabled on both your computer and Cricut Explore Air 2. Follow the instructions provided by Cricut to complete the pairing process.
If you encounter any issues during the connection process, troubleshoot common connectivity issues. Ensure that your computer or mobile device and Cricut machine are running the latest software updates. Restart your device and attempt the connection again. If problems persist, consult the Cricut support website or contact customer support for further assistance.
By following these steps and troubleshooting any connectivity issues, you’ll be able to successfully install and connect your Cricut Explore Air 2 to your computer or mobile device.
Navigating The Design Space Dashboard
When it comes to installing the Cricut Explore Air 2, navigating the Design Space Dashboard is an essential step. The dashboard is where you will find all the tools and features necessary to create your projects. Let’s start with an overview of the different sections and features available:
| Sections | Features |
| Canvas | Create your project and arrange elements |
| Insert Images | Access a library of pre-designed projects and images |
| Text | Add custom text to your design |
| Shapes | Choose from a variety of shapes |
| Layers | Organize and customize elements |
| Actions | Save, preview, and cut your project |
In addition to accessing pre-designed projects and images, you can also create a
new project from scratch. Simply click on the canvas section and start adding elements, text, and shapes to bring your imagination to life. With the Cricut Explore Air 2 and the intuitive Design Space Dashboard, the possibilities for creativity are endless.
Exploring The Tools And Functions
When it comes to installing the Cricut Explore Air 2, it’s important to understand the different tools and functions that come with this versatile machine. One of the first things you’ll notice is the various toolbars, each serving a specific purpose. These toolbars include the Design Space toolbar, which allows you to import and edit designs, and the Edit toolbar, which provides options for manipulating and customizing your projects.
Importing designs is a straightforward process, as the software supports a wide range of file types, including SVG, PNG, and JPG. Once imported, you can easily edit and personalize your designs using the Design Space toolbar. This toolbar offers features such as resizing, rotating, and layering, giving you complete control over your creations.
Another important aspect of using the Cricut Explore Air 2 is adjusting the cut settings for different materials. Whether you’re working with vinyl, cardstock, or fabric, the machine allows you to customize the cutting pressure, speed, and blade depth to ensure precise and clean cuts. By experimenting with different settings, you can achieve optimal results for a wide variety of projects.
Identifying The Different Blades And Their Uses
To successfully install the Cricut Explore Air 2, it is important to understand the different blades and their uses. The Cricut Explore Air 2 comes with a variety of blades that are designed for specific materials and projects. The fine-point blade is the default blade that comes with the machine and is suitable for cutting most materials. It is perfect for everyday crafting and can cut materials like paper, vinyl, cardstock, and thin fabrics. If you need to cut thicker materials like leather, chipboard, or matboard, you will need to use the deep-point blade. This blade has a steeper blade angle, allowing it to cut through thicker materials with ease. In addition to the fine-point and deep-point blades, there are also specialized blades available for specific projects. These include the bonded-fabric blade for cutting fabrics with an iron-on backing, the rotary blade for cutting fabric without a backing, and the knife blade for cutting thick materials like balsa wood and thick leather. By understanding the different blades and their uses, you can choose the appropriate blade for your materials and projects, ensuring clean and precise cuts with your Cricut Explore Air 2.
Installing And Replacing Blades
HTML
Step-by-step Instructions For Installing A New Blade
To install a new blade on your Cricut Explore Air 2, follow these simple steps:
1. Start by unplugging your machine to ensure safety.
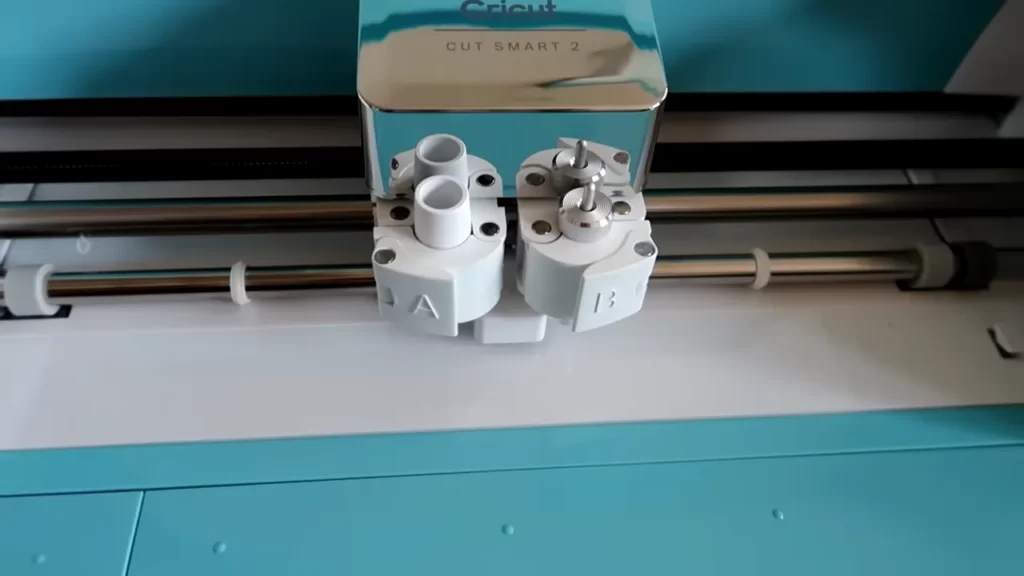
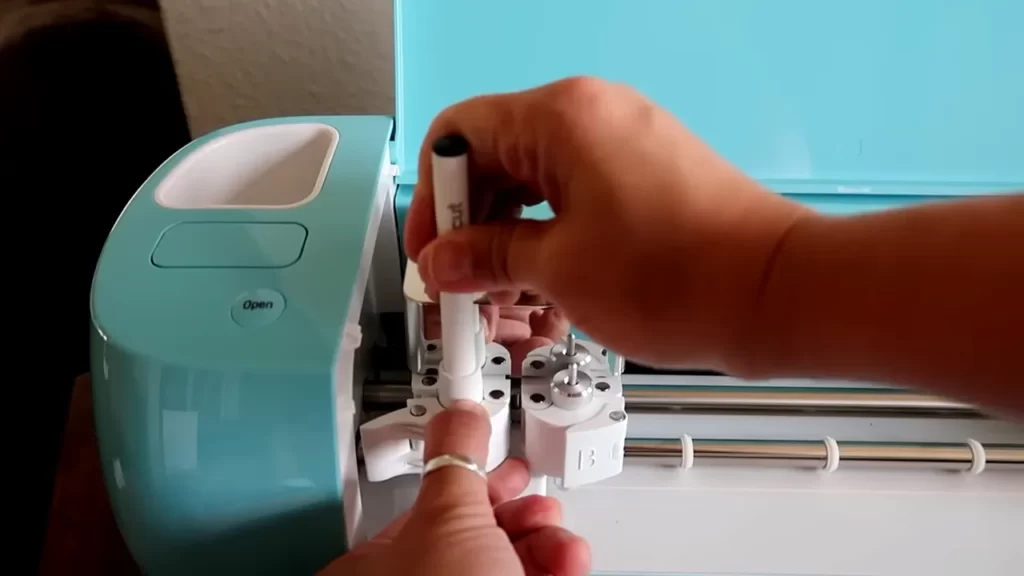
2. Locate the blade housing on the tool holder and press down on the top button to release the current blade.
3. Carefully remove the old blade and discard it.
4. Take your new blade and insert it into the housing, making sure it is properly aligned.
5. Press down firmly until you hear a click, indicating that the blade is securely in place.
6. Plug in your machine and turn it on to ensure the blade is functioning correctly.
Tips for proper blade alignment and calibration:
– Make sure the blade is straight and not tilted
– Check that the blade housing is clean and free from debris
– Calibrate your machine regularly to maintain optimal cutting performance
Troubleshooting blade installation issues:
– If the blade is not cutting properly, try adjusting the blade pressure settings
– Ensure your material is placed correctly on the cutting mat and is not wrinkled
– Clean the blade housing and tool holder regularly to prevent build-up
Exploring Basic Projects
In this blog post, we will explore the basic projects that you can create with the Cricut Explore Air 2. One of the exciting things you can do is creating custom cards and invitations. With the help of this cutting machine, you can design and cut intricate patterns and designs to make your cards and invitations stand out. The possibilities are endless and you can let your creativity flow.
Another project you can dive into is making personalized labels and decals. Whether you want to label your belongings or create unique decals for your laptop or water bottle, the Cricut Explore Air 2 makes it easy to design and cut professional-looking labels and decals.
Lastly, you can design your own iron-on transfers using this amazing cutting machine. Personalize your clothing, bags, and accessories by creating custom designs and transferring them onto fabric with ease. The Cricut Explore Air 2 provides precise cutting and intricate details, ensuring your iron-on transfers look professional and stylish.
Advanced Project Ideas And Inspiration
Looking for advanced project ideas and inspiration to take your Cricut Explore Air 2 skills to the next level? Look no further! We have some exciting crafting ideas that will help you unleash your creativity and make stunning home decor projects with vinyl.
One of the best ways to utilize your Cricut Explore Air 2 is for fabric projects. With the ability to cut and draw on various fabrics, you can create custom designs for clothing, tote bags, and more. Whether you want to personalize a t-shirt or make a unique gift, the Cricut Explore Air 2 has you covered.
Incorporating advanced techniques like print and cut opens up a whole new world of possibilities. You can create intricate designs with multiple colors, add details and textures, and experiment with different materials. With the Cricut Design Space software, you can easily upload your own designs or choose from a wide range of ready-to-make projects.
Machine Connectivity And Firmware Updates
Connecting your Cricut Explore Air 2 to your computer or mobile device is a crucial step in the installation process. A stable and reliable connection ensures seamless communication between the machine and your device.
Before proceeding with the connectivity, it is essential to update the machine’s firmware. Firmware updates are crucial as they often contain bug fixes, performance improvements, and compatibility enhancements. To update the firmware, follow these steps:
- Ensure your Cricut Explore Air 2 is powered on and connected to your computer via USB cable.
- Launch the Cricut Design Space software or app, and sign in to your account.
- In the sidebar, click on the three horizontal lines to open the main menu.
- Select “Machine” and then click on “Update Firmware” from the dropdown menu.
- Follow the on-screen instructions to complete the firmware update process.
If you encounter connectivity issues during installation, troubleshooting steps can help resolve them. Check your USB cable for any damages or try using a different cable. Ensure your computer or mobile device is updated with the latest software and drivers. Additionally, restart both the machine and your device, and try connecting again.
Design Space Errors And Crashes
Design Space Errors and Crashes
Encountering errors and crashes while using Cricut Design Space can be frustrating. However, there are some common error messages that users often face and simple solutions to resolve them.
Common error messages and their solutions:
| Error Message | Solution |
|---|---|
| “Design Space is not responding” | Try clearing your browser cache and cookies. Additionally, ensure that you have a stable internet connection. |
| “An unknown error has occurred” | Refresh the page and check for any available software updates for Design Space. If the issue persists, try using Design Space in a different browser. |
| “Image upload failed” | Check the file format and size of the image you are trying to upload. JPEG or PNG files under 10MB work best. |
| “Print then Cut calibration failed” | Make sure your printer is properly connected and calibrated. Try restarting the printer and checking for any available firmware updates. |
By following these troubleshooting steps, you can overcome common errors and crashes in Cricut Design Space.
Frequently Asked Questions For How To Install Cricut Explore Air 2
How Do I Pair My Cricut Explore Air 2 To My Computer?
To pair your Cricut Explore Air 2 with your computer, follow these steps: 1. Connect your Cricut machine to your computer using the USB cable. 2. Ensure that your computer has Cricut Design Space installed. 3. Open Cricut Design Space and sign in to your account.
4. Click on “New Machine Setup” and select Cricut Explore Air 2. 5. Follow the on-screen instructions to complete the pairing process.
How Do You Set Up A Cricut Explore Air 2?
To set up a Cricut Explore Air 2, follow these steps: 1. Unbox and plug in the machine. 2. Connect it to your computer or mobile device via USB or Bluetooth. 3. Install Design Space software. 4. Create a Cricut ID and log in.
5. Follow on-screen instructions to complete setup. Enjoy crafting with your new Cricut!
Why Won T My Cricut Explore Air 2 Connect To My Computer?
The Cricut Explore Air 2 may not connect to your computer due to incompatible software or outdated drivers. Ensure you have the latest version of Design Space installed. Also, check if the USB cable is securely connected, and try using a different USB port.
Conclusion
To wrap it all up, installing the Cricut Explore Air 2 doesn’t have to be a daunting task. By following these steps, you can quickly and easily set up your machine and start creating amazing crafts and designs. Remember to keep the necessary tools and materials handy, go through the user manual, and take advantage of the available resources online.
With a little patience and practice, you’ll be a pro at using your Cricut Explore Air 2 in no time. Happy crafting!