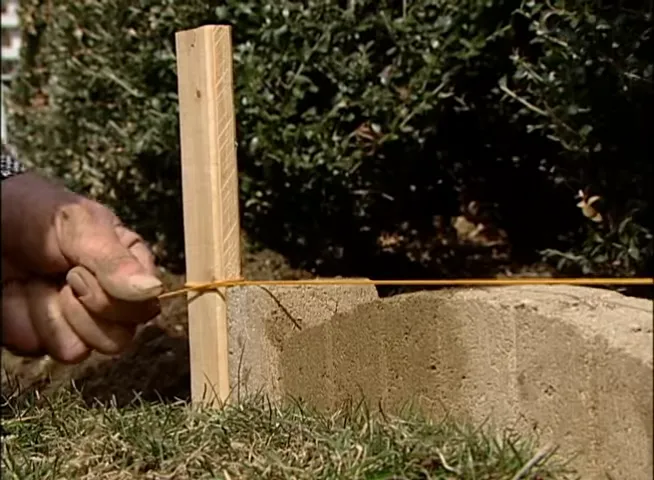
To install edger blocks, first, prepare the area by removing any existing debris and ensuring it is leveled and compacted. Then lay the edger blocks tightly against each other, using a rubber mallet to tap them into place.
Prepare The Groundwork
Evaluate your landscape and determine the need for edger blocks. Gather the necessary tools and materials such as a shovel, tape measure, edger blocks, and leveling sand. Measure and mark the area for installation, ensuring it is straight and even. Remove any existing sod or debris, clearing the ground for the edger blocks.

Next, dig a trench along the marked area, making sure it is deep enough for the edger blocks to sit flush with the ground. Compact the soil in the trench using a hand tamper. Lay a thin layer of leveling sand in the trench, smoothing it out evenly. This will provide a stable base for the edger blocks.
Place the edger blocks into the trench, fitting them tightly together. Use a rubber mallet or a hammer and block of scrap wood to tap each block into place. Check for level after installing every few blocks to ensure they are straight and even.
Finally, backfill behind the edger blocks with soil and compact it gently. Use a garden hose to water the area, settling the soil and locking the edger blocks in place. Now your edger blocks are ready for use!
Excavate The Area
To install edger blocks, begin by excavating the area. Start by clearing the specified area of any vegetation or debris. Once the area is cleared, dig a shallow trench that will be able to accommodate the edger blocks. Make sure to ensure the trench is level and evenly excavated. This will be crucial in ensuring that the edger blocks are properly positioned and level when installed.

Install The Edger Blocks
To install edger blocks, you need to start by laying a base layer of compacted gravel or sand. This base layer will provide stability and support for the edger blocks. After preparing the base layer, begin placing the edger blocks along the marked line. Make sure to check for levelness and adjust as necessary. It is important to connect the blocks securely using interlocking mechanisms to ensure durability and longevity. By following these steps, you can successfully install edger blocks and enhance the appearance and functionality of your landscape.
Backfill And Secure
Fill the backside of the edger blocks with soil or gravel. Compact the backfill material firmly behind the blocks. Verify the stability and alignment of the edger blocks. Install additional reinforcement for added durability.
Final Touches And Maintenance
Sweep off any excess debris from the edger blocks: Before you can proceed with final touches and maintenance, it is important to ensure that the area is clear of any loose debris. Using a broom or brush, carefully sweep off any leaves, dirt, or other materials that may have accumulated on the edger blocks.

Compact the soil or gravel adjacent to the blocks: To provide stability and support to the edger blocks, it is necessary to compact the soil or gravel that is in direct contact with them. Use a tamper or hand compactor to firmly press down on the soil or gravel, ensuring it is packed tightly.
Water the area and ensure proper drainage: Proper drainage is crucial for the longevity of the edger blocks. After compacting the soil or gravel, thoroughly water the area to settle the materials. Ensure that the water is able to drain away from the edger blocks, preventing any potential pooling or accumulation of water.
Regularly inspect and maintain the edger blocks: It is important to regularly inspect the edger blocks for any signs of damage or shifting. Check for cracks, unevenness, or any areas that may require repair. Additionally, keep the edger blocks clean by periodically washing them with water and a mild detergent.
Frequently Asked Questions Of How To Install Edger Blocks
How Do You Install Lawn Edging Blocks?
To install lawn edging blocks, follow these steps: 1. Determine the placement and layout of the blocks. 2. Dig a trench along the desired edging line. 3. Place the blocks into the trench, ensuring they are level. 4. Backfill the trench with soil, compacting it around the blocks.
5. Repeat until all blocks are installed, then water the area to settle the soil.
How Do You Lay Edger Bricks?
To lay edger bricks, follow these steps: prepare the area by digging a trench, add a layer of base material, level the base, set the bricks in place, tap them with a rubber mallet, and fill the gaps with sand.
Compact the bricks using a plate compactor, and then sweep away excess sand.
How Do You Install Paver Edgers?
To install paver edgers, follow these steps: 1. Prepare the area by removing any grass or debris. 2. Lay a base of crushed stone or sand. 3. Position the edgers along the desired layout. 4. Use a mallet to secure them into the ground.
5. Fill the gaps with sand or gravel for stability.
Conclusion
To recap, installing edger blocks is a simple yet effective way to enhance your landscaping. With a clear plan, the right materials, and the steps outlined in this guide, you can achieve a neat and polished look for your garden or pathways.
Remember to prepare the surface, lay the blocks properly, and secure them firmly. By following these instructions, you’ll be well on your way to creating a beautiful and durable edger block installation that will impress your guests and add value to your property.
