To install faux stone veneer, first, clean and prep the surface, then apply adhesive and attach the veneer. We will provide a step-by-step guide on how to successfully install faux stone veneer to enhance the aesthetic appeal of your home or business.
Whether you’re looking to revamp your interior or exterior space, faux stone veneer can be a great option for adding a natural, rustic look. By following the installation process correctly, you can achieve a beautiful, durable finish that mimics the appearance of real stone.
Let’s dive into the details and get started on transforming your space with faux stone veneer.
Choosing The Right Faux Stone Veneer
html
Factors to consider before installation:
| Type of Faux Stone Veneer | Advantages | Disadvantages |
|---|---|---|
| Natural-Looking | Provides an authentic appearance | More expensive compared to other types |
| Lightweight | Easy to install and handle | May have a less realistic look |
| Stacked Stone | Creates a visually appealing texture | Might be challenging to cut and trim |
Before installing faux stone veneer, it is essential to consider a few factors. When choosing the right faux stone veneer, explore the different options available. One option is the natural-looking veneer, which provides an authentic appearance but comes with a higher price tag. Another option is lightweight veneer, easy to install and handle, although it may not have the most realistic look. Stacked stone veneer creates a visually appealing texture, but it can be more challenging to cut and trim. Carefully evaluate the advantages and disadvantages of each type to determine which one fits your preferences and budget. Choose a faux stone veneer that aligns with your desired aesthetics and installation capabilities. By considering these factors, you can make an informed decision and successfully install faux stone veneer.
Preparing The Surface For Installation
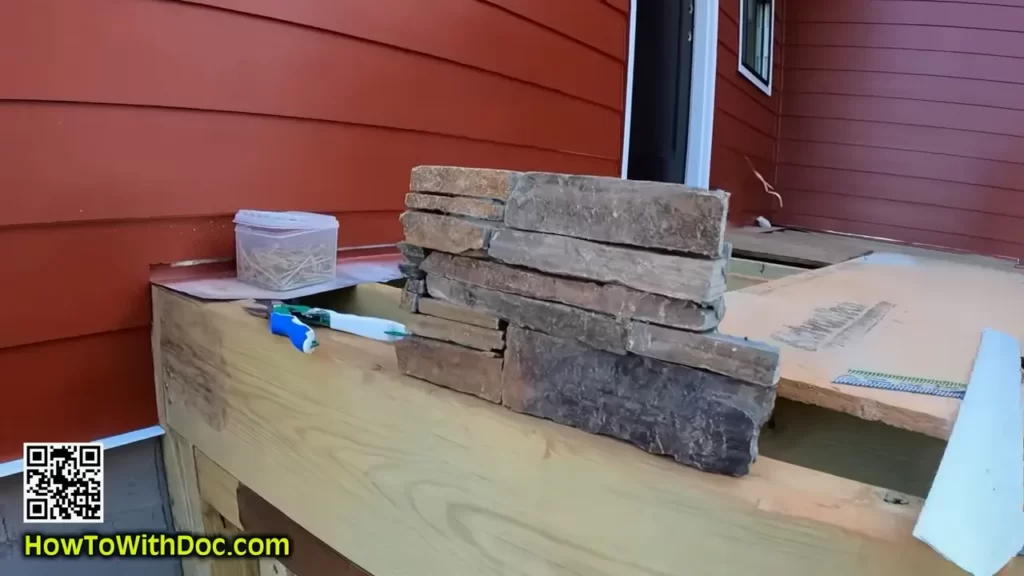
Assessing the condition of the wall or surface is the first step in preparing it for faux stone veneer installation. Before you begin, ensure that the surface is clean and free from any dust, debris, or grease. Use a pressure washer or a hose to wash off any dirt. For tough stains, you can use a mild detergent and a scrub brush. Allow the surface to dry completely.
Once the surface is clean, examine it for any cracks, loose paint, or flaking. Patch up any cracks or holes using a suitable filler and sand them down to create a smooth surface. If there is any loose paint, scrape it off carefully. The adhesion of the faux stone veneer is dependent on the surface being smooth and solid.
If the wall or surface is made of materials such as wood, plywood, or drywall, make sure it is structurally sound and free from any rot or damage. Repair or replace any damaged sections before proceeding with the installation.
Tools And Materials Needed For Installation
Essential tools for the installation process:
- – Trowel
- – Safety glasses
- – Masonry saw
- – Level
- – Measuring tape
- – Screwdriver
- – Drill
- – Caulk gun
Materials required for a successful installation:
- – Faux stone veneer
- – Adhesive
- – Screws
- – Nails
- – Mortar
- – Acrylic caulk
- – Paint
Having the right tools and materials is crucial for a smooth installation process. The trowel is necessary for applying the adhesive and mortar, while safety glasses protect your eyes from any flying debris. A masonry saw helps in cutting the veneer to the desired size, and a level ensures that the installation is plumb and level. Using a measuring tape helps in accurate placement of the veneer pieces, and a screwdriver or drill is required for securing them in place. Lastly, a caulk gun is needed for applying the acrylic caulk, and paint can be used to give the finishing touch to the veneer.
Measuring And Planning The Layout
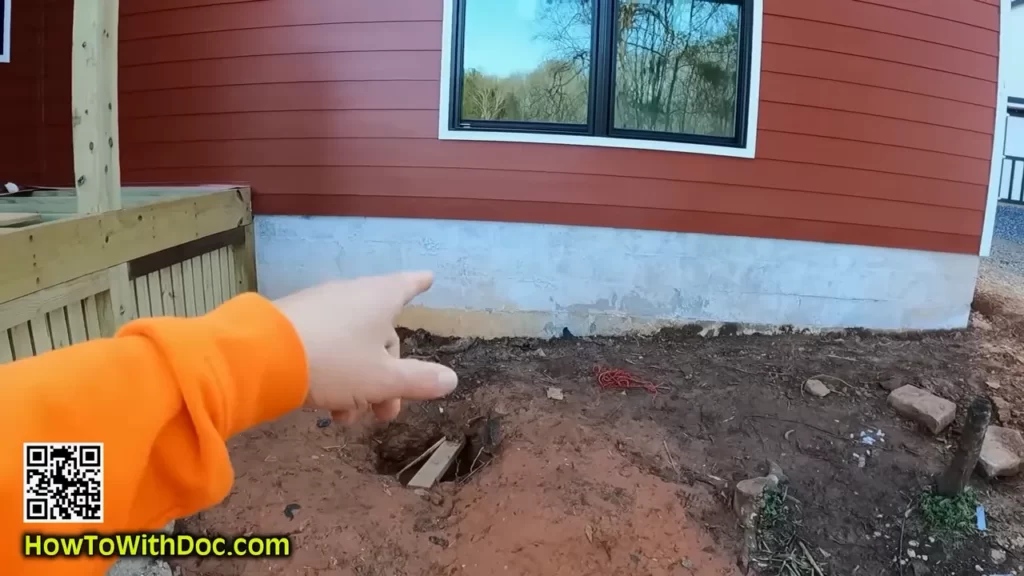
Accurate measurement is crucial for a precise installation of faux stone veneer. Before starting the installation process, it’s important to carefully measure the area where you plan to install the veneer. Start by measuring the height and width of the wall to determine the amount of materials needed. Take into account any corners or openings, such as windows or doors, and measure them as well.
Once you have the measurements, create a layout plan for the installation. This plan will help ensure that the placement of the stone veneer is aesthetically pleasing and balanced. Consider the overall design and layout of the space, and decide on the pattern and placement of the stones.
Having accurate measurements and a well-planned layout will make the installation process smoother and result in a professional-looking finish. Take your time with this step, as it will set the foundation for a successful installation of faux stone veneer.
Applying Adhesive And Installing The Faux Stone Veneer Sheets
Applying Adhesive:
To begin the installation process, prepare the wall or surface by thoroughly cleaning it. Remove any dirt, debris, or loose paint. Ensure that the surface is dry before proceeding. Next, apply an appropriate adhesive to the wall or surface using a trowel or putty knife. Spread the adhesive evenly, covering the entire area where the faux stone veneer sheets will be installed. Be sure to follow the manufacturer’s instructions regarding the recommended type and amount of adhesive to use.
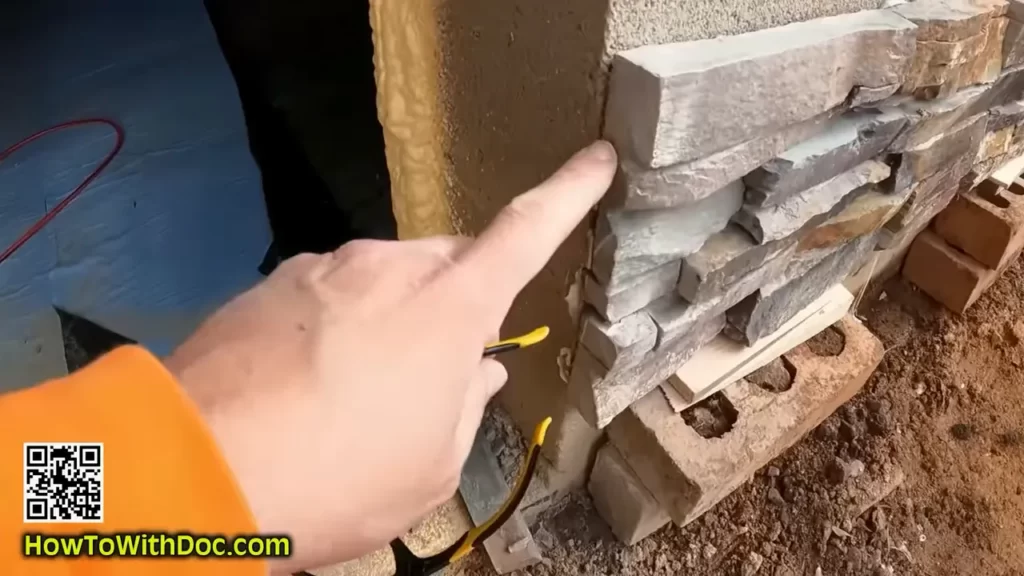
Installing the Faux Stone Veneer Sheets:
Once the adhesive has been applied, begin installing the faux stone veneer sheets. Carefully align each sheet, ensuring a proper fit and pattern continuity. Press firmly on each sheet to ensure good adhesion with the adhesive. Use a level and spacer wedges to maintain a straight and even installation. If needed, trim the sheets to fit corners or edges using a wet saw or masonry blade. Continue installing the sheets, working from bottom to top until the entire area is covered.
Cutting And Trimming The Faux Stone Veneer
When installing faux stone veneer, one important step is cutting and trimming the veneer sheets to ensure a seamless and professional look. There are several techniques and tools that can be used for this task.
Circular saws with a masonry blade are commonly used to make straight cuts on the veneer sheets. These saws have a rotating blade that can effectively cut through the stone material.
Angle grinders with a diamond blade are another option for cutting the veneer sheets. They are especially useful for making intricate and curved cuts.
Chisels and hammers can be used to manually trim the edges and corners of the veneer sheets. This technique is useful when working with irregularly shaped stones.
Regardless of the cutting tool used, it is important to measure and mark the exact dimensions before making any cuts. This ensures accuracy and minimizes wastage of materials. Additionally, wearing safety goggles and gloves is essential when cutting or trimming faux stone veneer as it can produce dust and sharp debris.
Creating Natural-looking Joints And Seams
Installing faux stone veneer is a great way to add a natural-looking element to your home’s exterior or interior. When it comes to creating realistic joints and seams, there are a few tips to keep in mind. Firstly, make sure to carefully choose the veneer sheets that blend well together, to ensure a seamless appearance. Additionally, consider using a grout bag or trowel to apply mortar in between the veneer sheets, as this will help achieve a more authentic look. Another technique is to use a jointing tool to create subtle texture and variation in the joints. Lastly, don’t forget to finish off the installation process by wiping away any excess mortar and cleaning the veneer thoroughly for a polished finish.
Adding Finishing Touches To Enhance The Appearance

When installing faux stone veneer, it’s important to consider adding finishing touches to enhance its appearance. One way to do this is by incorporating color or texture to the veneer. This can be achieved by using paint or stain specifically designed for faux stone surfaces. Through careful application, these additions can bring out the natural depth and variation of the veneer, adding visual interest and authenticity.
Additionally, applying a sealant to the faux stone veneer is crucial for protection and longevity. The sealant acts as a barrier, preventing moisture and dirt from seeping into the veneer and causing damage. It also helps to maintain the vibrant color and texture of the stone, ensuring its beauty lasts for years to come. Regular maintenance, including reapplication of the sealant as needed, will help to extend the life of the faux stone veneer and keep it looking as good as new.
Maintaining And Cleaning Faux Stone Veneer
Cleaning and maintaining faux stone veneer is crucial to ensure its longevity and aesthetics. Here are some best practices to follow:
Regular Cleaning
- Use a soft-bristle brush or sponge to remove dirt and debris from the surface. Avoid using wire brushes or abrasive materials that may damage the veneer.
- Mix a mild detergent with water and gently scrub the veneer to remove stains. Rinse thoroughly with clean water.
- For stubborn stains or mold and mildew growth, use a mixture of water and bleach in a 1:10 ratio. Test the solution in a small, inconspicuous area first to ensure it doesn’t cause discoloration. Rinse well after cleaning.
Preventing Damage
- Regularly inspect the veneer for any cracks or chips. Repair them promptly to avoid further damage.
- Avoid using pressure washers or excessive force when cleaning as it may cause the veneer to chip or break.
- Protect the veneer from direct contact with heat sources, such as grills or fire pits, as it can discolor or warp the material.
- Apply a clear sealant to the veneer every few years to maintain its appearance and protect it from water damage.
Addressing Common Issues
If you notice any issues with the faux stone veneer, such as loose panels or discolored areas, it’s important to address them promptly. Contact a professional installer or follow the manufacturer’s guidelines for repairs. Avoid using adhesives or sealants without proper instructions as they may cause more harm than good.
By following these best practices for cleaning, maintenance, and addressing common issues, you can ensure the longevity and beauty of your faux stone veneer.
Final Thoughts And Inspiration
Lorem ipsum dolor sit amet, consectetur adipiscing elit. Sed et gravida turpis, a maximus tellus. Sed ut arcu sed erat sollicitudin luctus. Ut et elit in nunc malesuada congue. Etiam blandit neque at consectetur eleifend. Sed sodales urna vitae metus tristique, ut congue ex lobortis. Vivamus pharetra enim fermentum, congue tortor ac, condimentum orci. Donec eget dui arcu. Vestibulum quis consectetur mi. Sed at est mauris. Pellentesque vestibulum nisi vitae arcu scelerisque, sed dictum nunc fermentum. Nunc ante risus, semper eu placerat ut, tempus nec lectus.
Nullam vel nulla massa. Sed congue consequat fermentum. Morbi non dui ut orci pulvinar laoreet. Nam iaculis sollicitudin dictum. Aenean sodales tortor a faucibus aliquet. Ut risus ligula, commodo quis dapibus a, cursus non purus. Praesent efficitur nisl id urna finibus ultricies. In hac habitasse platea dictumst. Sed vitae tincidunt nisi, nec tempus lorem. Phasellus id hendrerit nibh. Morbi a viverra felis. Orci varius natoque penatibus et magnis dis parturient montes, nascetur ridiculus mus.
Integer viverra, urna ullamcorper efficitur viverra, leo est sagittis risus, consequat hendrerit magna nisi lacinia turpis. Curabitur consectetur lorem nec lectus varius vulputate. Quisque et metus nec libero auctor molestie. Suspendisse volutpat pulvinar convallis. Nulla fermentum ipsum in tellus bibendum, nec tincidunt dolor condimentum. Integer eu pharetra nisi. Sed feugiat, tellus vitae pharetra fermentum, mauris dolor venenatis lacus, eu eleifend leo libero id urna.
| Installation | Location | Design |
|---|---|---|
| Living room | New York City | Contemporary |
| Fireplace | Los Angeles | Traditional |
| Exterior wall | Miami | Modern |
Donec ut pellentesque turpis. Quisque auctor fringilla dolor, ut luctus ligula dictum sit amet. Suspendisse sit amet molestie arcu, vel aliquam nisi. Mauris blandit, urna id semper aliquet, nunc purus varius nisl, nec finibus mi mauris vitae nisi. Donec odio ex, fermentum sed mi tempor, accumsan volutpat lorem. Sed lacinia dolor nec ipsum ultrices finibus. Cras luctus bibendum condimentum. Sed lorem nulla, lacinia ut enim vitae, blandit volutpat neque.
Proin et lobortis velit. Nam sed nunc sagittis, tempus lacus in, porttitor urna. Ut id dolor non mi commodo aliquet. Nulla metus metus, finibus ac ullamcorper hendrerit, tincidunt ac lectus. Integer feugiat malesuada ligula, et auctor massa venenatis ut. Mauris venenatis elit nec est consectetur, ac pellentesque velit fringilla. Duis luctus nibh dignissim, dignissim elit a, sagittis ligula. Morbi varius ante ac risus tristique, ac tristique ex dapibus.
Frequently Asked Questions For How To Install Faux Stone Veneer
How Do You Attach Exterior Stone Veneer?
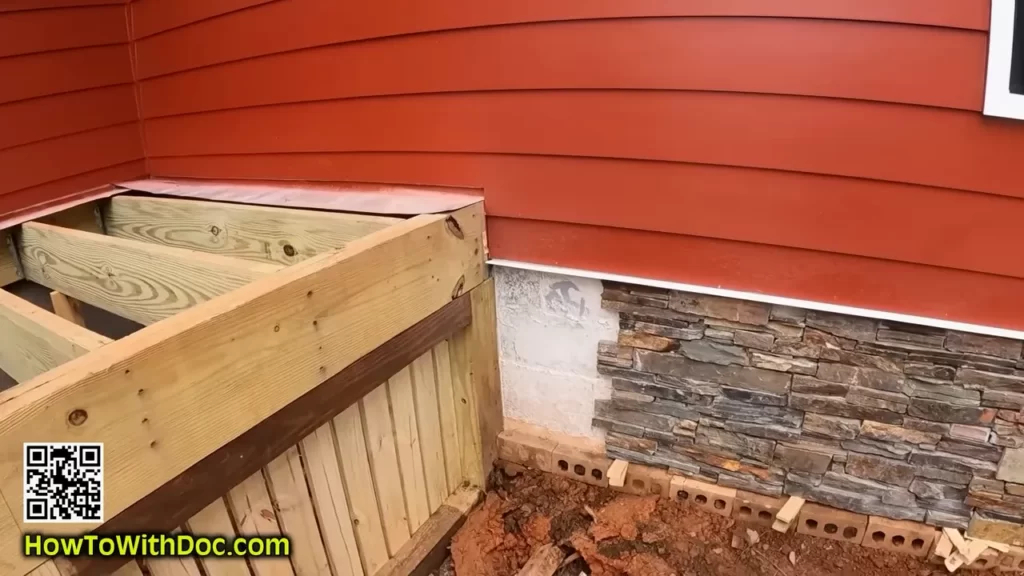
To attach exterior stone veneer, follow these guidelines: 1. Prepare the surface by ensuring it is clean and dry. 2. Apply a weather-resistant adhesive to the back of each stone piece. 3. Press the stones firmly onto the surface, starting from the bottom and working your way up.
4. Use mortar or grout to fill in any gaps between the stones. 5. Allow the adhesive and mortar to dry completely before finishing.
What Do You Use To Attach Stone Veneer?
Stone veneer is typically attached using a combination of mortar and metal lath. The mortar provides a strong bond, while the metal lath helps to create a secure attachment surface. This combination ensures that the stone veneer stays firmly in place, adding beauty and durability to any project.
What Kind Of Adhesive To Use For Stone Veneer?
For stone veneer, it is recommended to use an adhesive specifically designed for stone. Choose a high-quality adhesive that is suitable for the particular type of stone veneer you are using. It is important to follow the manufacturer’s guidelines for application and allow sufficient curing time for a strong bond.
Conclusion
Installing faux stone veneer can transform the appearance of any space, adding a touch of sophistication and charm. By following these step-by-step instructions, you can easily achieve professional-looking results. From preparing the surface to applying the adhesive and placing the stones, this guide has provided valuable insights into the installation process.
Remember, practice makes perfect, so don’t be discouraged if it takes a few tries to get it just right. Soon enough, you’ll be enjoying the beauty of your newly installed faux stone veneer. Happy renovating!