To install a field fence, start by marking out the boundaries and ensuring the corners are square. Then, dig holes for the fence posts, set them in concrete, and let them dry before attaching the fence panels securely.
Credit: www.homedepot.com
Choosing The Right Type Of Field Fence
When installing a field fence, it is important to consider various factors to ensure you choose the right type that meets your needs. First, you should consider the type of animals to be contained. Different animals have varying behaviors and sizes, which can determine the type of fence required. Evaluate the terrain and climate conditions of your area as these can affect the durability and maintenance of the fence. Additionally, determining the required height and spacing is crucial. The fence should be tall enough to prevent animals from jumping over, and the spacing between the wires should be appropriate for the size of the animals. By carefully considering these factors, you can select the most suitable field fence for your specific needs.
Preparing For Fence Installation
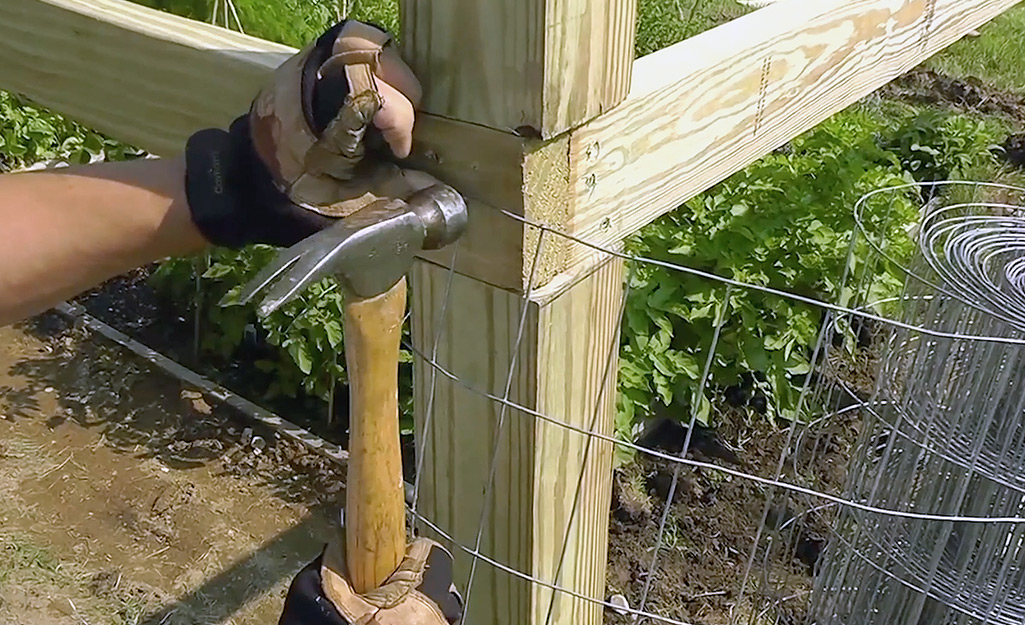
Preparing for Fence Installation: Before you begin installing a field fence, it is important to gather the necessary tools and materials. Some of the tools you may need include wire cutters, a measuring tape, fence posts, and a hammer. Make sure to check with local regulations to determine the appropriate materials and specifications for your fence.
Mark and Measure the Fence Perimeter: Once you have gathered the tools and materials, the next step is to mark and measure the fence perimeter. Use a measuring tape to determine the length of the area where you want to install the field fence. Mark the corners and any changes in direction using stakes or flags. This will help you visualize the layout of the fence and ensure accurate installation.
Clear the Area of Any Obstacles or Vegetation: Before you start installing the field fence, it is important to clear the area of any obstacles or vegetation. Remove any rocks, roots, or debris that could affect the installation process. Trim back any vegetation that may be in the way of the fence line. This will ensure a smooth installation and prevent any potential damage to the fence.
Step-by-step Field Fence Installation Guide
htmlTo install a field fence, follow these steps:
Setting up the corner and end posts: Start by setting up the corner and end posts at the desired locations. These are crucial points to ensure the strength and stability of the fence.
Stretching the guide wire for alignment: Attach a guide wire between the corner and end posts. This will help ensure the fence is properly aligned.
Digging and installing intermediate posts: Dig holes for the intermediate posts along the fence line, ensuring they are evenly spaced. Install the posts securely in the holes.
Attaching the fence fabric to the posts: Begin attaching the fence fabric to the corner and end posts using appropriate fasteners. Make sure the fabric is properly tensioned.
Tensioning and fastening the fence fabric: Continue attaching the fence fabric to the intermediate posts, ensuring it is properly tensioned and securely fastened.
Installing stays or braces for extra support: If additional support is needed, consider installing stays or braces at strategic points along the fence to prevent sagging.
Adding a top rail for added stability: For added stability, consider installing a top rail along the fence line. This helps prevent the fence from leaning or bowing.
Installing gates for convenient access: Finally, install gates at appropriate locations to provide convenient access to the enclosed area.
Maintenance And Troubleshooting Tips
Regularly inspecting the fence for damage or wear is an important part of field fence maintenance. This includes checking for any loose or broken fittings and fabric that may need to be repaired. It’s also crucial to address any soil erosion or drainage issues that could potentially affect the stability of the fence. By keeping the vegetation around the fence under control, you can prevent overgrowth that may cause damage or create hiding spots for unwanted pests.
Safety Measures And Legal Considerations
“`HTMLInstalling a field fence requires careful consideration of safety measures and compliance with local regulations. Ensuring the fence is installed according to these requirements is essential to avoid any legal implications. To comply with local regulations, it is crucial to familiarize yourself with specific rules and ordinances that govern fencing in your area. Additionally, implement appropriate safety precautions during installation to minimize any potential hazards. This includes wearing protective gear, such as gloves and safety goggles, and using the correct tools and equipment. In order to enhance visibility and prevent accidents, it is recommended to install warning signs and markings along the fence. These signals serve as a visual reminder to individuals about the presence of the fence, reducing the chances of unknowingly encountering it. Remember, prioritizing safety and adhering to legal considerations throughout the installation process will help ensure a secure and compliant field fence.
“`Enhancing The Durability And Performance
When it comes to installing a field fence, there are several steps you can take to enhance its durability and performance. One important step is applying protective coatings or treatments to the fence. These coatings or treatments can help prevent corrosion and extend the lifespan of the fence. It’s essential to choose high-quality materials and components for your field fence installation. This ensures that the fence will be strong and durable, capable of withstanding harsh weather conditions and the test of time. Additionally, adding electric fencing to your field fence can provide added security, deterring potential intruders and keeping your property safe. By following these recommendations and taking the necessary precautions, you can ensure that your field fence installation is of the highest quality, maximizing its durability and performance.
Frequently Asked Questions For How To Install Field Fence
How Far Apart Should T Posts Be For A Field Fence?
Field fence T-posts should be spaced approximately 8 to 10 feet apart for optimal stability.
Do You Have To Stretch Field Fence?
Yes, field fences need to be stretched to ensure proper installation and stability. Stretching the fence helps to maintain tension, prevent sagging, and keep the fence securely in place. It is a crucial step in achieving a durable and long-lasting fencing solution.
How Do You Run A Field Fence On Uneven Ground?
To run a field fence on uneven ground, follow these steps: 1. Begin by measuring the distance between the fence posts. 2. Dig holes for the posts, making sure to accommodate for the varying terrain. 3. Install the posts securely, ensuring they are level and stable.
4. Use tension wire or braces to maintain the fence’s stability on uneven ground. 5. Attach the field fence to the posts, ensuring it is tight and properly aligned.
What Do I Need To Build A Field Fence?
To build a field fence, you’ll need the following: fence posts, wire mesh or barbed wire, fencing tools like pliers and fence stretchers, a post hole digger, concrete mix, and gate hardware if installing a gate. Ensure you have all the necessary materials and tools before starting the project.
Conclusion
Installing field fence can be a daunting task, especially for beginners. By following the step-by-step guide provided in this blog post, you can easily install field fence on your property. Remember to measure accurately, dig proper post holes, and secure the fence tightly.
With the right tools and techniques, you can create a safe and secure enclosure for your livestock or property. Don’t hesitate to seek professional help if needed. Happy fencing!