To install garage door seal trim, start by measuring the length of the door bottom and trim the seal to fit accordingly; next, clean the bottom of the door and remove any old seal or adhesive residue; then, apply adhesive to the bottom of the door and press the seal firmly against it; finally, allow the adhesive to dry before testing the seal to ensure proper installation and functionality. Are you tired of dealing with drafts, pests, or water leaks coming into your garage?
Installing a garage door seal trim can be a simple and effective solution. This article will guide you through the steps necessary to install a garage door seal trim in a hassle-free manner. By following these instructions, you can achieve a tight seal on your garage door, helping to keep your garage space comfortable and protected.
Read on to learn how to install a garage door seal trim and enjoy the benefits of a more secure and energy-efficient garage.
Getting Started With Garage Door Seal Trim Installation
The installation of garage door seal trim is a crucial step in maintaining the security and functionality of your garage. By properly sealing the gaps around your garage door, you can prevent insects, dirt, and unwanted drafts from entering your space. Installing garage door seal trim is a relatively simple process, but it requires the right tools and materials to ensure a proper fit.
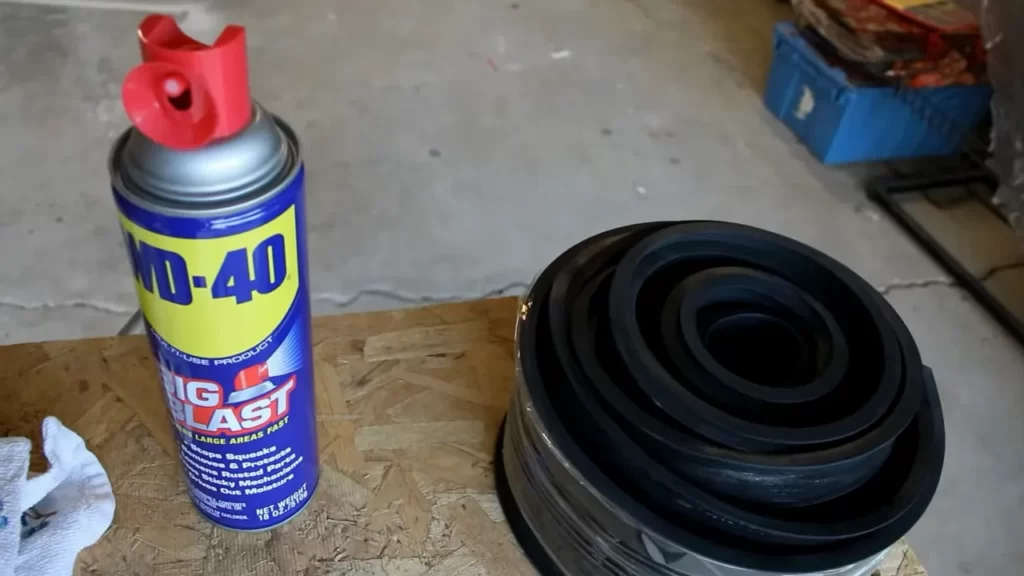
Before you begin, gather the necessary tools and materials, which may include a tape measure, utility knife, adhesive, and the seal trim itself. While the specific requirements may vary depending on the type of seal trim you choose, it’s important to have everything ready before you start the installation.
When installing garage door seal trim, safety precautions are essential. Make sure to wear protective gloves and safety glasses to avoid any accidents or injuries. Additionally, take the time to read and understand the manufacturer’s instructions to ensure a smooth and efficient installation process.
Assessing The Garage Door And Trim
To install garage door seal trim, it is important to assess the condition of the existing trim. Check for any signs of damage or wear that may affect the functionality of the new seal trim. Measuring the dimensions for the new trim is crucial to ensure a proper fit. Take accurate measurements of the length and width of the garage door to determine the exact size of the seal trim needed.
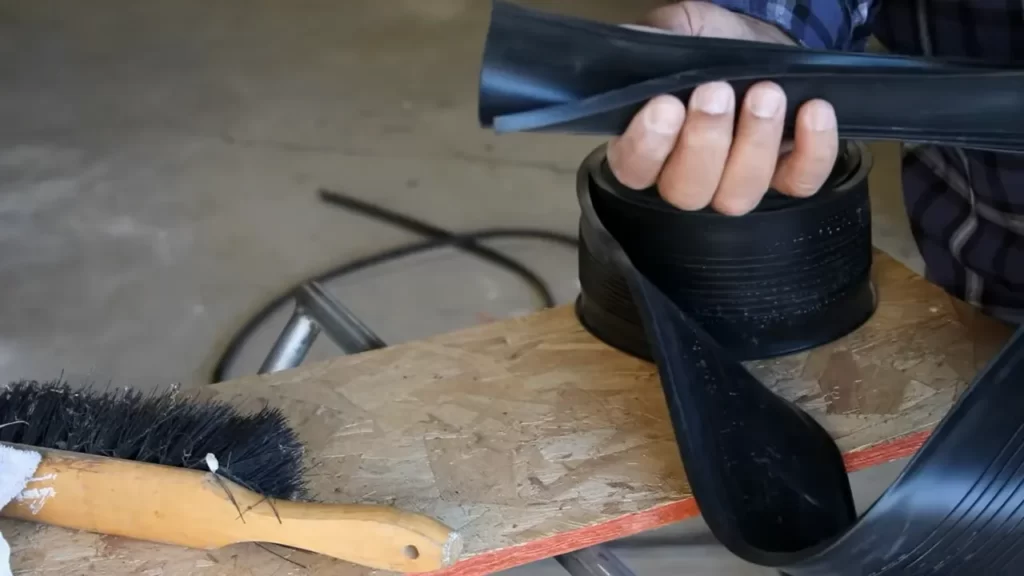
Once you have assessed the condition and measured the dimensions, it is time to choose the appropriate type of seal trim for your garage door. Consider factors such as material, design, and weather resistance when making your selection. There are various types of seal trims available, including rubber, vinyl, and weatherstripping, each with its own advantages and disadvantages.
By carefully evaluating the condition of the existing seal trim, measuring the dimensions accurately, and choosing the right type of seal trim, you can successfully install a garage door seal trim that provides effective protection against drafts, debris, and insects.
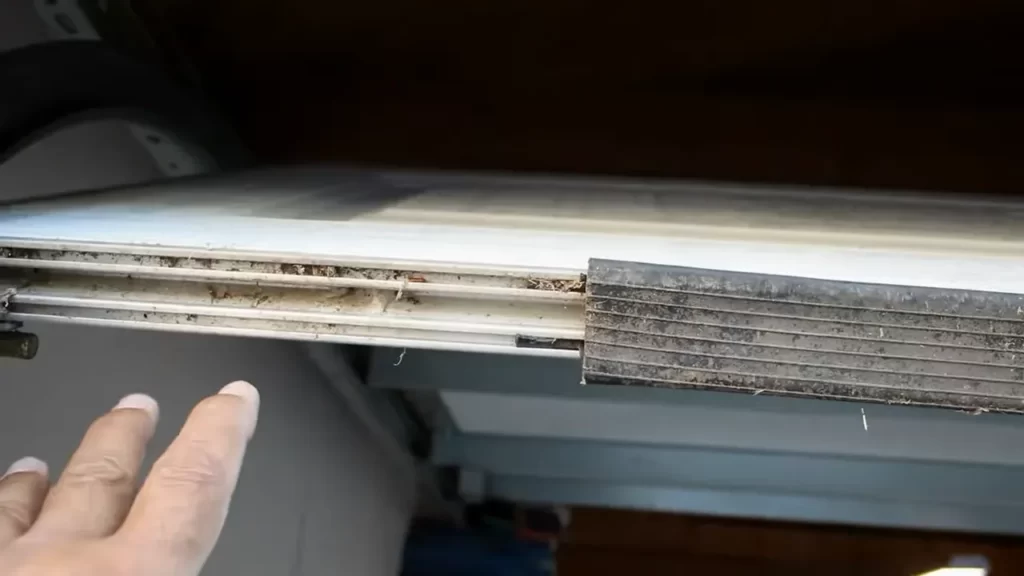
Removing The Old Garage Door Seal Trim
Removing the old garage door seal trim is an essential step in installing a new seal trim. To do this, follow these simple steps:
- Start by carefully examining the trim to identify any screws or fasteners holding it in place.
- Using the appropriate tools, such as a screwdriver or pry bar, gently remove these fasteners.
- Once the fasteners are removed, slowly and carefully detach the old trim from the garage door frame, taking care not to damage the door or the surrounding areas.
- Once the trim is removed, it is important to dispose of it properly. Check with your local waste management facility for regulations regarding the disposal of construction materials.
With the old trim removed, you can now prepare the garage door for the installation of the new seal trim. Make sure to clean the door and remove any debris or residue that may interfere with the installation process. A clean surface will ensure a proper seal and secure fit for the new trim.
Installing Garage Door Seal Trim
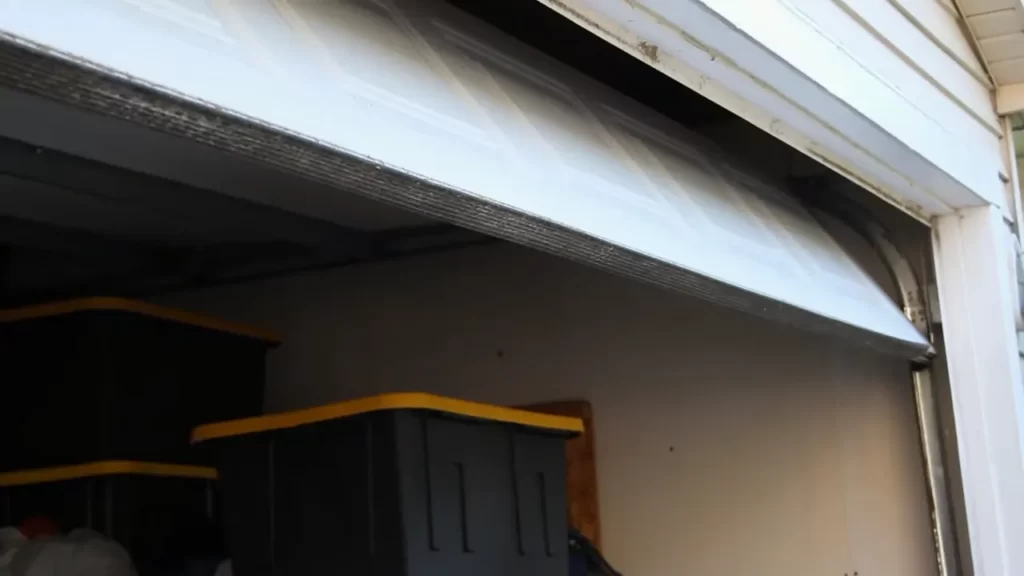
Installing a garage door seal trim is crucial to keeping your garage free from dirt, debris, and unwanted pests. Before starting the installation process, it is important to identify the starting point. Begin by determining which side of the garage door is most exposed to external elements. This is usually the side facing the weather or the side where the seal has worn out.
Proper positioning and alignment of the trim is vital to ensure its effectiveness. Make sure the trim aligns perfectly with the garage door edge, providing a tight seal when closed. Consider using a level to ensure an even installation.
Once the trim is correctly positioned, securely attach it to the garage door. Utilize galvanized screws or nails to prevent rusting over time. In areas prone to high winds, it’s advisable to use adhesive in addition to fasteners for extra stability.
Ensuring A Secure And Effective Seal
When installing a garage door seal trim, it is crucial to ensure a secure and effective seal that keeps out unwanted elements. Checking for any gaps or leaks in the seal is the first step in this process. Inspect the entire perimeter of the door, paying close attention to corners and the bottom area.
If any gaps or leaks are found, they should be promptly addressed. Additional sealants can be used to enhance the protection provided by the garage door seal trim. These sealants come in various forms, such as adhesive strips or caulking compounds. They can help fill in any gaps and provide an extra layer of insulation against drafts, moisture, and pests.
Proper maintenance of the garage door seal trim is also essential in ensuring its effectiveness. Regularly clean the seal to remove any dirt or debris that may have accumulated. Inspect for any signs of wear and tear, and replace the seal if necessary.
Troubleshooting And Tips
One of the essential elements of installing a garage door seal trim is troubleshooting to avoid common issues. Here are some tips to ensure a smoother and more efficient installation process:
– Ensure proper measurement: Accurate measurement of the door is essential to ensure a perfect fit for the seal trim.
– Clean the surface: Before installing the seal trim, clean the surface thoroughly to ensure proper adhesion.
– Use proper tools: Utilize the right tools for the job to avoid any damage or difficulties during installation.
– Apply adhesive evenly: To achieve a secure bond, apply adhesive evenly along the seal trim.
– Allow for curing time: Follow the instructions provided by the manufacturer for the adhesive to cure properly.
If you have any questions related to garage door seal trim installation, here are some frequently asked questions:
| Question | Answer |
|---|---|
| What should I do if the seal trim doesn’t fit? | Double-check your measurements and trim the seal accordingly if needed. Ensure the door is properly aligned. |
| How long does it take for the adhesive to cure? | The curing time varies depending on the adhesive type. Refer to the manufacturer’s instructions for accurate information. |
| Can I install the seal trim on my own? | Yes, you can install the seal trim yourself. Ensure you follow the proper installation steps and use the recommended tools. |
Frequently Asked Questions Of How To Install Garage Door Seal Trim
How Do You Install Garage Seal Strips?
To install garage seal strips, follow these steps: 1. Measure the width of the bottom of the garage door. 2. Cut the seal strip to match the measurement. 3. Clean the garage door bottom to remove dirt and debris. 4.
Peel off the backing and press the seal strip firmly onto the door. 5. Trim any excess material.
How Do You Seal Garage Door Trim?
To seal garage door trim, follow these steps: 1. Clean the trim thoroughly to remove dirt and debris. 2. Apply a silicone-based exterior caulk to seal any gaps or cracks. 3. Smooth the caulk with a caulk finishing tool or your finger.
4. Allow the caulk to dry completely before painting or applying any sealant. 5. Regularly inspect and reapply caulk as needed to maintain the seal.
How Do You Install A Bottom Seal Strip On A Garage Door?
To install a bottom seal strip on a garage door, follow these steps: 1. Open the garage door completely. 2. Remove the old seal strip from the bottom of the door. 3. Measure the width of the door and cut the new seal strip to fit.
4. Attach the new seal strip using adhesive or screws. 5. Close the door and test the seal for proper fit and functionality.
Conclusion
Installing garage door seal trim is a simple yet effective way to enhance the energy efficiency of your garage and protect it from dirt, debris, and pests. By following the step-by-step instructions outlined in this blog post, you can easily install the seal trim yourself, saving both time and money.
Remember to choose the right materials and tools, accurately measure the dimensions, and take necessary safety precautions. With a properly installed garage door seal trim, you can enjoy a more comfortable and clean garage space.