To install a garage door sensor, follow these steps.
Necessary Tools And Equipment
- Screwdriver: A screwdriver is essential for removing screws and securing various parts of the garage door sensor. Choose a screwdriver with a comfortable grip and different head sizes to fit different screws.
- Drill: You will need a drill to create holes for mounting the sensor on the garage door frame. Ensure that the drill is suitable for the material you’re drilling into and use the correct drill bit.
- Measuring tape: Accurate measurements are crucial when installing a garage door sensor. Use a measuring tape to determine the correct placement and alignment of the sensor. This will ensure optimal functionality and proper detection of the door’s movement.

Having these tools readily available before starting the installation process will make the task easier and more efficient. Make sure to familiarize yourself with the instructions provided by the sensor’s manufacturer to ensure proper installation and functionality.
Preparing For Installation
To successfully install a garage door sensor, it is important to prepare beforehand. The first step is to determine the position of the sensor. Ensure that it is placed in a spot that allows for proper alignment with the garage door. This ensures accurate detection and functioning of the sensor. Additionally, make sure there are no obstacles or obstructions that might interfere with the sensor’s performance. Clear away any items or debris that could potentially hinder its operation. Taking these preparatory steps will help ensure a smooth installation process and optimal performance of the garage door sensor.
Installing The Sensor
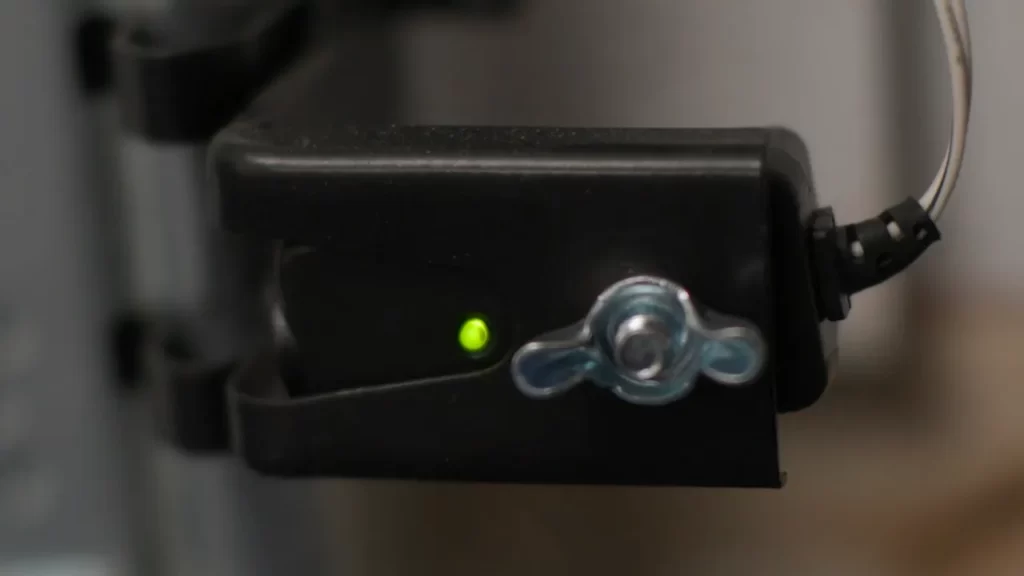
Installing a garage door sensor is a crucial step in ensuring the safety and security of your home. Here is a step-by-step guide on how to install a garage door sensor:
| Step 1: Mounting the sensor on the garage door frame |
| Step 2: Adjusting the sensor position |
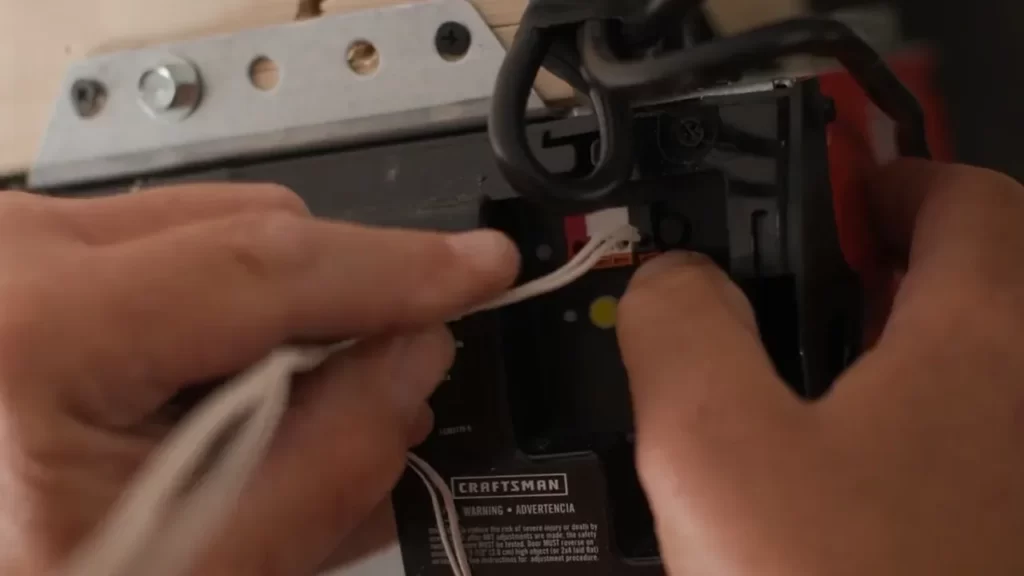
| Step 3: Connecting the sensor to the control panel |
| Step 4: Testing the sensor’s functionality |
Before starting the installation process, ensure that you have read the manufacturer’s instructions carefully. Step 1 involves mounting the sensor on the garage door frame using the provided screws. Make sure to choose a location that allows optimal coverage for the sensor. Step 2 requires adjusting the sensor position to ensure it is aligned properly with the control panel. Step 3 involves connecting the sensor to the control panel using the provided cables. Double-check all the connections to ensure they are secure. Lastly, in Step 4, test the sensor’s functionality by opening and closing the garage door to check if it detects any obstacles. Ensure the sensor is working correctly before considering the installation process complete.
Troubleshooting Common Issues

html
If your garage door sensor is not responding, there are a few potential causes to consider. First, check the power source. Ensure that the sensor is properly connected to a power outlet, and that the power cable is securely plugged in. If the power source is fine, inspect the sensor’s wiring. Look for any loose or damaged wires that may be interrupting the connection. It’s also a good idea to clean the sensor lenses. Dust, dirt, or debris may be blocking the sensor’s ability to detect movement accurately. If all else fails, consider replacing the sensor. Over time, sensors can wear out and become unresponsive. A new sensor should resolve the issue.
False alarms can be frustrating, but there are steps you can take to address the issue. First, check the sensor’s sensitivity settings. Adjusting the sensitivity can help prevent false alarms triggered by minor vibrations or environmental factors. Additionally, ensure that the sensor is properly aligned. Misalignment can cause the sensor to detect movement incorrectly, leading to false alarms. If you have pets, consider installing pet-friendly sensors. These sensors are designed to differentiate between human movement and pet activity, reducing the likelihood of false alarms. Lastly, make sure to regularly clean the sensor lenses. Dust or debris on the lenses can interfere with accurate detection and lead to false alarms.
If you are experiencing inconsistent signals from your garage door sensor, there are a few potential solutions. First, check the sensor’s range. Ensure that the sensor is within the specified range of the receiver. You may need to reposition the sensor or receiver to improve the signal strength. It’s also essential to check for any obstructions. Objects, walls, or structural elements can interfere with the signal’s transmission. Consider moving any potential obstructions out of the sensor’s line of sight. Finally, check the batteries. Low battery levels can cause inconsistent signals. If the batteries are low, replace them with fresh ones to improve signal reliability.
Maintaining And Caring For The Sensor
Regular cleaning and inspection of your garage door sensor is essential for its proper functioning. Over time, dirt and debris can accumulate on the sensor, affecting its performance. To clean the sensor, use a soft cloth or brush to remove any dust or grime that may have collected on its surface. Additionally, inspect the sensor for any signs of damage or wear. Look for cracks or loose connections that could affect its functionality.
Battery replacement is another important aspect of maintaining your garage door sensor. If the sensor is not responding properly or showing signs of low battery, it is a good idea to replace the batteries. Check the manufacturer’s instructions for the correct type of batteries to use and follow the steps for battery replacement.

If your garage door sensor is old or malfunctioning, you may consider upgrading or replacing it. Upgrading to a newer model with advanced features can enhance the security and convenience of your garage door system. Alternatively, if the sensor is beyond repair, it is wise to replace it with a new one to ensure reliable performance.
Safety Tips And Precautions
Turning off power before installation: Before installing a garage door sensor, it is important to turn off the power to the garage. This ensures your safety by preventing electric shocks or damage to the sensor during the installation process.
Handling and storing the sensor safely: It is essential to handle the garage door sensor with care. Avoid dropping or mishandling the sensor, as it can lead to malfunctioning or damage. Additionally, ensure that the sensor is stored in a safe place to prevent any accidental damage or exposure to harsh environmental conditions.
Seeking professional assistance if needed: If you have doubts or lack experience in installing a garage door sensor, it is advisable to seek professional assistance. Professional installers have the necessary expertise and tools to ensure a safe and proper installation. They can also provide guidance on positioning the sensor correctly for optimal performance.
Frequently Asked Questions On How To Install Garage Door Sensor
Can You Add Sensors To An Old Garage Door?
Yes, you can add sensors to an old garage door. It’s a simple and effective way to enhance safety and security. Just install the sensors on each side of the door to detect any objects or obstructions in the path, providing added assurance.
Do Both Garage Door Sensors Need To Be Green?
No, both garage door sensors do not need to be green. The color of the sensors does not affect their functioning.
How Do You Reattach A Garage Door Sensor Bracket?
To reattach a garage door sensor bracket, follow these steps: 1. Identify the sensor bracket that needs reattaching. 2. Use a screwdriver to remove any screws or bolts from the bracket and the mounting surface. 3. Position the bracket back in place.
4. Align the screw holes. 5. Insert and tighten the screws or bolts securely to reattach the sensor bracket.
Conclusion
To sum up, installing a garage door sensor is a simple and crucial step towards enhancing the security of your property. By following the step-by-step guide provided in this blog post, you can easily set up the sensor and ensure added safety for your garage.
Don’t underestimate the importance of this device in safeguarding your belongings and loved ones. Take action today and enjoy peace of mind knowing that your garage is protected.
