Here is how to install garage door trim: measure and cut the trim to fit the door, then attach it using nails or adhesive. A well-installed garage door trim not only enhances the aesthetics of your garage but also helps to protect the door from damage caused by weather elements.
In this guide, we will discuss the step-by-step process of installing garage door trim, ensuring that you can complete the project with ease and efficiency. Whether you are a seasoned DIYer or a beginner, this guide will provide you with the essential information you need to successfully install trim around your garage door.
So let’s get started and transform your garage’s appearance while adding functional benefits.
Choosing The Right Garage Door Trim
When installing garage door trim, it is important to choose the right materials for the job. There are various types of garage door trim materials available, each with its own advantages and disadvantages.
One option is vinyl trim, which is popular due to its durability and low maintenance requirements. Vinyl trim also comes in a variety of colors, allowing homeowners to match it to their garage doors. Another option is wood trim, which offers a classic and traditional look. However, wood trim may require regular staining or painting to maintain its appearance.
When selecting garage door trim, there are several factors to consider. First, think about the climate in your area. Some materials may be more suitable for certain weather conditions than others. Additionally, consider the overall style of your home and the garage door itself. You want the trim to enhance the aesthetics of your garage, so choose a material and design that complements the existing features.
In conclusion, choosing the right garage door trim involves considering different material options and factors such as climate and style. By selecting the appropriate trim, you can enhance the overall look and functionality of your garage door.
Necessary Tools For Garage Door Trim Installation
To successfully install garage door trim, you will need a few essential tools:
1. Tape Measure: Accurately measure the dimensions of the trim.
2. Miter Saw: Use a miter saw to cut the trim at precise angles.
3. Nail Gun: Secure the trim to the garage door using a nail gun for a secure hold.
4. Level: Ensure that the trim is straight and level during installation.
5. Caulk Gun: Apply caulk to seal any gaps between the trim and the garage door.
6. Safety Glasses: Protect your eyes from potential hazards during the installation process.
7. Gloves: Wear gloves to keep your hands safe while handling tools and materials.
8. Safety Precautions: Before starting the project, remember to take necessary safety precautions. This includes wearing appropriate protective gear, following manufacturer instructions, and working in a well-ventilated area.
By having these essential tools and following safety precautions, you can confidently tackle your garage door trim installation project.
Preparing For Installation
Before installing garage door trim, it is essential to prepare adequately. One of the first steps is to measure the area where the trim will be installed. This ensures that you have the correct dimensions and materials. When measuring, start at the bottom of the door and measure up to the desired height for the trim. It is also important to measure the width of the door to determine the length of the trim pieces needed.
After measuring the area, gather all the necessary materials. This may include the trim pieces, measuring tape, saw, nails or screws, a level, and a pencil for marking measurements. Double-check to ensure you have all the required materials to avoid any delays or interruptions during the installation process.
Removing The Old Trim
Looking to install new garage door trim? The first step is to safely remove the existing trim. Ensuring that you maintain the condition of your garage door during the removal process is crucial. Here are the steps to follow:
- Start by carefully inspecting the trim and identifying any nails or screws holding it in place.
- Using a pry bar or a similar tool, gently pry the trim away from the door frame. Be cautious not to damage the door or the surrounding areas.
- If the trim is particularly stubborn, you can use a hammer and chisel to carefully cut through any adhesive or caulk holding it in place.
- Once the trim is loosened, continue prying it away from the door frame until it is completely removed.
- Inspect the door frame for any damage or imperfections that may need to be addressed before installing the new trim.
By following these steps, you can safely remove the old trim and prepare your garage door for the installation of new, fresh trim that will enhance its appearance. Remember to handle the removal process with care to avoid any unnecessary damage.
Installing The New Trim
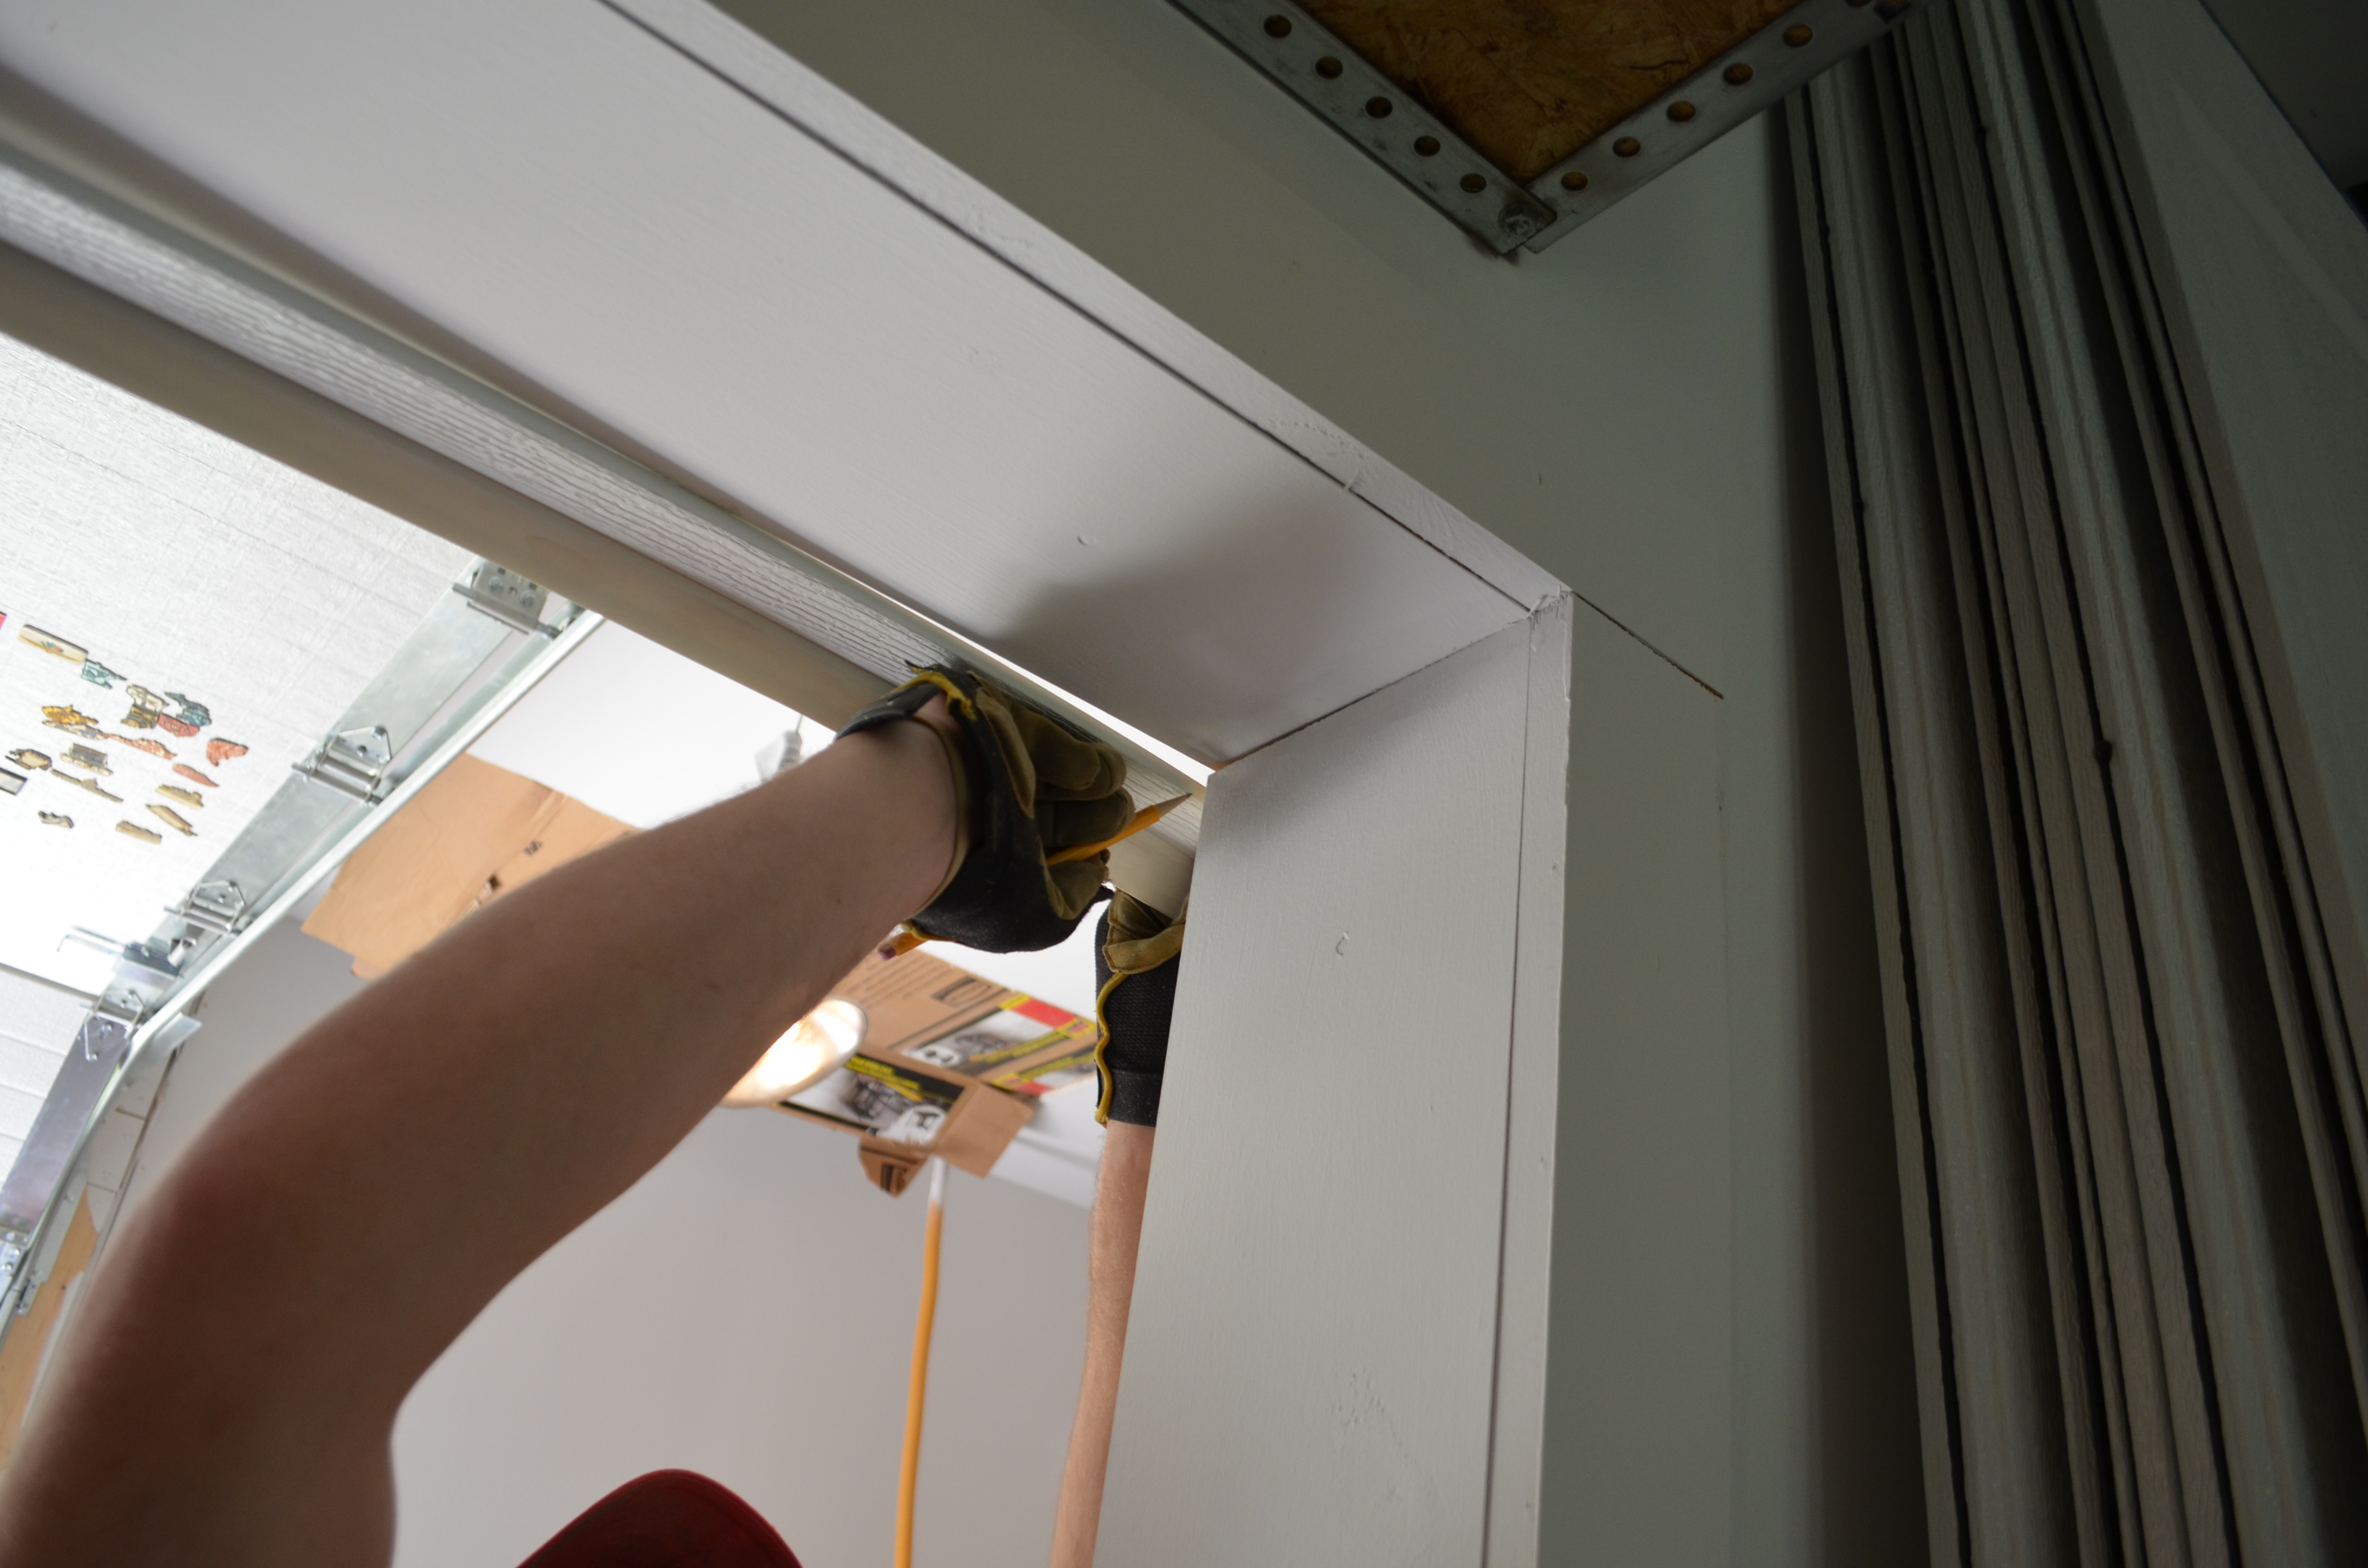
The first step in installing garage door trim is cutting the trim to the appropriate size. Measure the length and width of the trim needed for each section of the garage door. Use a miter saw to efficiently cut the trim to the correct dimensions. Take extra care to ensure precise cuts.
Once the trim is cut, the next step is attaching it securely to the garage door. Start by positioning the trim against the door and use a level to ensure it is straight. Use a hammer or a nail gun to fasten the trim in place. Securely attach the trim by driving nails or using screws at regular intervals along the length of the trim.
After attaching the trim, make sure to step back and assess the appearance. Check for any gaps or areas that may require additional adjustments. Fill any gaps with caulk to create a seamless and professional finish.
Credit: www.garagedoorstuff.com
Finishing And Sealing The Trim
When installing garage door trim, it is crucial to finish and seal it properly for a professional look. One way to achieve this is by applying caulking or sealant to ensure a tight and secure fit. This will not only enhance the appearance but also provide protection against elements such as rain and moisture.
Another important step is painting or staining the trim to match the aesthetic of the garage door. This can be done by selecting a suitable paint or stain that complements the color and style of the door. Properly painting or staining the trim will add a cohesive look to the garage area.
By following these steps, you can achieve a professional and visually appealing finish for your garage door trim.
Maintenance And Care Tips For Garage Door Trim
Maintenance and Care Tips for Garage Door Trim:
- Regular cleaning and inspection routines are essential for maintaining the condition of your garage door trim. This helps to identify any signs of damage or wear and tear early on.
- Cleaning the trim is a simple process that can be done using a mild detergent and water. Avoid harsh chemicals as they can damage the material.
- During the cleaning process, pay attention to any cracks or dents that may have occurred. Repairing or replacing damaged trim sections promptly will prevent further damage and deterioration.
- Regular inspection allows you to check for signs of rot, termites, or mold growth. If any issues are detected, it’s important to take immediate action to prevent further damage.
- Painting or staining the trim every few years is recommended to maintain its appearance and protect it from the elements.
- Ensure that the garage door trim is properly sealed to prevent moisture from seeping in and causing damage.
Enhancing The Look Of Your Garage Door With Trim
htmlEnhancing the Look of Your Garage Door with Trim
Looking to elevate the appearance of your garage door trim? Consider adding decorative elements or accents to achieve a more polished and eye-catching look. By incorporating trim, you can enhance the overall aesthetic appeal of your garage door.
One creative idea is to use molding to frame the perimeter of the door, giving it a more defined and finished look. Additionally, you can consider adding window trim or overlays to create an architectural detail that adds visual interest.
Another popular option is to paint the trim in a contrasting color that complements the overall color scheme of your home. This can create a striking visual effect and make your garage door stand out.
Incorporating decorative hardware, such as handles and hinges, can also add an element of charm and character to your garage door. These small details can make a big difference in transforming the overall look of your garage.
Frequently Asked Questions For How To Install Garage Door Trim
What Kind Of Nails To Use For Garage Door Trim?
For garage door trim, it is best to use finishing nails or brad nails. These types of nails are small and thin, making them suitable for attaching trim pieces. The nails should be long enough to penetrate the trim and secure it to the wall or door frame.
What Is The Trim Around The Garage Door Called?
The trim around a garage door is commonly referred to as “garage door trim. ” It serves as a decorative and protective border, enhancing the visual appeal of the door while also providing structural support. Garage door trim is available in various materials, such as vinyl or wood.
Should You Caulk The Bottom Of Garage Door Trim?
Yes, it is recommended to caulk the bottom of garage door trim. Caulking helps to seal any gaps or cracks, preventing moisture, insects, and drafts from entering the garage. It also helps to enhance the overall insulation and energy efficiency of the garage.
Conclusion
Installing garage door trim is a simple and rewarding project that can enhance the appearance of your home. By following the step-by-step instructions in this blog post, you can easily achieve professional-looking results. Remember to measure accurately, use the right tools, and take your time to ensure a perfect fit.
With the right approach, you’ll have a beautifully finished garage door in no time.