To install garage weather stripping, start by cleaning the surface thoroughly and measuring the length needed. Then, cut the weather stripping to size, peel off the adhesive backing, and firmly press it into place along the bottom of the garage door.
Are you tired of drafts, pests, or rainwater seeping into your garage? Installing garage weather stripping can help solve these problems. Weather stripping creates a seal along the bottom of your garage door, preventing heat loss, drafts, and even pests from entering.
In addition to keeping your garage insulated from the elements, weather stripping also helps reduce noise and dust contamination. This easy, do-it-yourself project only requires a few basic tools and some simple steps. In this guide, we will walk you through the process of installing garage weather stripping, ensuring a tight seal and a well-protected garage space.
Why Garage Weather Stripping Is Essential
Garage weather stripping plays a crucial role in maintaining the overall integrity of your garage. It is essential for various reasons:
- Protection against drafts: Weather stripping seals gaps and cracks around the garage door, preventing cold or hot air from entering the garage
- Moisture prevention: By sealing gaps, weather stripping prevents water infiltration, which can cause damage to the garage and its contents
- Pest control: Weather stripping acts as a barrier, reducing the likelihood of insects, rodents, and other pests from entering the garage
- Energy efficiency: Properly installed weather stripping helps to insulate the garage, reducing heat or cooling loss and improving energy efficiency
Installing garage weather stripping has several benefits, such as minimizing drafts, preventing moisture, and increasing energy efficiency. It is an essential component for maintaining a well-insulated and secure garage.
Determine The Type Of Weather Stripping Required
When installing garage weather stripping, the first step is to determine the type of weather stripping required. Several factors should be considered when making this decision.
The first factor is to assess the specific needs of your garage. Consider the climate conditions in your area and the level of insulation required. Different types of weather stripping are designed to withstand different temperature variations and provide varying levels of insulation.
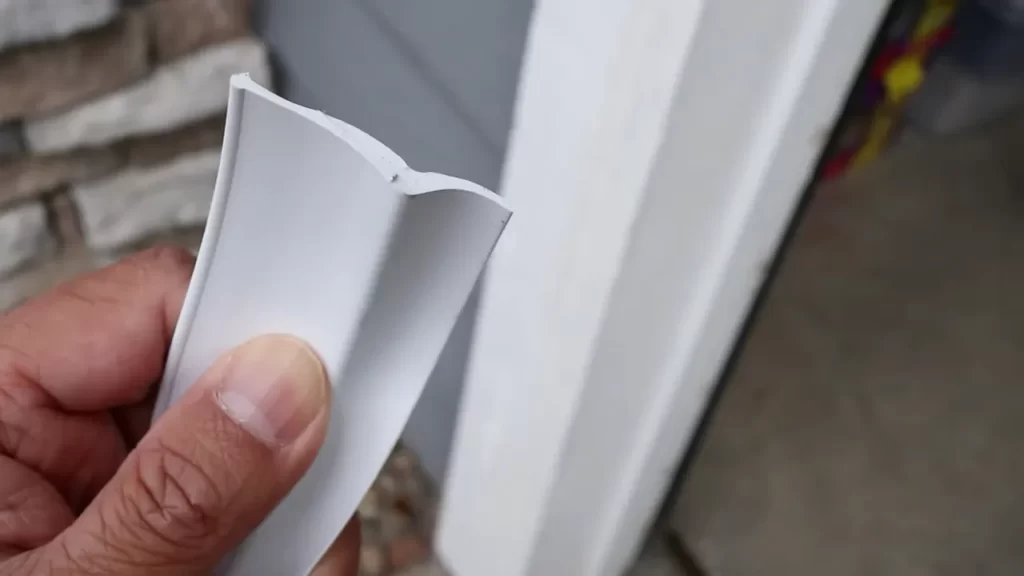
Next, familiarize yourself with the different types of weather stripping available. Some common options include adhesive-backed foam tape, V-strip weather stripping, and door threshold seals. Each type has its own benefits and drawbacks, so it’s important to choose the most suitable one for your garage.
To determine the most suitable type for your garage, consider factors such as the size and shape of the door, the material of the door and frame, and the ease of installation and maintenance. Additionally, take into account any specific requirements or preferences you may have.
By carefully evaluating these factors, you can select the appropriate weather stripping for your garage and ensure optimal insulation and protection against the elements.
Tools And Materials Needed For Installation
Tools and Materials Needed for Installation:
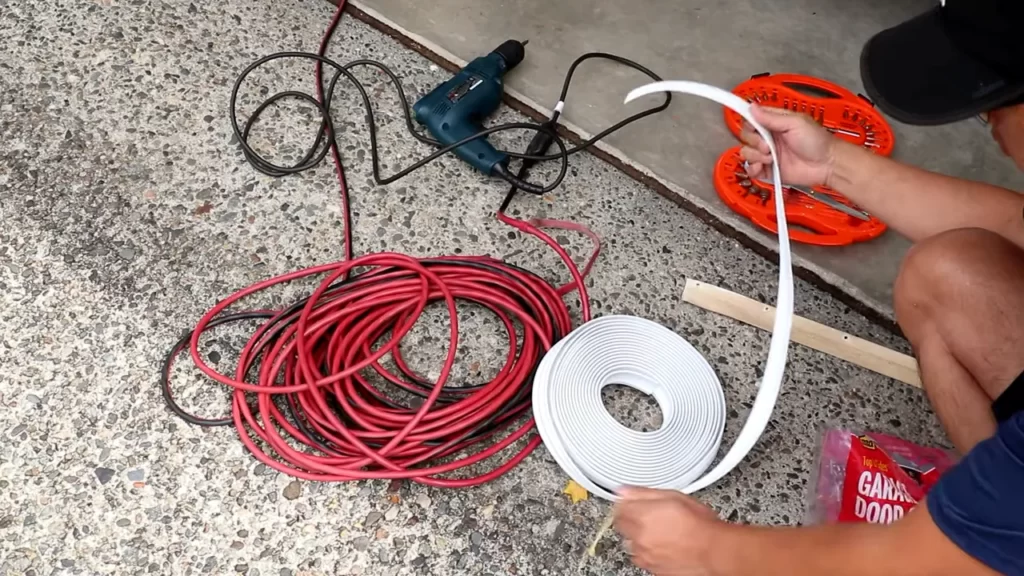
When preparing to install garage weather stripping, there are several essential tools you will need. These include a tape measure to accurately measure the dimensions of your garage door, a utility knife to cut the weather stripping to size, and a screwdriver or drill to secure the stripping in place.
As for materials, there are a few options to consider. The most commonly used material for weather stripping is rubber, as it is durable and provides a good seal. However, you may also find options made of vinyl or foam, which can be equally effective.
| Suggested Materials for Weather Stripping |
|---|
| Rubber |
| Vinyl |
| Foam |
When it comes to adhesives and sealants, it is important to choose a product designed for outdoor use and capable of bonding well with the material of your garage door. Some commonly used options include adhesive tapes, silicone sealants, or specific weather stripping adhesives.
Finally, safety equipment is essential to protect yourself during the installation process. Consider wearing gloves to prevent any accidental cuts or abrasions, as well as safety glasses to shield your eyes from any debris.
Preparing The Garage Door For Weather Stripping Installation
If you are planning to install garage weather stripping, it is important to properly prepare your garage door. One of the first steps in this process is clearing and cleaning the garage door. Make sure to remove any debris or dirt from the surface of the door to ensure proper adhesion of the weather stripping.
Inspecting the existing weather stripping is also essential. Check for any signs of wear or damage such as cracks or gaps. If the weather stripping is in poor condition, it will need to be removed before installing the new one.
Properly measuring the dimensions of the garage door is crucial to ensure a proper fit for the weather stripping. Measure the width and height of the door, as well as any slots or grooves where the weather stripping will be placed.
By following these steps, you can ensure a successful installation of garage weather stripping, which will help keep your garage insulated and protected from the elements.
Installing Bottom Weather Stripping
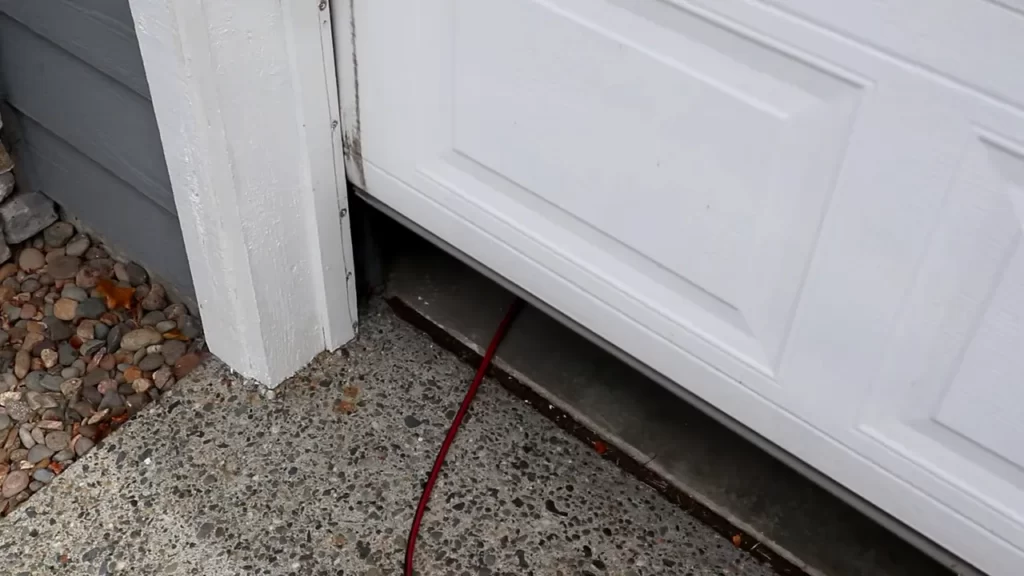
Installing Bottom Weather Stripping: Garage weather stripping is essential for maintaining a comfortable and insulated space. When it comes to bottom weather stripping, its purpose is to create a seal between the garage door and the floor. This prevents drafts, debris, and pests from entering the garage. To install bottom weather stripping, follow these steps: 1. Measure the width and length of the garage door. Cut the weather stripping to size using a utility knife. 2. Clean the bottom of the garage door thoroughly to ensure proper adhesion. Remove any existing weather stripping. 3. Apply adhesive to the bottom of the garage door and attach the weather stripping, pressing firmly to secure it in place. 4. Trim any excess weather stripping using a utility knife. 5. Test the door to ensure a proper seal. Close the door and inspect for any gaps or air leaks. Adjust the width and length of the weather stripping as required. By installing bottom weather stripping, you can enhance the insulation and energy efficiency of your garage, creating a more comfortable and protected space.
Adding Garage Door Threshold Seal
| Installing garage weather stripping, specifically a threshold seal, is an essential step in maintaining the insulation and security of your garage. This type of seal offers numerous benefits. It helps keep out drafts, insects, dust, and debris while also preventing water from entering the garage. By effectively sealing the gap between the garage floor and the bottom of the door, it enhances energy efficiency and reduces the risk of moisture damage. |
| Before installing the threshold seal, it’s important to prepare the garage floor properly. Start by cleaning the area thoroughly to remove any dirt or debris. Make sure the floor is dry before proceeding. Next, measure the width of the garage door opening and cut the threshold seal to fit. |
| Once the floor is prepared, it’s time to install the threshold seal. Apply a bead of adhesive along the edge of the seal and press it firmly against the garage floor. Make sure it is aligned with the bottom of the door and extends across the entire width of the opening. Use a roller or block of wood to ensure proper adhesion. Allow the adhesive to dry completely before testing the seal. |
| After the installation, it’s crucial to check for any gaps or unevenness. Close the garage door and inspect the seal from the inside. Look for any areas where the seal is not making full contact with the door. This can be fixed by adjusting the placement of the seal or adding additional adhesive if necessary. It’s important to have a proper seal to maximize the benefits and effectiveness of the threshold seal. |
Applying Weather Stripping To The Sides And Top Of
The Garage Door
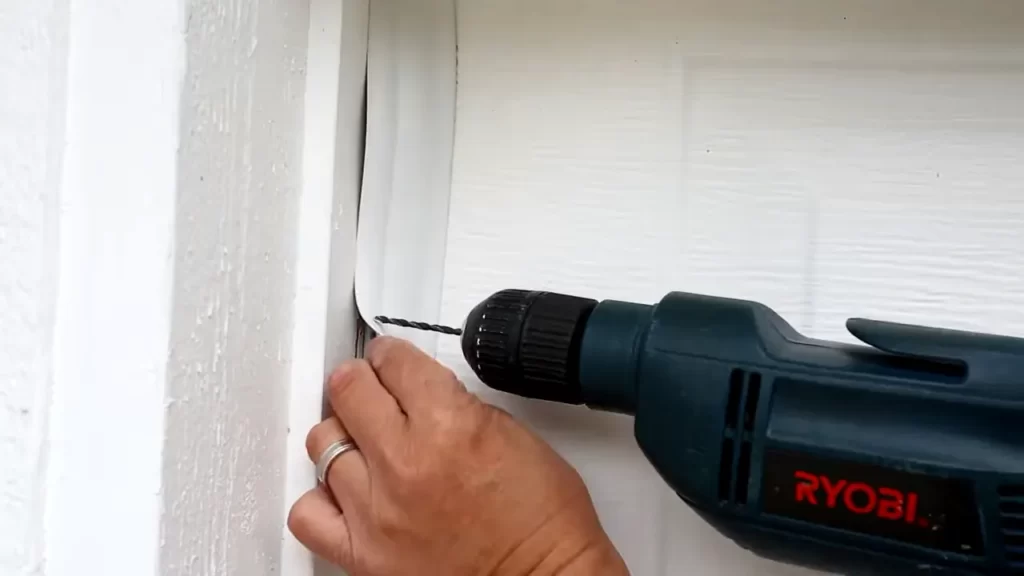
Applying weather stripping to the sides and top of the garage door is essential for creating an effective seal and preventing drafts and energy loss. To install side weather stripping, start by measuring and cutting the stripping to the length of the vertical track. Fit the stripping into the track and secure it using screws or adhesive, ensuring a snug fit. Repeat this process on the other side.
To ensure a tight seal along the sides, it’s important to check for any gaps or spaces that may allow air to pass through. Use caulk or sealant to fill in any holes or cracks. Additionally, attaching a bottom seal to the garage door will further prevent drafts and create a more energy-efficient space.
Installing top weather stripping is equally important for effective insulation. Measure and cut the stripping to match the width of the door frame. Attach the stripping to the top section of the garage door using adhesive or screws. This will provide an extra layer of protection against weather elements.
Sealant Application For Enhanced Protection
The proper application of sealant is essential to ensure effective protection when installing garage weather stripping. Sealants act as a barrier against unwanted air infiltration, moisture, and other potential intrusions. Choosing the right type of sealant for your climate is crucial for long-lasting results.
Before applying the sealant, carefully clean and dry the surfaces where the weather stripping will be attached. This will help to maximize adhesion and ensure a secure bond. Make sure to follow the manufacturer’s instructions for both the weather stripping and the sealant to guarantee proper application.
| Overview of sealants used with weather stripping |
|---|
| Acrylic-based sealants |
| Silicone sealants |
| Polyurethane sealants |
| Butyl rubber sealants |
Apply the sealant evenly along the edge of the weather stripping, ensuring
complete coverage. Use a caulking gun or a suitable tool for uniform application. After attaching the weather stripping, press firmly to ensure a tight seal. Regularly inspect the weather stripping and reapply sealant as needed to maintain its effectiveness.
By following these tips for proper application and maintenance, you can enhance the protection provided by garage weather stripping, keeping your garage insulated and protected from the elements.
Testing And Adjusting The Weather Stripping
When installing garage weather stripping, it is important to test and adjust it to ensure maximum efficiency and effectiveness. Start by checking for any gaps or leaks in the existing weather stripping. If any are found, they should be promptly addressed by adjusting the weather stripping to eliminate the gaps and provide a tight seal.
It is also crucial to verify proper insulation and protection. Make sure that the weather stripping is providing the intended thermal and weather insulation, and that it is protecting the garage from outside elements.
Performing routine maintenance and inspections is another key step. Regularly inspect the weather stripping to detect any wear and tear, and promptly replace it if needed. Additionally, take the time to clean and lubricate the weather stripping as part of your maintenance routine, ensuring its longevity and optimal performance.
Frequently Asked Questions Of How To Install Garage Weather Stripping
How Do You Attach Weather Stripping To A Garage Door?
To attach weather stripping to a garage door, follow these steps: 1. Clean the surface of the door to ensure proper adhesion. 2. Measure the length needed and cut the weather stripping accordingly. 3. Apply adhesive to the back of the weather stripping.
4. Press the weather stripping firmly onto the door, starting from one end and working your way to the other. 5. Allow the adhesive to dry completely before using the garage door.
How Do You Install Weather Stripping On A Garage Floor?
To install weather stripping on a garage floor, follow these steps: 1. Clean the floor thoroughly. 2. Measure and cut the weather stripping to fit. 3. Apply adhesive to the bottom of the weather stripping. 4. Press the weather stripping firmly onto the garage floor.
5. Allow the adhesive to dry completely.
How Do You Install Rubber Strips On A Garage Door?
To install rubber strips on a garage door, follow these steps: 1. Measure the length and width of the door. 2. Cut the rubber strips to fit the measurements. 3. Clean the area where the strips will be attached. 4. Apply adhesive to the back of the strips.
5. Press the strips firmly against the bottom of the door.
Conclusion
Installing garage weather stripping is a simple and effective way to improve energy efficiency and reduce drafts in your garage. By following the steps outlined in this guide, you can ensure a proper installation that will provide long-term benefits for your home.
Remember to measure accurately, clean the surface thoroughly, choose the right type of weather stripping, and apply it correctly. Taking the time to install weather stripping in your garage will not only save you money on energy bills but also create a more comfortable environment for your vehicles and belongings.
Start the installation process today and enjoy the benefits of a well-insulated garage