Installing Hardie lap siding requires measuring and cutting the siding to fit, nailing it into place, and sealing the joints for a secure and weather-resistant installation. Hardie lap siding is a popular choice for homeowners looking to enhance the durability and aesthetic appeal of their exterior walls.
Made from fiber cement, this siding material is resistant to moisture, rot, and pests, making it a long-lasting and low-maintenance option. Additionally, the installation process is relatively straightforward and can be completed with a few essential tools and some basic carpentry skills.
We will walk you through the steps to install Hardie lap siding on your home, providing you with a comprehensive guide to achieve a professional-looking result. So, let’s get started and transform your home’s exterior with beautiful and durable Hardie lap siding.
Tools And Materials Needed
htmlList Of Tools Required For The Installation
- Hammer
- Tape measure
- Circular saw
- Utility knife
- Nails or screws
- Speed square
- Pry bar
- Nail gun
List Of Materials Needed For The Installation
- Hardie lap siding
- Trim boards
- House wrap
- Flashing
- Siding nails or screws
- Paint or primer
Preparing The Installation Area
In order to install Hardie Lap Siding, proper preparation of the installation area is crucial. This involves clearing the area of any debris or obstructions that may hinder the installation process. Additionally, it is important to inspect the existing structure to ensure that it is in good condition and can support the siding properly.
When clearing the area, remove any plants, furniture, or other objects that may be in the way. This will provide a clean space to work and prevent any damage to these items. Inspecting the existing structure involves checking for any signs of damage or rot that may need to be addressed before the siding can be installed.
During the preparation process, it is also essential to take necessary precautions for safety. Wear appropriate protective gear, such as gloves and safety glasses, to protect yourself from any potential hazards. Follow proper safety guidelines and procedures to ensure a safe working environment throughout the installation process.
Measuring And Cutting The Siding
When installing Hardie Lap Siding, it is crucial to measure the siding boards accurately to ensure a proper fit. Correctly measuring the siding boards will help minimize waste and ensure a professional-looking installation. To measure the siding boards, you will need a tape measure and a pencil.
Start by measuring the length of the walls where the siding will be installed. Measure from one corner to the other, making sure to take into account any breaks or interruptions in the wall, such as windows or doors. Write down the measurements and add an extra inch as a safety margin.
Once you have measured the length, determine the width of the siding boards. Measure the height of the area to be covered, excluding any areas where windows or doors will be installed. Again, add an extra inch to the measurement to allow for adjustments during the installation process.
After measuring, it’s time to cut the Hardie Lap Siding boards to the correct size. Use a circular saw or a fiber cement blade on a sliding miter saw for precise and clean cuts. Be sure to wear eye protection and follow the manufacturer’s instructions for using the cutting tools. Remember to measure twice and cut once to avoid any mistakes and wasted materials.
Installing The First Row
To install Hardie Lap Siding, begin by aligning and securing the starter strip. Make sure that it is level and positioned correctly before nailing it in place. Once the starter strip is secured, you can start nailing the first row of siding boards.
When nailing the first row, ensure that each board is placed with a small gap between them for expansion. Use galvanized nails that are long enough to penetrate through the siding and into the underlying sheathing. Space the nails evenly, approximately 16 inches apart, and make sure to secure each board to the studs or furring strips beneath.
Continue this process for the entire first row, remembering to check for level and alignment as you go. Take your time to ensure that each board is securely fastened and properly positioned. Once the first row is complete, you can move on to installing the subsequent rows, following the manufacturer’s guidelines for overlap and fastening.
Installing Subsequent Rows
When installing subsequent rows of Hardie Lap Siding, it is important to properly overlap the joints to ensure a tight and secure fit. Start by applying a continuous bead of caulking to the top of the previous row. This will help seal any potential gaps and provide additional weather resistance.
Next, align the bottom edge of the new siding piece with the top edge of the previous row. Make sure they are flush and level. To securely fasten the siding, use corrosion-resistant galvanized nails that are specifically designed for use with Hardie Lap Siding.
When nailing, position the nail above the overlap area to prevent splitting. Place one nail every 16 inches along the width of the siding, keeping it 1 inch from the top edge. Avoid nailing too tightly, as it may cause buckling and hinder proper expansion and contraction.
Continue this process for each subsequent row, overlapping the joints properly and ensuring proper alignment and nailing. Following these installation guidelines will result in a durable and visually pleasing Hardie Lap Siding installation.
Cutting And Fitting Around Windows And Doors
Installing Hardie lap siding around windows and doors requires accuracy in measuring and marking. Before cutting the siding, ensure you measure the opening accurately, taking into account any trim or casings. Use a tape measure to determine the width and height, and then transfer these measurements to the siding.
Next, mark the siding with a pencil or marker to indicate the dimensions of the opening. Be sure to align the marks with the bottom edge of the siding to ensure proper installation. To cut the siding, use a circular saw or a cutting tool specifically designed for Hardie lap siding. Make sure to follow the manufacturer’s instructions for cutting and safety precautions.
When fitting the siding around windows and doors, it’s essential to leave a small gap for expansion and contraction. This gap will prevent the siding from buckling or warping over time. Refer to the installation instructions provided by the manufacturer for the appropriate gap size.
Applying And Finishing With Trim
Installing trim pieces is an essential step when applying and finishing Hardie Lap Siding for a polished and professional look. Before starting the installation process, it is important to gather all the necessary trim pieces. These include corner trims, window and door trims, soffit trims, and fascia trims.
Once you have the trim pieces, begin by measuring and cutting them to the appropriate length. Position the trim pieces in the desired locations, ensuring they are level and plumb. Secure them with the appropriate nails or screws, making sure they are securely attached to the structure.
After installing the trim pieces, the next step is to properly caulk the joints and gaps between the siding and the trim. Use a high-quality caulk that is specifically designed for exterior use. Apply a bead of caulk along the seams, smoothing it out with a caulk tool or your finger.
Once the caulk has dried, it is time to paint the siding and the trim. Choose a high-quality exterior paint that is compatible with the Hardie Lap Siding. Apply the paint evenly, using a brush or roller. Multiple coats may be necessary to achieve the desired coverage and finish.
By following these steps and paying attention to detail, you can achieve a professional installation and finish for your Hardie Lap Siding.
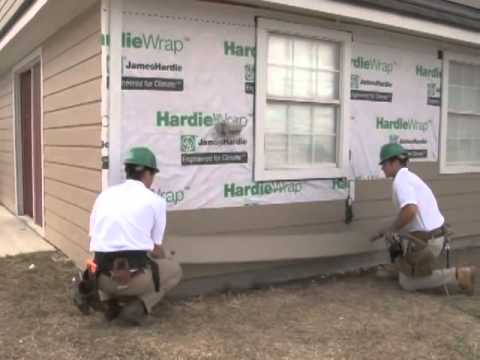
Credit: m.youtube.com
Cleaning And Maintenance Tips
Regular cleaning and maintenance is essential to keep your Hardie Lap Siding looking its best and ensuring its longevity. Here are a few tips to help you maintain the siding’s appearance and durability:
1. Clean Regularly: Regularly washing the siding with a mild mixture of water and soap can help remove dirt, dust, and stains. Use a soft-bristle brush or a sponge to gently scrub the surface.
2. Inspect for Damage: Regularly inspect your siding for any signs of damage such as cracks, chips, or loose boards. If you notice any issues, address them immediately to prevent further damage.
3. Avoid Pressure Washing: While pressure washing may seem like an efficient cleaning method, it can actually damage the siding. Instead, opt for a gentle hand wash or use a low-pressure setting on your pressure washer.
4. Trim Nearby Trees and Plants: Overhanging branches and vines can scratch and damage your siding. Regularly trim nearby trees and plants to prevent any potential harm.
5. Address Mold and Mildew: If you notice mold or mildew growth on your siding, use a solution of water and bleach to remove it. Scrub gently and rinse thoroughly.
Remember, by following these cleaning and maintenance tips, you can ensure that your Hardie Lap Siding remains in impeccable condition, enhancing the overall appearance of your home.
Frequently Asked Questions Of How To Install Hardie Lap Siding
What’s The Best Way To Attach Hardieplank Siding?
The best way to attach HardiePlank siding is by using corrosion-resistant nails or screws specifically made for this type of siding. Make sure to follow the manufacturer’s installation instructions and use the recommended fasteners to ensure a secure and long-lasting installation.
Do You Nail Or Screw Hardie Siding?
To attach Hardie siding, it is recommended to use nails instead of screws.
Can You Install Hardie Board Yourself?
Yes, you can install Hardie board yourself. It’s a DIY-friendly project. Just follow the installation instructions provided by the manufacturer. Make sure to have the necessary tools, skills, and safety precautions.
What Nails Should I Use For Hardie Lap Siding?
For Hardie lap siding, it’s important to use nails specifically designed for siding installation. Choose hot-dipped galvanized or stainless steel nails with a minimum gauge of 15. These nails offer superior corrosion resistance and durability, ensuring a secure and long-lasting siding installation.
Avoid using standard nails that may corrode over time.
Conclusion
Installing Hardie lap siding is a straightforward process that can give your home a durable and attractive exterior. By following the steps outlined in this guide, you can ensure a successful installation and enhance the overall value of your property.
With its resistance to weather elements and low maintenance requirements, Hardie lap siding is a smart choice for homeowners looking for a long-lasting solution. Start your project today and enjoy the benefits of this versatile material.