o install a sink trap, start by placing the trap under the sink drain and tightening the slip nuts with a wrench. Then, connect the trap to the tailpiece using a slip joint nut and washer.
Removing The Existing Trap
Installing a sink trap can be a simple and straightforward process. If you are looking to remove an existing trap, there are a few steps you can follow. First, you need to loosen the slip nuts that connect the trap to the drain pipe. Using a wrench, turn the slip nuts counterclockwise to loosen them. Once the slip nuts are loose, you can easily detach the trap from the drain pipe. Be sure to hold onto the trap tightly so that it does not fall or create a mess. Once the trap is detached, you can proceed to clean it or replace it with a new one. Make sure to tighten the slip nuts securely when reattaching the trap to prevent any leaks. With these simple steps, you can successfully remove the existing sink trap and prepare for a new installation.
Preparing The New Sink Trap
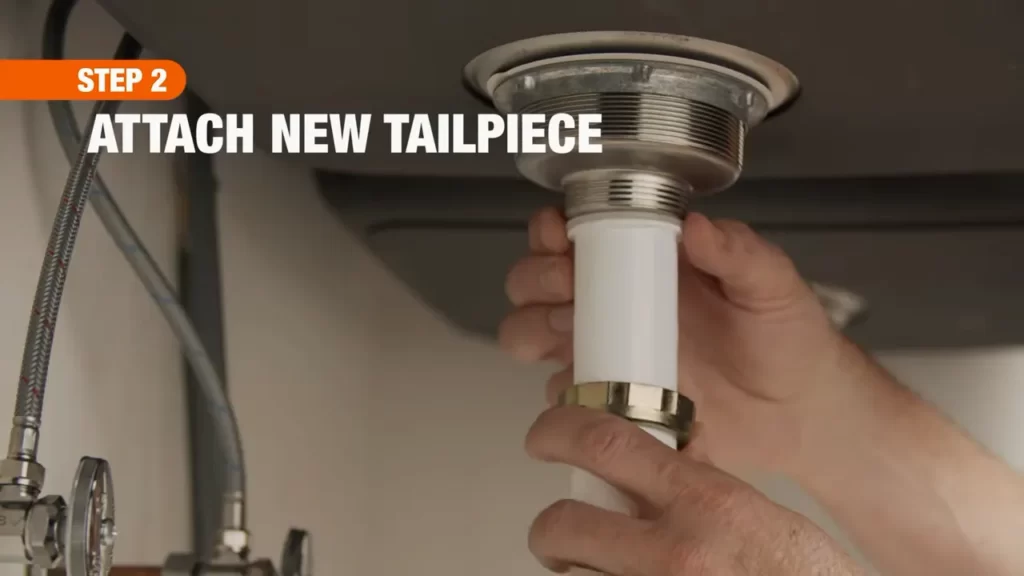
Installing a sink trap involves a few important steps that should be followed carefully. It is crucial to prepare the new sink trap before starting the installation process. This includes cleaning and inspecting the new trap to ensure it is free from any debris or damage.
Once the trap is cleaned and inspected, plumber’s tape should be applied to the threaded connections. This tape helps to create a tight seal and prevent any leaks in the future. It is important to wrap the tape clockwise around the threads, making sure to cover them completely.
By following these steps and properly preparing the new sink trap, you can ensure a successful installation that will function effectively and without any issues. Remember to check for any leaks after the installation is complete, and make any necessary adjustments to ensure proper functionality.
Attaching The New Sink Trap
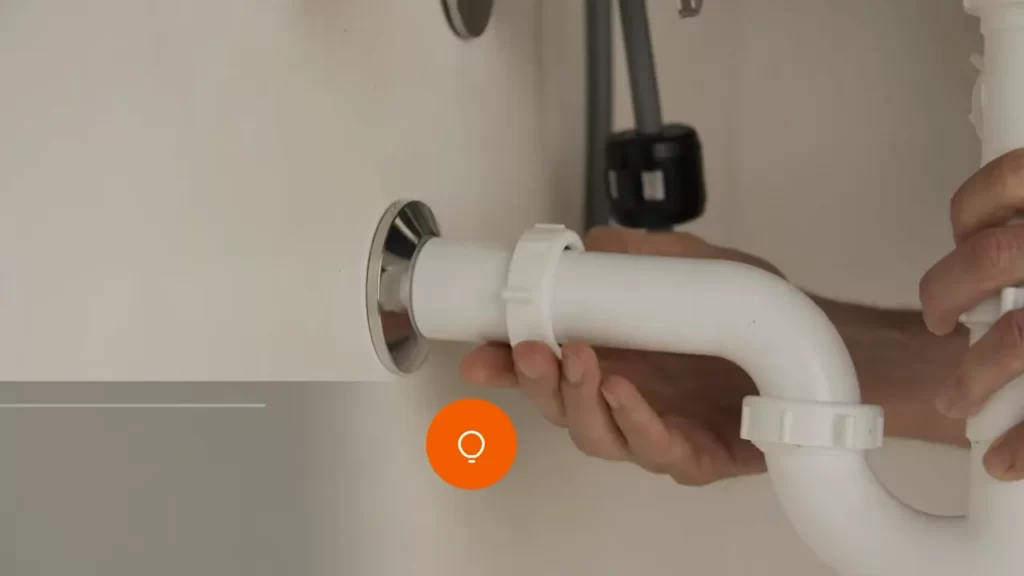
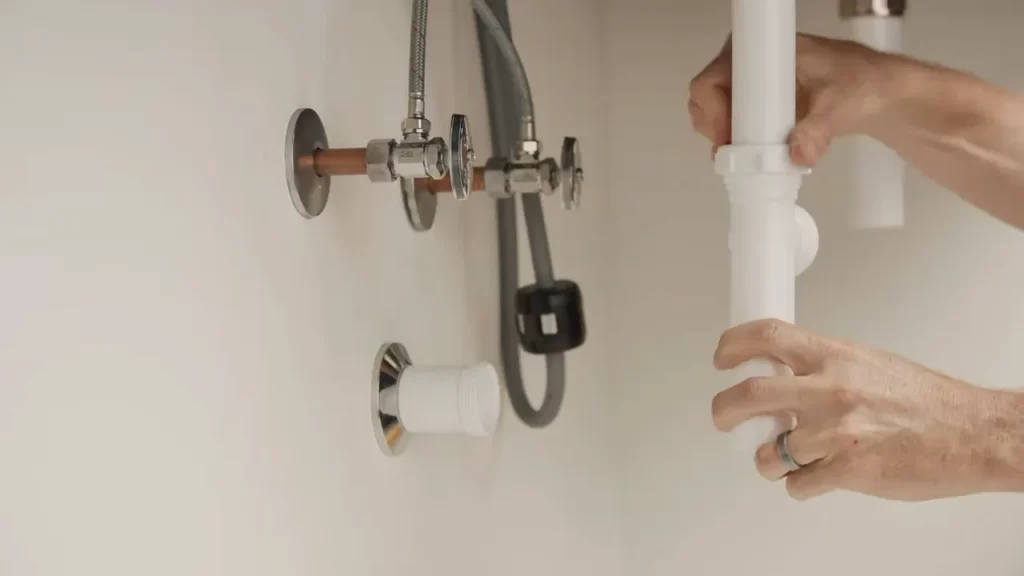
When installing a new sink trap, it is important to connect the trap to the drain pipe correctly. First, ensure that the trap is aligned properly with the drain pipe. Then, use slip nuts to secure the trap in place. Hand tighten the slip nuts to ensure a secure connection. Once the trap is attached, it is important to check for leaks. Run water through the sink and inspect the trap for any signs of leakage. If any leaks are detected, tighten the slip nuts further or reposition the trap if necessary.
By following these steps, you can successfully attach a new sink trap and ensure a proper connection with the drain pipe. Remember to check for leaks to avoid any future issues.
Dealing With Leaks
Dealing with leaks: When it comes to installing a sink trap, leaks can be a common issue that needs to be addressed. The first step in fixing a leak is identifying its source. Check all the connections and look for any signs of water leakage. Once you have identified the source, the next step is to re-tighten the connections. Use a wrench to tighten any loose connections. If the leak persists, you can try applying plumber’s tape to the threaded parts of the connections. This will create a watertight seal and prevent any further leaks. Remember to apply the tape in a clockwise direction to ensure a secure fit. Regularly inspect the sink trap for any signs of leaks and address them promptly to avoid any potential water damage. By following these steps, you can easily handle leaks and ensure a properly functioning sink trap.
Clearing Clogs In The Trap
To install a sink trap, start by placing a bucket or container under the trap to catch any water or debris that may come out. Next, unscrew the nuts or connectors holding the trap in place and carefully remove the trap.
To clear clogs in the trap, you can use a drain snake or plunger. A drain snake is a long, flexible tool that can be inserted into the drain to break up and remove obstructions. Simply insert the snake into the drain, rotate it while pushing it through the pipe, and then pull it out to collect any debris. Alternatively, a plunger can create suction and pressure to dislodge clogs. Place the plunger over the drain, ensuring a tight seal, and then push and pull the plunger several times to break up the obstruction.
To prevent future clogs in the sink trap, regular maintenance is key. This includes avoiding pouring grease, coffee grounds, or food scraps down the drain. Use drain strainers or screens to catch hair and larger debris. Additionally, running hot water down the drain after each use can help flush away any residues that may accumulate in the trap.
Choosing The Right Type Of Sink Trap
When it comes to installing a sink trap, it is important to choose the right type that meets your specific needs and preferences. There are different types of traps available, each with its own advantages. Some commonly used options include:
| Type of Sink Trap | Advantages |
|---|---|
| PEX Trap | Flexible and easy to install, resistant to corrosion. |
| PVC Trap | Durable, inexpensive, and widely available. |
| Brass Trap | Sturdy, long-lasting, and aesthetically pleasing. |
| Cast Iron Trap | Highly durable and suitable for heavy usage. |
By selecting the trap that best suits your requirements, you can ensure proper drainage and prevent any potential plumbing issues. Consider factors such as durability, flexibility, cost, and aesthetics when making your decision. It is also recommended to consult with a professional plumber for expert advice and proper installation. With the right sink trap in place, you can enjoy a functional and hassle-free plumbing system.
Proper Maintenance For A Long-lasting Trap
Having a properly installed and well-maintained sink trap is essential for the smooth operation of your plumbing system. Regular cleaning and inspection are key to ensuring the longevity of your trap. It is important to recognize signs of wear and promptly replace any worn-out components.
Start by regularly cleaning your sink trap to prevent clogs and foul odors. Remove the trap and use a brush and mild detergent to clean away any accumulated debris. Rinse thoroughly before reattaching it to the drain.
In addition to regular cleaning, inspect the trap for any signs of wear or damage. Look for cracks, leaks, or corrosion on the trap itself and the connecting pipes. If you notice any issues, it is crucial to replace the affected components to maintain proper functioning.
By following these maintenance steps, you can ensure that your sink trap remains in good condition and contributes to the efficient functioning of your plumbing system.
Frequently Asked Questions For How To Install Sink Trap
How Do You Put A Trap On A Sink?
To put a trap on a sink, follow these steps: 1. Turn off the water supply. 2. Place a bucket under the sink to catch any water. 3. Loosen the nuts connecting the trap to the drain pipe using pliers. 4.
Remove the old trap and replace it with a new one. 5. Tighten the nuts to secure the trap in place.
How Do You Install A Pvc Trap?
To install a PVC trap, follow these steps: 1. Prepare the necessary materials: PVC trap, pipe cutter, primer, and cement. 2. Cut the existing pipe to accommodate the trap. 3. Apply primer to the pipe and the trap’s inlet. 4.
Then apply cement to both and push the trap onto the pipe. 5. Allow it to dry, and you’re done!
How Do You Attach A P-trap To A Drain Pipe?
To attach a p-trap to a drain pipe, first, ensure the p-trap matches the diameter of the drain pipe. Then, apply plumber’s putty to the drain tailpiece and insert it into the drain pipe. Next, connect the p-trap’s other end to the drainage system.
Finally, tighten the nuts by hand and check for leaks.
Conclusion
Installing a sink trap doesn’t have to be a daunting task. With the right tools and a step-by-step guide, you can easily complete the installation process. Remember to carefully follow the instructions to ensure a secure and leak-free connection. By properly installing a sink trap, you’ll be able to effectively prevent clogs and keep your plumbing system running smoothly.
So, don’t hesitate to tackle this DIY project and enjoy a fully functioning sink in no time!