To install a wood fence post, dig a hole, insert the post, fill with concrete, and let it set. This secure method ensures a sturdy and durable fence post installation.
Wood fence posts can be installed easily by following these steps. First, determine the location of the post. Then, dig a hole deep enough to accommodate one-third of the post’s length. Next, put the post in the hole and fill it with concrete, making sure it is level.
Finally, let the concrete set overnight before attaching the fence panels. This straightforward process will result in a strong and reliable wood fence post installation.

Materials Needed For Installing Wood Fence Post
Materials Needed for Installing Wood Fence Post:
- Wood fence posts
- Post hole digger
- Concrete mix
- Gravel
- Water
- Level
- Tape measure
- Fence panels
- Nails or screws
- Hammer or drill
Before installing a wood fence post, gather all the necessary materials. You will need wood fence posts, which will serve as the main support for your fence. Additionally, you will need a post hole digger to create holes in the ground for the posts.
To secure the posts and ensure stability, you will require concrete mix and gravel. Mix the concrete according to the manufacturer’s instructions, and add it to the holes along with some gravel for drainage. Pour water into the holes to assist in setting the concrete.
Use a level to ensure that the posts are plumb and straight. Measure the height of the fence panels with a tape measure to achieve proper placement of the posts.
Finally, attach the fence panels to the wood posts using nails or screws. You can use a hammer or drill for this purpose.
Step 1: Planning And Preparation
Planning and preparation is an essential first step before installing a wood fence post. To begin, measure and mark the area where the fence will be located. This will help determine the number of posts needed and ensure accurate placement.
Next, it’s important to check for utility lines in the ground. This can be done by contacting your local utility company or using a utility line locator tool. Avoiding any accidental damage to these lines is crucial for safety and to prevent service disruptions.

If necessary, obtain the required permits for building a fence. Check with your local building department to find out if permits are needed and what specific regulations apply. It’s essential to comply with any local codes to avoid any potential penalties or issues down the line.
Step 2: Digging The Post Holes
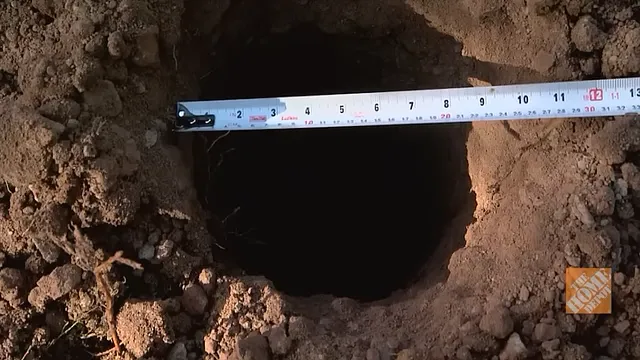
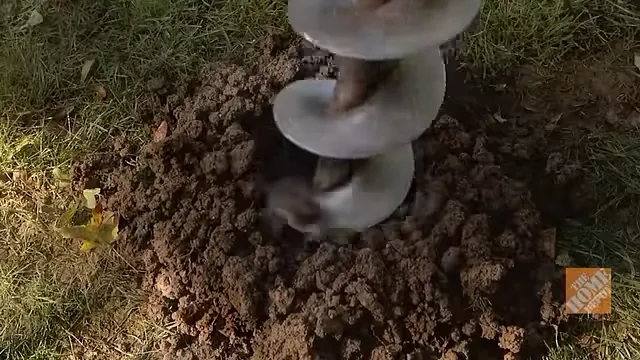
To install a wood fence post, one of the crucial steps is digging the post holes. To determine the spacing between post holes, take into consideration the length of the fence panels and the desired distance between each post. Use a post hole digger to dig the holes, ensuring they are deep enough to provide stability for the fence. The depth of the holes will depend on the height of the fence. Additionally, make sure the holes have the right diameter to accommodate the size of the fence posts. Proper spacing and hole dimensions are essential for a sturdy and durable wood fence installation.
Step 3: Setting The Fence Posts
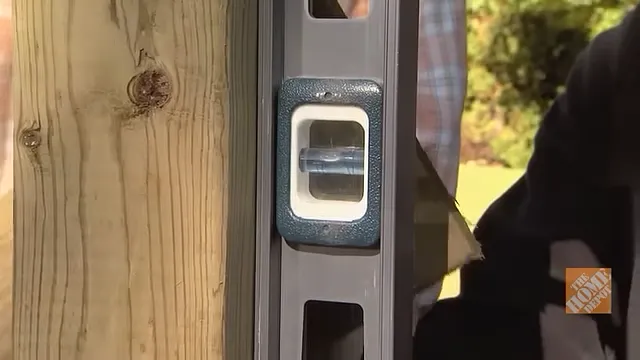
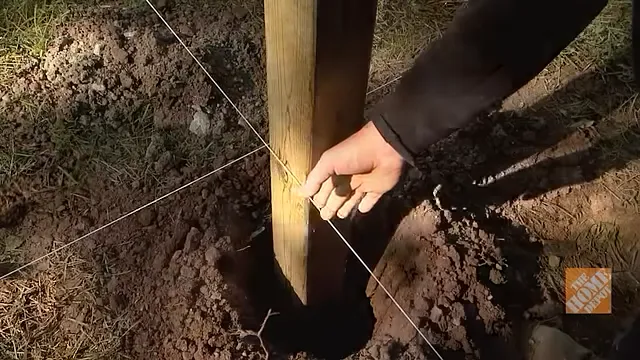
To properly install wood fence posts, it is important to follow the correct steps. Step 3 involves setting the fence posts in place. Begin by placing a layer of gravel at the bottom of each hole. This will help with drainage and prevent water from pooling around the posts. Next, carefully insert the wood fence posts into the holes, ensuring they are straight and level. Use a level tool to check the posts for accuracy. Once the posts are in position, use temporary braces to hold them securely. These braces will provide support and stability during the installation process. By following these steps, you can ensure that your wood fence posts are properly set and ready for the next stage of the installation process.
Step 4: Mixing And Pouring Concrete

Prepare the concrete mix according to the instructions.
Pour the concrete around the posts, filling the holes.
Use a level to check the posts for plumb and adjust if necessary.
Ensure the concrete is properly packed and forms a solid foundation.
Step 5: Securing The Fence Panels
Step 5 of installing a wood fence post involves securing the fence panels to the wood posts. To do this, you can use nails or screws to attach the panels. It is important to ensure that the panels are level and evenly spaced to maintain the overall aesthetic appeal of the fence. If necessary, trim any excess material from the panels to achieve a perfect fit. By following these steps, you can successfully secure the fence panels to your wood posts and complete the installation of your wood fence.
Step 6: Finishing Touches
Step 6: Finishing Touches
Remove the temporary braces: After the concrete has set and cured, it’s time to remove the temporary braces that were used to hold the fence post in place. Carefully unscrew or remove the nails holding the braces and gently take them off.
Clean up any excess concrete: Use a brush or a gardening tool to clean up any excess concrete around the base of the fence post. Make sure to remove any loose debris or dirt that may have accumulated during the installation process.

Allow the concrete to cure: Before applying any additional treatments or decorations to your wood fence post, it’s important to allow the concrete to fully cure. This can take anywhere from 24 to 48 hours, depending on the type of concrete used and the weather conditions.
Tips And Considerations For Installing Wood Fence Post
When installing a wood fence post, it is important to consider a few key tips and considerations to ensure a successful installation. First and foremost, choose high-quality wood posts for durability. This will help to ensure that your fence will last for years to come.
Consider installing a post cap for added protection against the elements. This can help to prevent water damage and extend the lifespan of your wood fence post.
If the posts will be in direct contact with the ground, it is recommended to use pressure-treated wood. This type of wood is specially treated to resist rot and decay, making it ideal for ground contact applications.
Always follow local building codes and regulations when installing a wood fence post. These regulations may dictate the depth of the post holes, the type of fasteners to use, and other important installation requirements.
If you are unsure about any aspect of the installation process, it is always best to seek professional help. A professional fence installer can ensure that your wood fence post is installed correctly and securely.
Frequently Asked Questions Of How To Install Wood Fence Post
Should Wood Fence Posts Be Set In Concrete Or Not?
Wood fence posts should be set in concrete to ensure stability and durability. The concrete provides a solid foundation that prevents the posts from shifting or leaning over time. This helps maintain the integrity of the fence and prolong its lifespan.
What Is The Proper Way To Install A Fence Post?
To install a fence post properly, follow these steps: 1. Begin by digging a hole at least one-third the height of the post. 2. Ensure the hole is wider at the bottom to provide stability. 3. Place the post in the hole, making sure it is level and aligned.
4. Backfill the hole with concrete or gravel to provide additional support. 5. Allow the post to set for 24-48 hours before attaching the fence panels.
Do Fence Posts Have To Be Cemented In?
Yes, fence posts can be cemented in. Cementing fence posts adds stability and helps prevent leaning or falling. This method is commonly used for durability and security purposes. However, alternative methods, such as using gravel or post spikes, can also be effective depending on the fence type and soil conditions.
Conclusion
To sum up, installing a wood fence post may seem daunting, but with the right tools and knowledge, it can be a manageable DIY project. By following the step-by-step process and taking into account the tips and precautions mentioned in this blog post, you can ensure a sturdy and long-lasting fence for your property.
Remember to choose the right materials, dig the right-sized hole, and secure the post firmly. Enjoy the privacy and security that a wood fence can provide for years to come.
